Showing posts with label French. Show all posts

Sunday, July 11, 2010

Île Flottante (Floating Islands)

I'm too cheap to pay for cable, but I always say that if the people at Comcast made me a deal where I just pay for one channel, they would have me sold. Of course, that one channel would be FoodNetwork and the one show I'd be sure to watch is Barefoot Contessa.

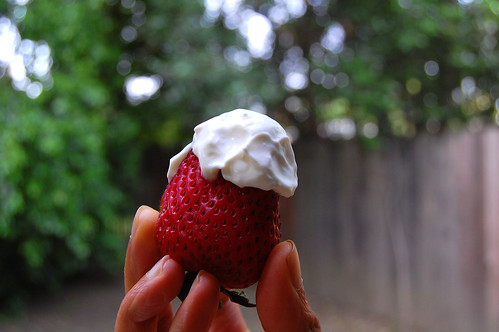
A few months ago when I visited my parents (who apparently are not to cheap too pay for cable), I watched Ina Garten make an Île Flottante. The dessert looked so elegant and different than anything I'd ever made, I was instantly intrigued. Fluffy meringues that are ever-so slightly baked floating on top of a rich and boozy sauce? Yes please!

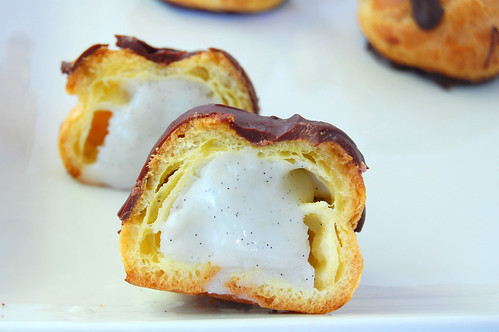
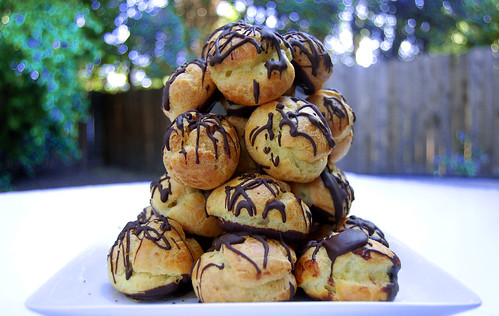
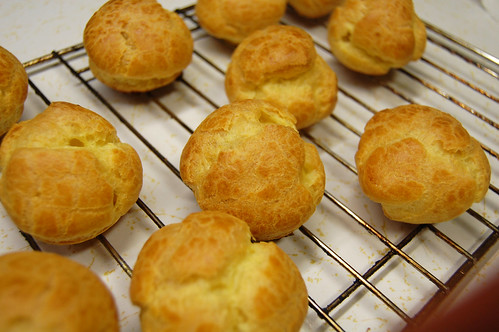
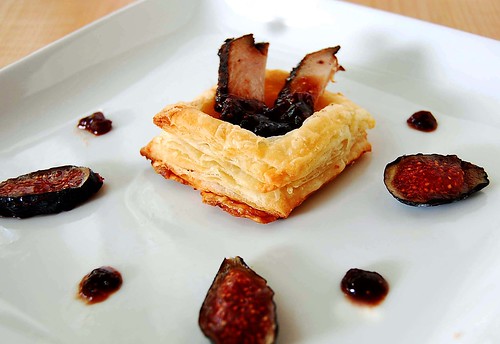
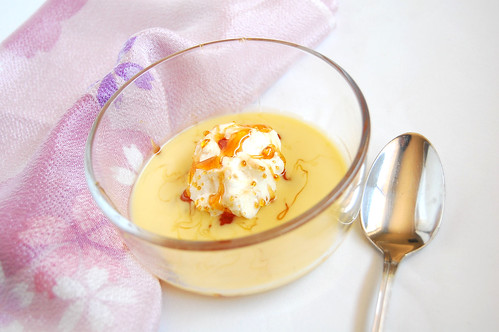
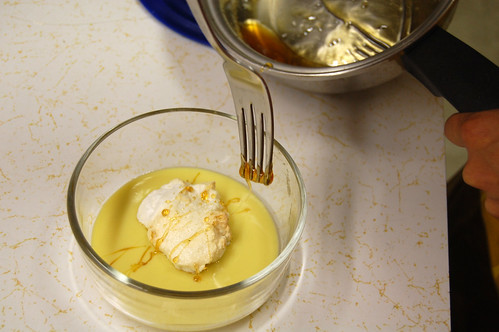
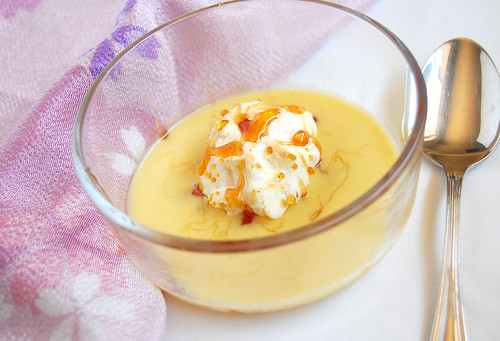
This dessert was definitely interesting. I know that's not the most appetizing word to describe a dessert, but it seems the most accurate to me. The crème anglaise was fantastic: I spiked it with a touch of Pisco (a Peruvian brandy) which complemented the vanilla extract very nicely. The caramel was tasty as well, albeit somewhat tricky to work with. The meringues were a different story. They baked up beautifully, but me being the idiot that I am, decided to refrigerate them until I was ready to assemble this dessert. Yes, I know Ina would want to rip out her hair (or maybe mine) if she knew I committed this cardinal sin against meringues, but I really had no choice. I simply did not have enough time to make the entire dessert, plate it up prettily, and take pictures before the sun went down.


Despite the chewy and cold meringues, I enjoyed this dessert. I'm also pretty confident that had I not chilled the little meringues to death, it would have been the luscious dessert Ina intended it to be. Maybe the next time I have enough time (and sunlight), I will make this dessert again. In the meantime, anyone out there work for Comcast? Make me a deal, and I'll make this dessert for you (sans the chewy meringues, of course).


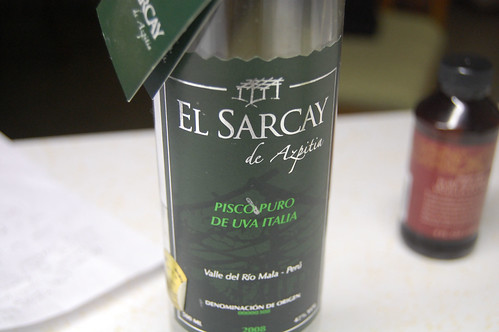
Île Flottante (adapted from Ina Garten)

For caramel (about 1 cup):
*1 1/2 cups sugar
*1 cup water
*1/2 teaspoons pure vanilla extract

For meringues (the recipe says this will make 12 meringues, but I got more than twice this amount):
*8 extra-large egg whites, at room temperature
*1/8 teaspoon kosher salt
*1/4 teaspoon cream of tartar
*1 cup sugar

For crème anglaise (2 cups):
*4 extra-large egg yolks
*1/2 cup sugar
*1 teaspoon cornstarch
*1 3/4 cups scalded milk
*1 teaspoon pure vanilla extract
*1 1/2 teaspoons Cognac or brandy

Directions:
1. Preheat the oven to 250 degrees F. Line 2 sheet pans with parchment paper or a baking sheet.

2. For the caramel , heat 1 1/2 cups of the sugar and 1/2 cup water in a small, heavy-bottomed saucepan until the sugar dissolves. Cook over medium heat until the syrup turns a warm caramel color. Don't stir, just swirl it in the pan. Off the heat, add 1/2 cup water and 1/2 teaspoon of the vanilla; be careful, the syrup will bubble violently. Stir and cook over high heat until the caramel reaches 230 degrees F (thread stage) on a candy thermometer. Set aside.

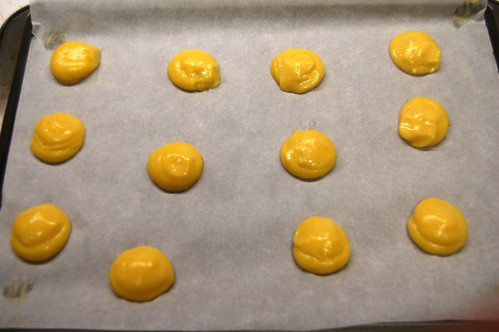
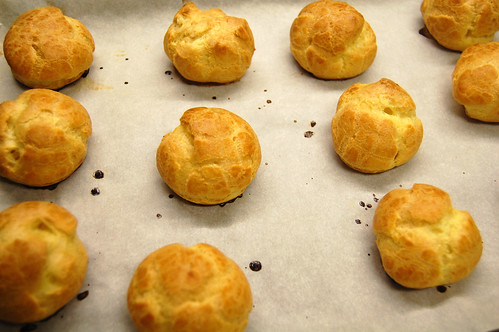
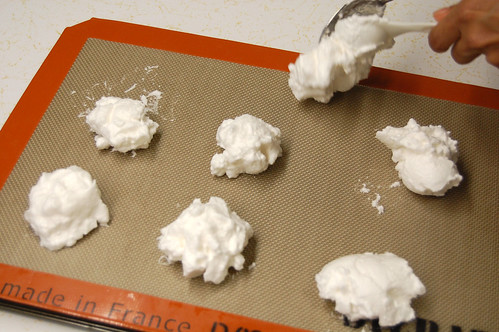
3. For the meringues , beat the egg whites, salt, and cream of tartar in the bowl of an electric mixer fitted with the whisk attachment on medium speed until frothy. Turn the mixer on high speed and sugar. Beat until the egg whites are very stiff and glossy. Whisk in the vanilla. With dessert spoons place 12 mounds of meringue on the parchment paper and bake for 20 minutes, or until a cake tester comes out clean.

4. For the crème anglaise , beat the egg yolks and sugar in the bowl of an electric mixer fitted with the paddle attachment on medium-high speed for 3 minutes, or until very thick. Reduce to low speed, and add the cornstarch. With the mixer still on low, slowly pour the hot milk into the eggs. Pour the custard mixture into a saucepan and cook over low heat, stirring constantly with a wooden spoon, until thickened. The custard will coat the spoon like heavy cream. Don't cook it above 180 degrees F or the eggs will scramble! Pour the sauce through a fine strainer, add the vanilla extract, Cognac or brandy, and chill.

For serving, pour creme anglaise on the bottom of individual plates. Place a meringue on top of each serving, drizzle with caramel sauce, and serve.

To make a day or two ahead, leave the caramel at room temperature and refrigerate the creme anglaise. Reheat the caramel and bake the meringues before guests arrive and assemble the desserts just before serving.

This dessert is also my attempt to make up for missing last month's Daring Bakers challenge. I know it is not the Chocolate Pavlova challenge hosted by Dawn, but it does consist of a few of the same components: baked meringues and creme anglaise. Click here to see the actual Daring Bakers creations for June.

Saturday, June 26, 2010

Homemade Crème Fraîche

This will be a quick post with a simple recipe. Crème Fraîche is a thickened cream that has recently gotten much press throughout the food blogosphere. It is similar to sour cream, but less tangy with an amazing but subtle nuttiness. Grocery stores like to overcharge you for this stuff, which is silly to me, since it is very simple (and kind of fun) to make at home. After making this recipe and tasting how delicious the homemade version is, I will never consider buying this from a store.

I have also tried this other recipe that calls for heating the heavy cream, and it did not work for me. Instead of crème fraîche, I ended up with sour heavy cream - definitely not good eats. Below is the simplest recipe I have found for homemade crème fraîche, and it comes out beautifully. No heating, no fear of burnage, just mix, wait, and enjoy.

Homemade Crème Fraîche (from Dorie Greenspan)

1 cup heavy cream
1 tablespoon buttermilk or plain yogurt (I used yo

1. Put the cream and buttermilk or yogurt in a clean jar with a tight-fitting lid. Cover the jar and shake for a minute or so.
2. Put the jar on a counter in a warm location (I placed it on top of my water heater) and leave it for 12 to 24 hours, or until the cream thickens slightly.
3. When the cream thickens, place the jar in the refrigerator and let it chill for 1 day.

Thursday, May 27, 2010

Daring Bakers Piece Montée (Croquembouche)

The May 2010 Daring Bakers’ challenge was hosted by Cat of Little Miss Cupcake. Cat challenged everyone to make a piece montée, or croquembouche, based on recipes from Peter Kump’s Baking School in Manhattan and Nick Malgieri.

I wanted to make this dessert for one of my best friends (hi Nancy!) who was visiting a few weekends ago and my goal was to minimize the amount of work I had while she was here. Since there were several steps to this recipe, I started early -- made the pastry cream 3 days in advance, baked the pâte à choux the day before, and filled and froze them overnight. The next day, I assembled the Croqembouche while the choux were still frozen. I think freezing them actually made the assembly easier. The choux were much easier to handle, and the glaze hardened quickly which helped them stick together. Nancy is a fan of fruity desserts and chocolate, so I filled the choux with a banana pastry cream and assembled the Croquembouche with a chocolate glaze.


I had never made a pâte à choux before but had been longing to try it for some time. Cat's recipe for the choux was absolutely perfect. These little babies puffed up so beautifully I almost couldn't believe I actually made them. I ate one right out of the oven - no filling, no frosting, completely unadorned, and it was simply amazing. Like the most delicious fluffy little pillow you could ever eat.


For the pastry cream, I started with Kat's recipe for vanilla pastry cream, reduced the sugar a bit, and added a mashed banana. The cream was good but not spectacular. It was a bit too sweet and not very flavorful. I scraped in some vanilla beans, which helped enhance the flavor a bit, but I still wasn't in love. I would have preferred a creamier, maybe even gooier, filling for the choux.


Assembling the Croquembouche was probably the step I was most intimidated by, but it actually turned out to be much simpler than I had imagined. As I mentioned, I think working with frozen choux made it much simpler, and my Croquembouche came together pretty easily.

All in all, I really enjoyed making, and even more so eating, this dessert. Cat's pâte à choux recipe has opened up a world of possibilities -- I've been dreaming about eclairs, cream puffs, and profiteroles. This will be my go-to recipe the next time I want to make a pâte à choux, and there definitely will be a next time.

Piece Montée (Croquembouche)

For the Banana Crème Patissiere:
*1 cup (225 ml) whole milk
*2 tablespoons cornstarch
*6 tablespoons (100 g) sugar
*1 large egg
*2 large egg yolks
*1 small banana, mashed
*2 tablespoons (30 g) unsalted butter
*1/2 teaspoon vanilla extract
*1/2 vanilla bean, split lengthwise

Dissolve cornstarch in ¼ cup of milk. Combine the remaining milk with the sugar in a saucepan; bring to boil; remove from heat.

Beat the whole egg, then the yolks into the cornstarch mixture. Pour 1/3 of boiling milk into the egg mixture, whisking constantly so that the eggs do not begin to cook.

Return the remaining milk to boil. Pour in the hot egg mixture in a stream, continuing whisking.

Continue whisking (this is important – you do not want the eggs to solidify/cook) until the cream thickens and comes to a boil. Remove from heat and stir in the mashed banana, then beat in the butter and vanilla extract. Scrape the seeds from the vanilla bean and stir in to combine. Finally, for a smooth consistency, strain the creme through a sieve.

For the Pate a Choux (Yield: About 28)
*¾ cup (175 ml.) water
*6 Tbsp. (85 g.) unsalted butter
*¼ Tsp. salt
*1 Tbsp. sugar
*1 cup (125 g.) all-purpose flour
*4 large eggs

For Egg Wash:
*1 egg and pinch of salt ( Instead of egg wash, I brushed the choux with a bit of milk)

Pre-heat oven to 425◦F/220◦C degrees. Line two baking sheets with parchment paper.

To prepare batter: 1. Combine water, butter, salt and sugar in a saucepan over medium heat. Bring to a boil and stir occasionally. At boil, remove from heat and sift in the flour, stirring to combine completely. Return to heat and cook, stirring constantly until the batter dries slightly and begins to pull away from the sides of the pan. Transfer to a bowl and stir with a wooden spoon 1 minute to cool slightly. Add 1 egg. The batter will appear loose and shiny. As you stir, the batter will become dry-looking like lightly buttered mashed potatoes. It is at this point that you will add in the next egg. Repeat until you have incorporated all the eggs.

To Pipe:
Transfer batter to a pastry bag fitted with a large open tip (I piped directly from the bag opening without a tip). Pipe choux about 1 inch-part in the baking sheets. Choux should be about 1 inch high about 1 inch wide. Using a clean finger dipped in hot water, gently press down on any tips that have formed on the top of choux when piping. You want them to retain their ball shape, but be smoothly curved on top.

Brush tops with egg wash (1 egg lightly beaten with pinch of salt) or milk.

To Bake:
Bake the choux at 425◦F/220◦C degrees until well-puffed and turning lightly golden in color, about 10 minutes.

Lower the temperature to 350◦F/180◦C degrees and continue baking until well-colored and dry, about 20 minutes more. Remove to a rack and cool.

Can be stored in a airtight box overnight.

To Fill:
When you are ready to assemble your piece montée, using a plain pastry tip, pierce the bottom of each choux. Fill the choux with pastry cream using either the same tip or a star tip, and place on a paper-lined sheet. Choux can be refrigerated briefly at this point while you make your glaze.


For Chocolate Glaze:

*8 ounces/200 g. finely chopped semi or bitter sweet chocolate (use the finest quality you can afford as the taste will be quite pronounced)

Melt chocolate in microwave or double boiler. Stir at regular intervals to avoid burning. Use immediately.

Assembling the Piece Montée:
You may want to lay out your unfilled, unglazed choux in a practice design to get a feel for how to assemble the final dessert. For example, if making a conical shape, trace a circle (no bigger than 8 inches) on a piece of parchment to use as a pattern. Then take some of the larger choux and assemble them in the circle for the bottom layer. Practice seeing which pieces fit together best.

Once you are ready to assemble your piece montée, dip the top of each choux in your glaze (careful it may be still hot!), and start assembling on your cake board/plate/sheet. Continue dipping and adding choux in levels using the glaze to hold them together as you build up.


Wednesday, May 12, 2010

Vegetarian Cassoulet

One of the most rewarding perks of living in California is the amazing produce we can get pretty much all year round. Many Californians are fortunate enough to have year-long farmers markets that are fully stocked with fresh and local fruits and vegetables. So it's not surprising that one of my main goals for this blog was to post recipes for foods prepared with these seasonal ingredients. Sounds simple right? Maybe for some, but for me? Not so much. Things come up. Interviews, presentations, deadlines. A certain advisor sends a certain angry email regarding a certain thesis that should have been finished some three weeks ago. See, things come up, and although I made this cassoulet a while back, when it was more probable to find fresh local leeks, here I am weeks later finally posting about it, and guess what?...my thesis is still not done (ssh...don't tell the advisor!)


I have been fascinated by cassoulets ever since I saw a Julia Child recipe in her Menu Cookbook. Julia's recipe is definitely not for the faint of heart. It requires 3 types of meat- pork, sausage, and goose (I'm not even sure I know where to buy goose from). The recipe also states that it requires more than 4 hours of cooking time (plus more for preparation). That's the required time for normal people, so for someone like me, this recipe would take oh, roughly...4 days. Yup, that sounds about right.

One of these days (I'm thinking maybe sometime around retirement?) I'll try Julia's recipe, but until then I will definitely be making this simpler vegetarian version often. It takes about 2 1/2 hours from start to finish - including preparation (and yes, even for me!) and is so delicious and hearty that even my carnivorous BF didn't miss the meat. Although I'm sure a few chunks of chicken or sausage wouldn't hurt a thing, and would certainly bring you one tiny step closer to Julia's version.

Vegetarian Cassoulet (adapted from Smitten Kitchen and Gourmet)
For cassoulet:
2 medium leeks (spring leeks work well, white and pale green parts only)
1/2 large onion, diced
4 medium carrots, halved lengthwise and cut into 1-inch-wide pieces
3 celery ribs, cut into 1-inch-wide pieces
4 garlic cloves, chopped
1/4 cup olive oil
4 thyme sprigs (I used home-dried thyme sprigs)
4 parsley sprigs
2 Turkish or 1 California bay leaf
1/8 teaspoon ground cloves
3 (19-ounce) cans cannellini or Great Northern beans, rinsed and drained or 4 1/2 cups cooked dried beans
1 19-ounce can diced tomatoes, with their juice
3 tablespoons tomato paste
1 quart vegetable broth

For garlic crumbs
4 cups coarse fresh bread crumbs
1/3 cup olive oil
1 tablespoon chopped garlic
1/4 cup chopped parsley

To make cassoulet:
Halve leeks lengthwise and cut crosswise into 1/2-inch pieces, then wash well and pat dry.

1. Cook leeks, onion, carrots, celery, and garlic in oil with herb sprigs, bay leaves, cloves, and 1/2 teaspoon each of salt and pepper in a large heavy pot over medium heat, stirring occasionally, until softened and golden, about 15 minutes.
2. Stir in beans, tomatoes, tomato paste, then stock, and simmer, partially covered, stirring occasionally, until carrots are tender but not falling apart, about 30 minutes.

To make garlic crumbs while cassoulet simmers:
Preheat oven to 350°F.

Toss bread crumbs with oil, garlic, and 1/4 teaspoon each of salt and pepper in a bowl until well coated. Spread in a baking pan and toast in oven, stirring once halfway through, until crisp and golden, 12 to 15 minutes. Cool crumbs in pan, then return to bowl and stir in parsley.

To finish cassoulet:
Discard herb sprigs and bay leaf. Mash some of beans in pot with a potato masher or back of a spoon to thicken broth. Season with salt and pepper. Just before serving, sprinkle with garlic crumbs.

Saturday, February 20, 2010

Whole Wheat French Baguette and an Award

This bread brings back memories of my trip to Paris a few years ago. Out of college, with no job, a friend and I backpacked around Europe for a month, and Paris was our last stop. At this point in the trip, I was exhausted and almost ready to go home, so honestly, I did not have high hopes for this city. But I was totally wrong - there was something very unique and comforting about Paris and I LOVED it.

Our budget was tight, so we stayed at a less than pleasant youth hostel. Till this day, there are two memories that still stick with me about this place: 1) the awful co-ed bathrooms - these were so gross that I seriously could not spend more than 5 minutes in the shower, and 2) the free breakfasts: a cup of orange juice, a small plastic container of jam, and a mini french baguette. The bread was so simple, yet SO amazingly delicious. It was seriously some of the best bread I'd ever had: warm, chewy, crusty, and perfect with that small amount of jam.

The recipe for this bread is in Peter Reinhart's book The Bread Baker's Apprentice. As much as I want to share this recipe, I won't out of fear of the copyright police coming to get me. Seriously, there must be some top-secret law that prohibits food bloggers from posting recipes from this book because I cannot find any of these recipes online. Try for yourself: do a Google search on Bread Baker's Apprentice French Bread -- see? lots of nice posts and pictures but NO recipes. Coincidence? I think not!

I cannot take credit for this bread, as much as I want to. Last week as I was visiting the east coast, BF discovered my Bread Bakers Apprentice book and made this bread. He followed the recipe for French baguette and replaced all of the bread flour with whole wheat (yes! I've taught him well). The result was a chewy, crusty and hearty french bread that is unbelievably good for sandwiches.
Now, on to the award...A while back, Jill from JilliciousDiscoveries, awarded me the Honest Scrap award. Jill is a fantastic baker and a master cake decorator (a skill I clearly lack). She has also been very supportive of my blog by taking the time to leave thoughtful comments on so many of my posts. Thank you for your support Jill!
I'd like to pass on this award to some other fabulous food bloggers. Since there are so many fantastic food blogs I've discovered within the last few months, it was really difficult for me to decide which blogs to choose. Honestly, I think they all deserve an award. In the end, I realized that it has been almost a year since I started this blog, so I decided to pass this award along to relatively new bloggers who have been blogging for less a than year (my apologies if you have already received this award, you still deserve it!):
1. Memória at Mangio da Sola - a gorgeous blog with beautiful photos and fantastic recipes like homemade tamale and chocolate mousse cheesecake (oh my!).
2. Marcellina at Marcellina in Cucina - lovely blog with a great mix of savory and sweet recipes
3. Rebecca at CakeWalk - tons of tasty and interesting recipes with an emphasis on using healthy and all-natural ingredients.
4. Valerina at Une Gamine dans la Cuisine - delicious photos and recipes with an emphasis on sweet treats.
5. Ju at The Little Teochew - always a fun read, lots of unique recipes and culinary stories.

Congratulations!

Sunday, September 27, 2009

Daring Bakers Vols-au-Vent


The September 2009 Daring Bakers' challenge was hosted by Steph of A Whisk and a Spoon. She chose the French treat, Vols-au-Vent based on the Puff Pastry recipe by Michel Richard from the cookbook Baking With Julia by Dorie Greenspan.

My goodness this was a challenge. Roll, fold, chill, and repeat, about 900 times and somehow you end up with puff pastry. Form the pastry into pretty shapes and fill them and you get Vols-au-Vent (little puff pastry cases designed to hold filling).

The BF helped out big time with this challenge because for once he was as excited as I was about making it. No surprise since it was the first non-dessert challenge I've had with the Daring Bakers. So the BF and I each picked our signature filling and had a vols-au-vent throwdown.

Meanie: Goat cheese and roasted red pepper with basil pesto.
(Yes, it's lopsided, but just tilt your head to the right and I promise it'll be ok).

BF: Smoked pork with fig balsamic glaze.
Unfortunately, I didn't try his (don't eat meat), but he assures me that he's the winner ( I just nod and smile).

Recipes:
Puff Pastry/vols-au-vent : here on Steph's amazing drool-inducing blog.
Basil Pesto: From Ina Garten

Fig Balsamic Glaze
1/4 cup fig jelly
2 Tb water
1 tsp salt
2 Tb balsamic vinegar
1 tsp chilli powder

Stir the jelly and water in a small saucepan over medium heat. Stir in salt and chilli powder. Cook for 5 min. Lower the heat. Stir in vinegar. Cook over low heat for 5 min.