Showing posts with label dessert. Show all posts

Sunday, September 26, 2010

Swiss Roll Bombe

Wow. It has been a loooong time. Ready for my sob story? Because here it comes...
Over the last few months I've come to realize how precious is this thing that we call time. Time! What a sneaky thing you are. A few months ago I had so much of you -- almost too much. It was March and I had an offer for a job that didn't start until the end of August. I had 6 whole months to relish California while I slowly finished up my thesis. And now look at me...I barely have enough of you to sit down and write a post.

The last few months have been some of the craziest in my life. I went from being a graduate student on the verge of completely losing all motivation to an assistant professor. Sounds like a big change, but honestly, I don't think much has really changed. Sure, I'm in a different location, with a (dare I say it) real job, and a real (non-stipend) salary. But inside, I am still the same grad student -- stressing over deadlines, working late hours, and trying to hold on to every last bit of motivation I can find. It's been a challenge to say the least.

The hardest part is being away from those I love. I am in the middle of the country (literally) thousands of miles from anyone I love and sometimes I can't help but wonder if it's really worth it. Honestly, I'm still not sure. But this is what I've got myself into, so I might as well savor it while I've got it.

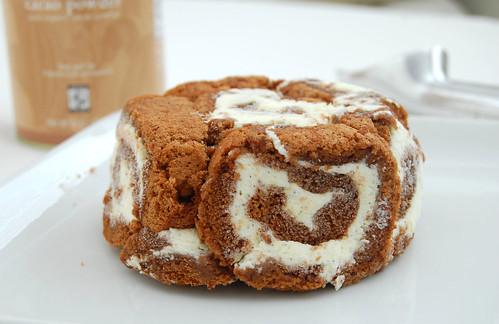
OK, enough rambling. I'm ready to talk food. I'm almost embarrassed to post this, but I'll do it anyway. This was supposed to be my submission for some past Daring Bakers challenge -- so long ago, I don't even remember the month, and right now I'm too lazy to look it up. The challenge was to create a Swiss bombe: basically cake-covered ice cream. That's right: Cake. And. Ice Cream. Together. Dessert doesn't get much better than this.

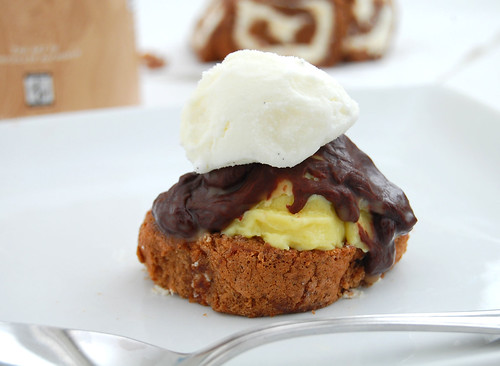
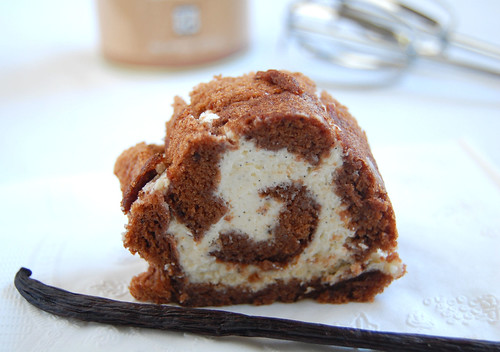
The swiss roll cake was really fantastic. Of course mine looked less than perfect, but the taste was phenomenal. Light and moist with the perfect amount of sweetness. I made two flavors of ice cream: vanilla bean and french vanilla (sorry, forgot which recipes I used), and added a layer of chocolate ganache. I made a mini bombe and a deconstructed version. Personally, I liked the deconstructed version better. But that's just me sometimes: disorganized and random (sshh...don't tell my students).

I also want to thank all my readers who left me the most endearing comments on my last post. After not blogging for so many months, I missed it terribly, and now I know why. Reading your comments and knowing that someone out there actually (somewhat?) cares about what's going on in my kitchen means so much to me. Seriously, your comments really touched me.
I really hope to be blogging regularly again soon.

Here are the recipes for the cake and ganache.

Sunday, July 11, 2010

Île Flottante (Floating Islands)

I'm too cheap to pay for cable, but I always say that if the people at Comcast made me a deal where I just pay for one channel, they would have me sold. Of course, that one channel would be FoodNetwork and the one show I'd be sure to watch is Barefoot Contessa.

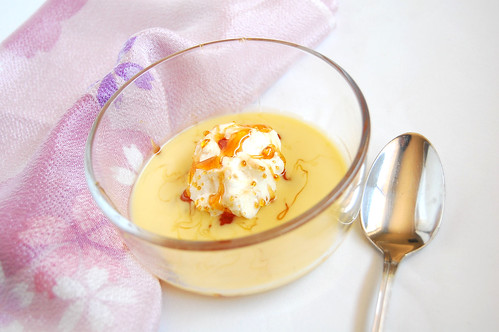
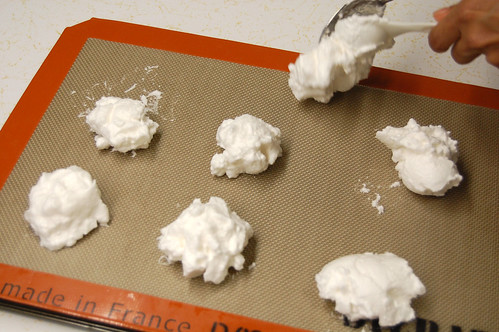
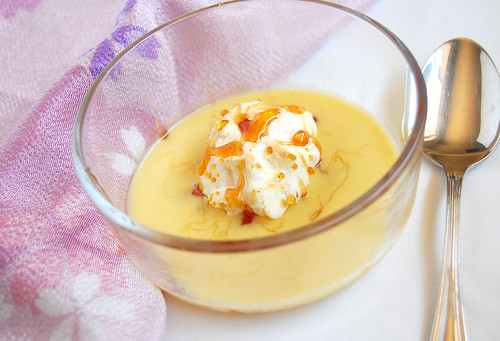
A few months ago when I visited my parents (who apparently are not to cheap too pay for cable), I watched Ina Garten make an Île Flottante. The dessert looked so elegant and different than anything I'd ever made, I was instantly intrigued. Fluffy meringues that are ever-so slightly baked floating on top of a rich and boozy sauce? Yes please!

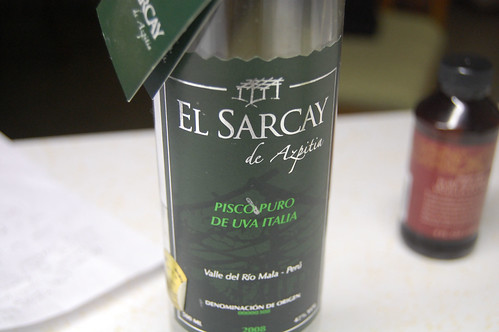
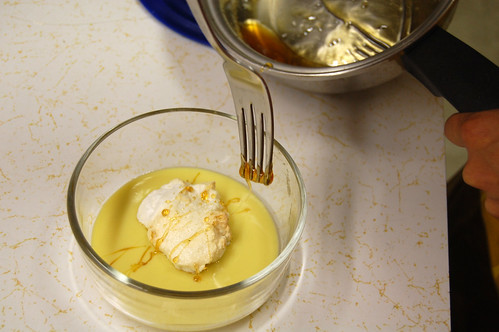
This dessert was definitely interesting. I know that's not the most appetizing word to describe a dessert, but it seems the most accurate to me. The crème anglaise was fantastic: I spiked it with a touch of Pisco (a Peruvian brandy) which complemented the vanilla extract very nicely. The caramel was tasty as well, albeit somewhat tricky to work with. The meringues were a different story. They baked up beautifully, but me being the idiot that I am, decided to refrigerate them until I was ready to assemble this dessert. Yes, I know Ina would want to rip out her hair (or maybe mine) if she knew I committed this cardinal sin against meringues, but I really had no choice. I simply did not have enough time to make the entire dessert, plate it up prettily, and take pictures before the sun went down.


Despite the chewy and cold meringues, I enjoyed this dessert. I'm also pretty confident that had I not chilled the little meringues to death, it would have been the luscious dessert Ina intended it to be. Maybe the next time I have enough time (and sunlight), I will make this dessert again. In the meantime, anyone out there work for Comcast? Make me a deal, and I'll make this dessert for you (sans the chewy meringues, of course).


Île Flottante (adapted from Ina Garten)

For caramel (about 1 cup):
*1 1/2 cups sugar
*1 cup water
*1/2 teaspoons pure vanilla extract

For meringues (the recipe says this will make 12 meringues, but I got more than twice this amount):
*8 extra-large egg whites, at room temperature
*1/8 teaspoon kosher salt
*1/4 teaspoon cream of tartar
*1 cup sugar

For crème anglaise (2 cups):
*4 extra-large egg yolks
*1/2 cup sugar
*1 teaspoon cornstarch
*1 3/4 cups scalded milk
*1 teaspoon pure vanilla extract
*1 1/2 teaspoons Cognac or brandy

Directions:
1. Preheat the oven to 250 degrees F. Line 2 sheet pans with parchment paper or a baking sheet.

2. For the caramel , heat 1 1/2 cups of the sugar and 1/2 cup water in a small, heavy-bottomed saucepan until the sugar dissolves. Cook over medium heat until the syrup turns a warm caramel color. Don't stir, just swirl it in the pan. Off the heat, add 1/2 cup water and 1/2 teaspoon of the vanilla; be careful, the syrup will bubble violently. Stir and cook over high heat until the caramel reaches 230 degrees F (thread stage) on a candy thermometer. Set aside.

3. For the meringues , beat the egg whites, salt, and cream of tartar in the bowl of an electric mixer fitted with the whisk attachment on medium speed until frothy. Turn the mixer on high speed and sugar. Beat until the egg whites are very stiff and glossy. Whisk in the vanilla. With dessert spoons place 12 mounds of meringue on the parchment paper and bake for 20 minutes, or until a cake tester comes out clean.

4. For the crème anglaise , beat the egg yolks and sugar in the bowl of an electric mixer fitted with the paddle attachment on medium-high speed for 3 minutes, or until very thick. Reduce to low speed, and add the cornstarch. With the mixer still on low, slowly pour the hot milk into the eggs. Pour the custard mixture into a saucepan and cook over low heat, stirring constantly with a wooden spoon, until thickened. The custard will coat the spoon like heavy cream. Don't cook it above 180 degrees F or the eggs will scramble! Pour the sauce through a fine strainer, add the vanilla extract, Cognac or brandy, and chill.

For serving, pour creme anglaise on the bottom of individual plates. Place a meringue on top of each serving, drizzle with caramel sauce, and serve.

To make a day or two ahead, leave the caramel at room temperature and refrigerate the creme anglaise. Reheat the caramel and bake the meringues before guests arrive and assemble the desserts just before serving.

This dessert is also my attempt to make up for missing last month's Daring Bakers challenge. I know it is not the Chocolate Pavlova challenge hosted by Dawn, but it does consist of a few of the same components: baked meringues and creme anglaise. Click here to see the actual Daring Bakers creations for June.

Monday, June 21, 2010

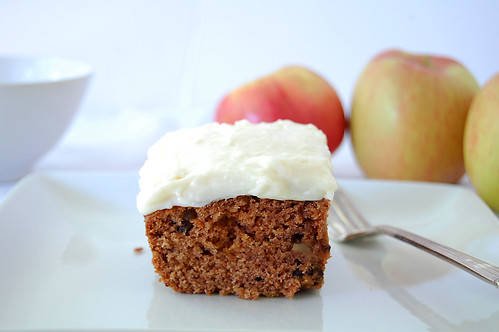
Applesauce Spice Cake

Can you tell I've had some free time on my hands? After making all the edits on my thesis, filling out a hundred forms about my graduate school experience, and setting up my meeting to officially submit my thesis (tomorrow at 10am!), I spent a few hours pimping up this blog. You like? Suggestions anyone?

I also thought and thought about what to write for this post. I know I have been trying to advocate local and seasonal recipes here on CCT, and as much as I try to eat locally and seasonally, I have a little confession everyone. Here goes...I eat apples. Every. Single. Day. Of the year. Just about. Fall? Yes, of course. Winter? Sure, cold storage apples are pretty awesome too. But then, I also eat apples in the spring...and summer (gasp!). Not sure why -- just trying to keep the doctor away, I guess.

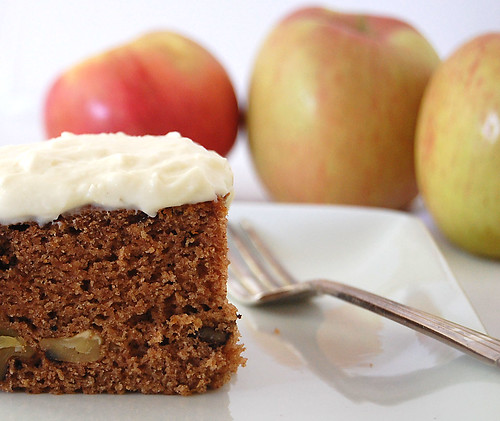
And hence, the apples in the background of this picture. But here's the thing about this recipe...it doesn't call for apples, it calls for applesauce. So even if you abide by all the local and seasonal rules, you can still enjoy this cake all year long.

I'm not sure what prompted me to make this very autumn-esque cake in the middle of June. I was craving something sweet and spicy and nutty, and this just fit the bill. Maybe it was the countless number of yummy looking cake recipes I've been seeing on Grace's lovely site. Maybe I was just longing for Fall. Maybe I'm trying to use up what seems like hundreds of jars of Trader Joe's applesauce before I prepare for my big move across the country. Whatever the reason, I made this cake, and it made me happy.

Applesauce Spice Cake with Cream Cheese Frosting (adapted from Joy of Cooking, makes about 12 servings)

*This cake was very spicy and moist, but a bit dense. I think next time I will increase the oil to 1/2 cup and reduce the flour by about 1/4 cup.

For cake:
1 cup sifted all-purpose flour
1 cup sifted whole wheat flour
1 teaspoon baking soda
1 teaspoon ground cinnamon
1/2 teaspoon ground cloves
1/2 teaspoon ground allspice
1/2 teaspoon salt
1/3 cup oil (I used canola)
1 cup packed brown sugar
1 large egg
1/4 cup buttermilk or yogurt (I used a mix)
1 cup unsweetened applesauce
1 cup chopped walnuts

For Cream Cheese Frosting:
1 8oz package cream cheese
2 tablespoons softened butter
1 cup confectioners' sugar, sifted
1/2 teaspoon vanilla extract

To make cake:
1. Preheat oven to 350F. Grease and flour an 8-inch square baking pan.
2. In a large bowl, whisk together the sifted flours, baking soda, cinnamon, cloves, allspice, and salt.
3. In a separate bowl, using a mixer on high speed, beat together the oil and sugar for about 3 minutes.
4. Set the speed to low, and beat in the egg. Stir in the flour mixture in 3 parts, alternating with the applesauce. Do not overmix. Finally, stir in the walnuts.
5. Scrape batter into pan and spread evenly. Bake for 25-30 minutes or until a toothpick inserted into the center comes out clean. Once cool, top with cream cheese frosting.

To make frosting:
In a large bowl, cream together cream cheese and butter until creamy. Gradually beat in the sugar until smooth. Beat in vanilla extract.

Thursday, May 27, 2010

Daring Bakers Piece Montée (Croquembouche)

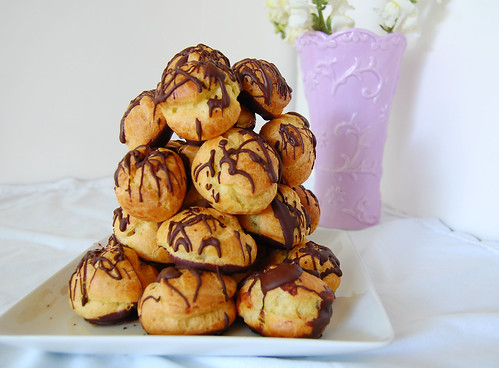
The May 2010 Daring Bakers’ challenge was hosted by Cat of Little Miss Cupcake. Cat challenged everyone to make a piece montée, or croquembouche, based on recipes from Peter Kump’s Baking School in Manhattan and Nick Malgieri.

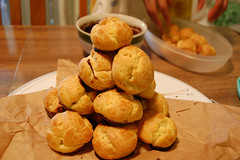
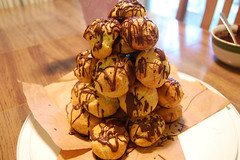
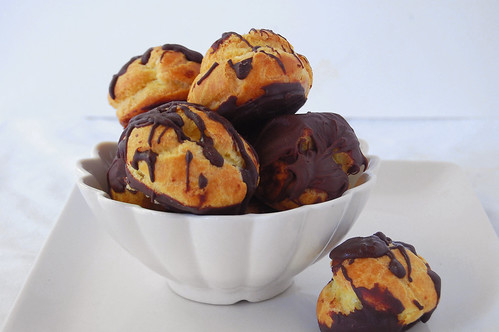
I wanted to make this dessert for one of my best friends (hi Nancy!) who was visiting a few weekends ago and my goal was to minimize the amount of work I had while she was here. Since there were several steps to this recipe, I started early -- made the pastry cream 3 days in advance, baked the pâte à choux the day before, and filled and froze them overnight. The next day, I assembled the Croqembouche while the choux were still frozen. I think freezing them actually made the assembly easier. The choux were much easier to handle, and the glaze hardened quickly which helped them stick together. Nancy is a fan of fruity desserts and chocolate, so I filled the choux with a banana pastry cream and assembled the Croquembouche with a chocolate glaze.
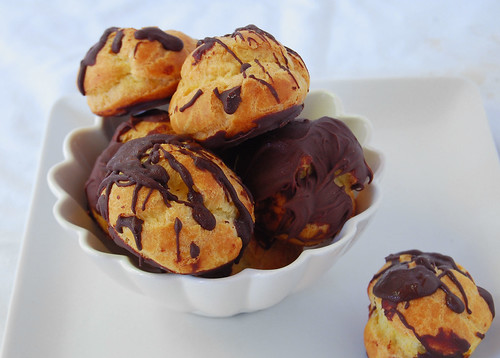

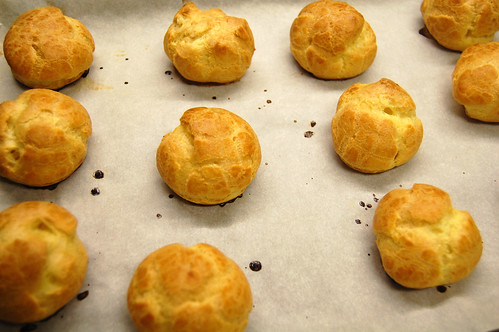
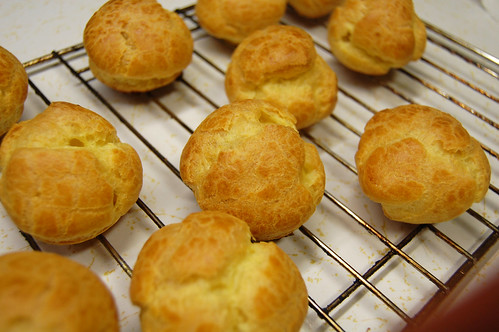
I had never made a pâte à choux before but had been longing to try it for some time. Cat's recipe for the choux was absolutely perfect. These little babies puffed up so beautifully I almost couldn't believe I actually made them. I ate one right out of the oven - no filling, no frosting, completely unadorned, and it was simply amazing. Like the most delicious fluffy little pillow you could ever eat.

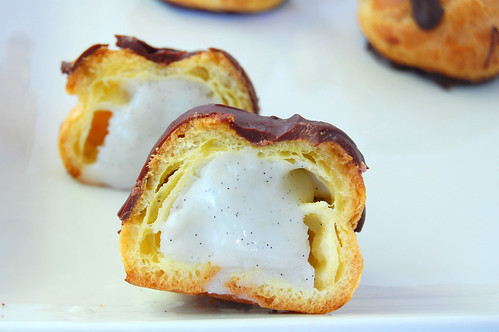
For the pastry cream, I started with Kat's recipe for vanilla pastry cream, reduced the sugar a bit, and added a mashed banana. The cream was good but not spectacular. It was a bit too sweet and not very flavorful. I scraped in some vanilla beans, which helped enhance the flavor a bit, but I still wasn't in love. I would have preferred a creamier, maybe even gooier, filling for the choux.

Assembling the Croquembouche was probably the step I was most intimidated by, but it actually turned out to be much simpler than I had imagined. As I mentioned, I think working with frozen choux made it much simpler, and my Croquembouche came together pretty easily.

All in all, I really enjoyed making, and even more so eating, this dessert. Cat's pâte à choux recipe has opened up a world of possibilities -- I've been dreaming about eclairs, cream puffs, and profiteroles. This will be my go-to recipe the next time I want to make a pâte à choux, and there definitely will be a next time.
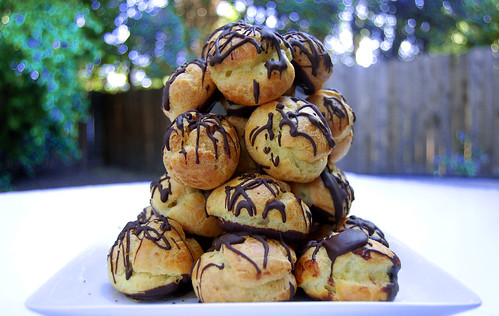
Piece Montée (Croquembouche)

For the Banana Crème Patissiere:
*1 cup (225 ml) whole milk
*2 tablespoons cornstarch
*6 tablespoons (100 g) sugar
*1 large egg
*2 large egg yolks
*1 small banana, mashed
*2 tablespoons (30 g) unsalted butter
*1/2 teaspoon vanilla extract
*1/2 vanilla bean, split lengthwise

Dissolve cornstarch in ¼ cup of milk. Combine the remaining milk with the sugar in a saucepan; bring to boil; remove from heat.

Beat the whole egg, then the yolks into the cornstarch mixture. Pour 1/3 of boiling milk into the egg mixture, whisking constantly so that the eggs do not begin to cook.

Return the remaining milk to boil. Pour in the hot egg mixture in a stream, continuing whisking.

Continue whisking (this is important – you do not want the eggs to solidify/cook) until the cream thickens and comes to a boil. Remove from heat and stir in the mashed banana, then beat in the butter and vanilla extract. Scrape the seeds from the vanilla bean and stir in to combine. Finally, for a smooth consistency, strain the creme through a sieve.

For the Pate a Choux (Yield: About 28)
*¾ cup (175 ml.) water
*6 Tbsp. (85 g.) unsalted butter
*¼ Tsp. salt
*1 Tbsp. sugar
*1 cup (125 g.) all-purpose flour
*4 large eggs

For Egg Wash:
*1 egg and pinch of salt ( Instead of egg wash, I brushed the choux with a bit of milk)

Pre-heat oven to 425◦F/220◦C degrees. Line two baking sheets with parchment paper.

To prepare batter: 1. Combine water, butter, salt and sugar in a saucepan over medium heat. Bring to a boil and stir occasionally. At boil, remove from heat and sift in the flour, stirring to combine completely. Return to heat and cook, stirring constantly until the batter dries slightly and begins to pull away from the sides of the pan. Transfer to a bowl and stir with a wooden spoon 1 minute to cool slightly. Add 1 egg. The batter will appear loose and shiny. As you stir, the batter will become dry-looking like lightly buttered mashed potatoes. It is at this point that you will add in the next egg. Repeat until you have incorporated all the eggs.

To Pipe:
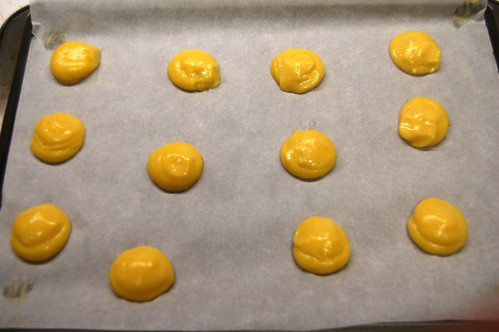
Transfer batter to a pastry bag fitted with a large open tip (I piped directly from the bag opening without a tip). Pipe choux about 1 inch-part in the baking sheets. Choux should be about 1 inch high about 1 inch wide. Using a clean finger dipped in hot water, gently press down on any tips that have formed on the top of choux when piping. You want them to retain their ball shape, but be smoothly curved on top.

Brush tops with egg wash (1 egg lightly beaten with pinch of salt) or milk.

To Bake:
Bake the choux at 425◦F/220◦C degrees until well-puffed and turning lightly golden in color, about 10 minutes.

Lower the temperature to 350◦F/180◦C degrees and continue baking until well-colored and dry, about 20 minutes more. Remove to a rack and cool.

Can be stored in a airtight box overnight.

To Fill:
When you are ready to assemble your piece montée, using a plain pastry tip, pierce the bottom of each choux. Fill the choux with pastry cream using either the same tip or a star tip, and place on a paper-lined sheet. Choux can be refrigerated briefly at this point while you make your glaze.


For Chocolate Glaze:

*8 ounces/200 g. finely chopped semi or bitter sweet chocolate (use the finest quality you can afford as the taste will be quite pronounced)

Melt chocolate in microwave or double boiler. Stir at regular intervals to avoid burning. Use immediately.

Assembling the Piece Montée:
You may want to lay out your unfilled, unglazed choux in a practice design to get a feel for how to assemble the final dessert. For example, if making a conical shape, trace a circle (no bigger than 8 inches) on a piece of parchment to use as a pattern. Then take some of the larger choux and assemble them in the circle for the bottom layer. Practice seeing which pieces fit together best.

Once you are ready to assemble your piece montée, dip the top of each choux in your glaze (careful it may be still hot!), and start assembling on your cake board/plate/sheet. Continue dipping and adding choux in levels using the glaze to hold them together as you build up.



Sunday, May 16, 2010

Classic Yellow Cupcakes

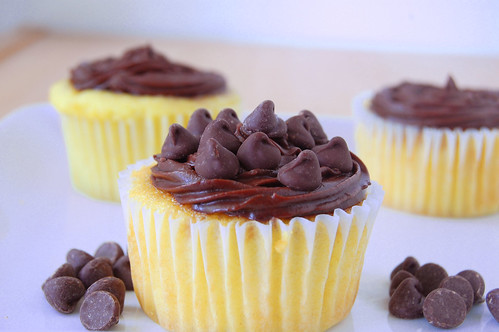
Oh goodness me. Can someone teach me how to frost a cupcake? Apparently, I suck at this. These cupcakes were so cute out of the oven, and then I pulled out my piping bag, tips and all. Next thing you know, there I was, "piping" globs of frosting on them, desperately trying to maintain some coherent design, but really just creating what I can only describe as poo-like piles. Sorry for the description, but I need some pointers! Fellow bakers, how do you frost your cupcakes so beautifully, and why do mine always look so...strange? I read all the tips in Joy of Baking, even watched some videos, but something always goes astray. Either I pull away too quickly and end up with skinny tubes, or pipe for too long and end up with big puddles. Maybe I just need a different piping tip. Yup, that must be it. Blame it on the tools, not the handy man woman.
Luckily, I was able to somewhat salvage these cupcakes by using the frosting as more of a glue and sticking on some little chocolate chips (another reason why I love chocolate chips!). And in all seriousness, these cupcakes were rich, moist, and just sweet enough with a subtle hint of vanilla. Utterly delicious - botched-up frosting and all.

Yellow Cupcakes with Chocolate Frosting (adapted from Hummingbird Bakery Cookbook, makes about 18 cupcakes)

*2 cups all-purpose flour
*1 1/2 cup sugar
*2 teaspoons baking powder
*1 teaspoon baking soda
*pinch of salt
*6 tablespoons unsalted butter, at room temperature
*1 cup whole milk
*2 eggs
*1 teaspoon vanilla extract

Chocolate Buttercream Frosting
* 2 1/4 cup confectioner's sugar
* 8 Tb cocoa powder
* 6 Tb butter, at room temperature
* 1 tsp vanilla
* 2 Tb milk

1. In a large bowl, sift together the confectioners sugar and cocoa, and set aside.
2. In another large bowl, cream butter until smooth. Gradually add in one quarter of the sugar mixture, 2 Tb at a time. Add in all of the vanilla, then another quarter of the sugar mixture, two tablespoons at a time. The mixture should be firm. At this point, gradually add the milk, about a 1/2 tablespoon at at a time, alternating with 2 tablespoons at a time of the rest of the sugar mixture.
1. Preheat oven to 350 degrees.
2. Put the flour, sugar, baking powder, salt and butter in an electric mixer with a paddle attachment (or use a hand-held electric whisk) and beat on slow until you get a sandy consistency and everything is combined. Gradually pour in half the milk and beat until the milk is just incorporated.
3. Whisk the eggs, vanilla extract, and remaining milk together in a separate bowl for a few seconds, then pour into the flour mixture and continue beating until just incorporated (scrape any unmixed ingredients from the side of the bowl with a rubber spatula). Continue mixing for a couple more minutes until the mixture is smooth. Do not over-mix.
4. Pour the mixture into a muffin pan lined with paper cases until two thirds full and bake in the preheated oven for 20–25 minutes, or until light golden and the sponge bounces back when touched (smaller cupcakes will need 3-5 minutes less baking time).
5. A toothpick inserted in the center should come out clean. Leave the cupcakes to cool slightly in the tray before turning out on to a wire cooling rack to cool completely.
6. When the cupcakes are cold, frost with chocolate buttercream frosting. To

Wednesday, May 5, 2010

Swedish Visiting Cake

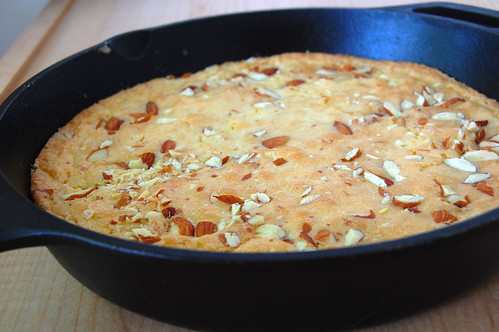
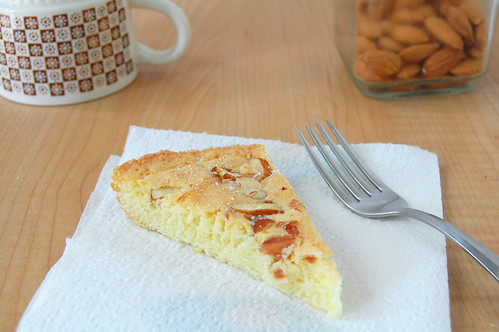
I'd seen this cake made by the Tuesdays With Dorie group a few weeks ago, and I just could not resist. Maybe it was the simplicity of the recipe, or the rustic but oh-so-pretty pictures in Dorie's book, but something about this cake just called out to me.

This cake is seriously one of the most delicious cakes I have ever made and it probably took me about 15 minutes tops to prepare. Am I tooting my own horn? Sure, maybe a little, but not really, since the deliciousness of this cake is not a reflection of the baker, it is a reflection of the recipe. It is so simple to make and just wonderful to eat. Butter, flour, sugar, vanilla, and almonds...how can you go wrong? Plus, the batter is easily prepared in one bowl and doesn't require a mixer.

Best of all, this cake is just a blank canvas for so many variations I have in mind - maybe adding a touch of cinnamon and nutmeg, or topping it with a fruit compote, or folding in a handful of... chocolate chips (bet you didn't see that one coming). So rebellious yet so delicious too. The possibilities are seriously endless.


Swedish Visiting Cake (from Dorie Greenspan, Baking: From My Home to Yours)

*8 tbsp (1 stick) unsalted butter, melted and cooled, plus more for pan
*1 cup sugar, plus more for sprinkling
*Grated zest of 1 lemon
*2 eggs
*1/4 tsp salt
*1 tsp vanilla extract
*1/2 tsp almond extract
*1 cup flour
*1/4 cup sliced almonds (blanched or not)
*powdered sugar (optional, for serving)

1. Center a rack in oven and preheat to 350 degrees. Butter a seasoned 9-inch cast-iron skillet or other heavy oven-proof skillet, a 9-inch round cake pan or even a pie pan.

2. Pour sugar into a medium bowl. Add lemon zest and blend zest into sugar with your fingers until sugar is moist and aromatic. Whisk in eggs, one at a time, until well blended. Whisk in salt and vanilla and almond extracts.

3. Switch to a rubber spatula and stir in flour. Finally, fold in melted butter. Scrape batter into prepared skillet or pan and smooth top with rubber spatula.

4. Scatter sliced almonds over top and sprinkle with sugar. If using a cake or pie pan, place pan on baking sheet. Bake for 25 to 30 minutes, or until golden and a little crisp on outside; the inside will remain moist. Let cook slightly, and sprinkle with a bit of powdered sugar before serving.

Monday, May 3, 2010

Chocolate Chip and Pecan Oatmeal Cookies

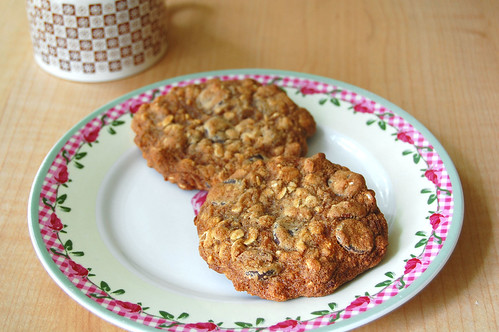
Boyfriends are fun to mess with. Especially mine. I have a simple trick that I like to play on him: I take some of our favorite dessert recipes, make some healthy substitutions (without him knowing of course), and innocently watch him to see if he notices any differences. Yes, he is the official guinea pig of MsMeanie's Test Kitchen.

I'll admit it though, some recipes don't fool him, and he can detect a hint of healthy, but these oatmeal cookies? They get him - every, single, time.

The first time I made these cookies, I followed the recipe exactly and they were amazing - rich and chewy and just sweet enough. A few weeks later I made them again, this time with a few healthy tweaks, and guess what? They were STILL amazing. Deliciously rich from the chocolate and pecans, with a balance of crispy on the outside and chewy in the center. My tastebuds loved me, my arteries thanked me, and my test kitchen guinea pig devoured them without suspecting a thing. Now, that to me is cookie perfection.

Chocolate Chip and Pecan Oatmeal Cookies (adapted from Smitten Kitchen and David Lebovitz, makes about 36 cookies)

*4 tablespoons unsalted butter, at room temperature
*4 tablespoons unsweetened applesauce
*3/4 cup white sugar
*1 cup light brown sugar, firmly packed
*1 teaspoon salt
*1 teaspoon vanilla extract
*2 large eggs
*1/2 cup all purpose flour
*3/4 cup whole wheat pastry flour
*1 teaspoon baking soda
*1 1/2 cup quick-cooking oats
*2 cups chopped pecans
*12 ounces semisweet chocolate chips

1.Preheat oven to 350°F. Lightly butter a large cookie sheet or line with parchment paper.
2. Using an electric mixer, beat the butter and applesauce in a bowl until light and fluffy. Add both sugars, salt, and vanilla, and beat until well mixed, about three minutes. Stir in eggs, one at a time.
3. Sift together the flour and baking soda in a separate bowl. Stir in half of the flour mixture to the butter. Once the flour has been incorporated, add the second half. Stir in the oats, pecans, orange zest, and chocolate chips.
3. Place a small piece of plastic wrap over the dough and chill in the refrigerator for a few hours (at least 1 hour). This step gives the cookies a great texture and really enhances the flavor. The longer the cookies are chilled, the chewier and more flavorful they will be.
4. Allow the dough to sit at room temperature for a few minutes, then drop the dough, by the tablespoon, onto the cookie sheet and bake for 10 to 12 minutes or until golden. Remove from the oven and cool the cookies on a rack.

Monday, April 12, 2010

The Baked Brownie

Firstly, I want to thank you all for your well wishes and kind words in my last post. I was amazed at the amount of support I received in the comments and I have come to realize that I have the BEST blog readers ever! :)

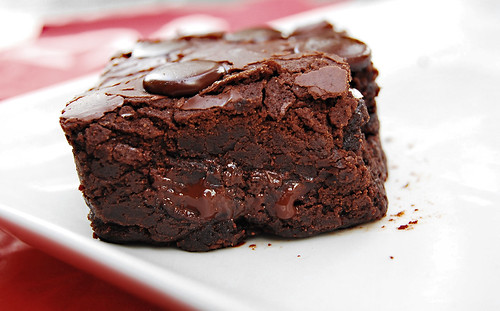
Now, let's talk brownies. I know what you're thinking - "another brownie recipe? Doesn't this girl get tired of chocolate, like ever?". The answer is "No. I don't." I am on a mission to find the best brownie recipe, even if that means baking a new batch every month and posting about them. A few weeks ago, I made the highly coveted King Arthur Flour brownies, and although I really enjoyed the texture of these - dense and fudgy, I felt they were a bit lacking in chocolate flavor. But since so many of my favorite fellow food bloggers love this recipe, I blame myself, and not the King, for their shortcomings. I will definitely try these brownies again, with a few changes, but in the meantime, I wanted to share another brownie recipe.

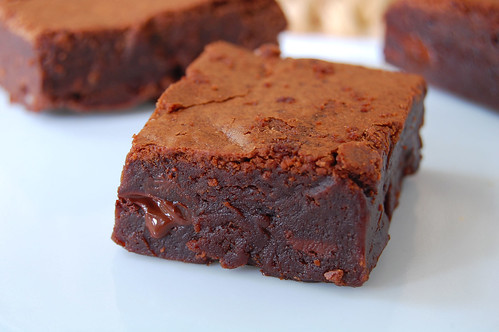
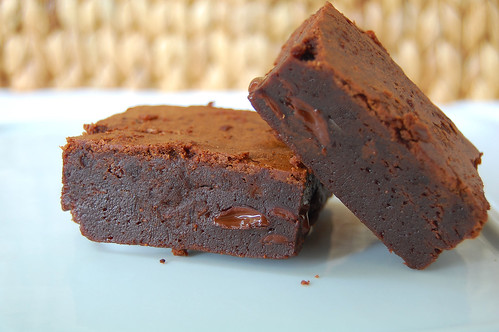
This one is the famous Baked brownie, created by the people at Baked bakery in Brooklyn, New York. These brownies were AMAZING. I brought one of these to work for an after lunch treat; one bite and I almost fell out of my chair - they were that good. They are rich, dense, and fudgy, and the brown sugar and espresso powder give them an unbeliveably delicious chocolate flavor. If you are looking for the perfect brownie, I highly recommend you try this one. You will not be disappointed!
Baked Brownie (from Baked – New Frontiers in Baking)
*1 1/4 cups all-purpose flour
*1 teaspoon salt
*2 tablespoons dark unsweetened cocoa powder
*11 ounces dark chocolate (60 to 72% cacao), coarsely chopped
*1 cup (2 sticks) unsalted butter, cut into 1-inch pieces
*1 teaspoon instant espresso powder
*1 1/2 cups granulated sugar
*1/2 cup firmly packed light brown sugar
*5 large eggs, at room temperature
*2 teaspoons pure vanilla extract

1. Preheat the oven to 350 degrees F. Butter the sides and bottom of a 9 x 13 glass or light-colored metal baking pan.
2. In a medium bowl, whisk the flour, salt and cocoa powder. Put the chocolate, butter, and instant espresso powder in a large bowl and set it over a saucepan of simmering water, stirring occasionally, until the chocolate and butter are completely melted and smooth. Turn off the heat, but keep the bowl over the water and add the sugars. Whisk until completely combined, then remove the bowl from the pan. The mixture should be room temperature.
3. Add 3 eggs to the chocolate mixture and whisk until combined. Add the remaining eggs and whisk until combined. Add the vanilla and stir until combined. Do not overbeat the batter at this stage or your brownies will be cakey.
4. Sprinkle the flour mixture over the chocolate mixture. Using a spatula (not a whisk), fold the flour mixture into the chocolate until just a bit of the flour mixture is visible.
5. Pour the batter into the prepared pan and smooth the top. Bake in the center of the oven for 30 minutes, rotating the pan halfway through the baking time, until a toothpick inserted into the center of the brownies comes out with a few moist crumbs sticking to it. Let the brownies cool completely, then cut them into squares and serve. Tightly covered with plastic wrap, the brownies keep at room temperature for up to 3 days.

Friday, March 26, 2010

Sooji Halwa

"Everything in moderation, including moderation." --Julia Child

This is my favorite quote from one of my favorite chefs, and pretty much sums up my attitude towards food. Yes, I know that moderation is the key to staying healthy and still being able to enjoy rich foods and sweet desserts, and I'm all for it. But sometimes a girl (and by girl I mean me), just needs to sit down and pig out on dessert, and not feel like she's committed a sin. I know they say to eat until you are just satisfied, but sometimes I'm not satisfied until I know I'm over-satisfied. Sometimes I'm not full until I'm over-full. Sometimes moderation just does not cut it.

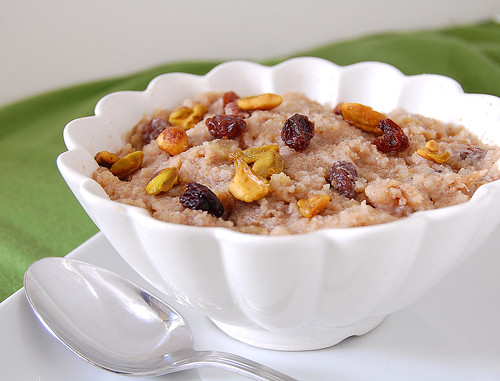
Sooji halwa is a very popular Indian dessert, often translated as 'semolina pudding'. It is the kind of dessert that you can eat a whole lot of without feeling the need to throw up or run a marathon afterward. It is light but extremely satisfying, sweet but not overly so, creamy but not too rich - all in all, the perfect dessert for assuaging all those sweet cravings that beg for more than just a few little bites.

Sooji Halwa (Semolina Pudding)
*1/4 cup butter
*1 cup semolina (cream of wheat)
*2 bay leaves
*1 cup sugar
*pinch of salt
*1/2 cup water
*1 cup milk
*1/8 teaspoon ground cardamon
*1/2 cup raisins
*1/2 cup chopped walnuts, almonds, pistachios, or cashews (or a combination)

1. In a large skillet (cast iron works well), melt the butter over medium heat.
2. Add the semolina and bay leaves, and cook for about 7-8 minutes until the semolina is reddish-brown in color but not burnt! Stir constantly, being careful not to burn it.
3. Add the sugar, and stir for about 15-20 seconds. Add the salt, water, milk, cardamom, raisins, and nuts, and stir for about 2 minutes. The mixture should still be somewhat wet.
4. Remove from heat and serve.

Monday, March 22, 2010

Whole Wheat Cinnamon Rolls

I hate flying. Hate it. Love traveling, but hate flying. This is a difficult feeling to manage when you live 3000+ miles away from all of your family and most of your closest friends. Almost every year, I swear to myself that I will not fly home for the holidays this year, just to find myself frantically searching for flights come December. The worst part about flying to New York from California is having a lay-over in some city which will inevitably have some sort of weather problem. Yes, I know there are direct flights from California to New York, but I am too cheap for those (please see profile: graduate student=no money).

My worst trip home was a few years ago when two days before Christmas, during my layover in Indiana, my flight was canceled, and I had to spend the night in an airport hotel. The compensation from the airlines was a $15 food voucher to buy dinner from any airport restaurant. As appetizing as fast food and greasy pizza sounded, I opted for another airport classic: a giant cinnamon roll from no other than Cinnabon.

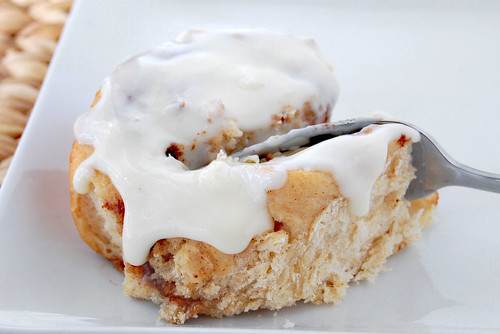
What is it about a cinnamon roll that is so comforting and satisfying? The soft and warm bread slathered in cinnamon and butter, and topped with gooey, tangy, and sweet frosting. Yum. Luckily, you don't have to be stuck in an airport to enjoy this warm, gooey goodness - delicious cinnamon rolls are pretty simple to make at home. I have made cinnamon rolls using all purpose flour in the past, but this time wanted to try whole wheat. I used white (rather than regular) whole wheat, and the results were amazing -- taste-wise, these rolls are just as delicious as their all-purpose cousins. Visually, they were a bit browner, and therefore require a bit more care to make sure they don't overcook.

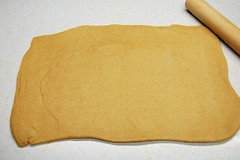
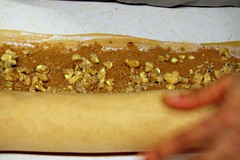
Once the dough is mixed up, it must rise for at least 2 hours. Then it is rolled
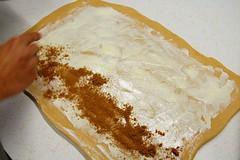
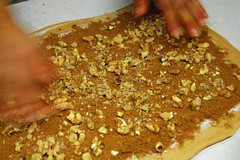
into a large rectangle and sprinkled with butter and a generous helping of
cinnamon sugar.


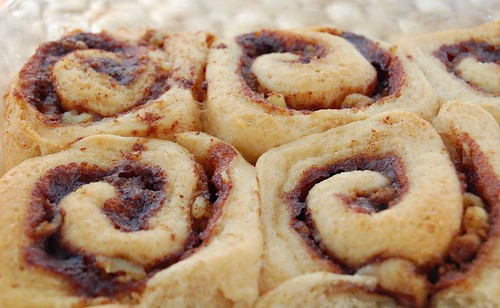
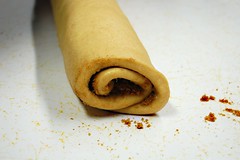
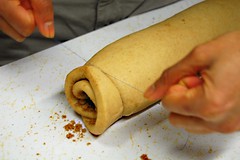
The dough is then rolled up and cut into individual rolls. Using thread
(or unwaxed dental floss) to cut the dough helps prevent it from sticking
to itself.


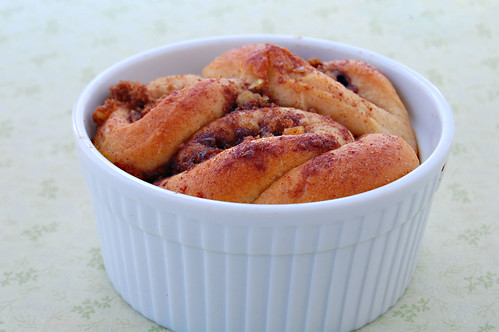
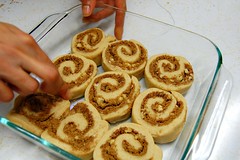
I baked the ends in a ramekin - a trick I learned from here (woops, somehow I ended up with 3 ends instead of 2).
Whole Wheat Cinnamon Rolls (Adapted from Molly Wizenberg’s recipe in Bon Appetit, March 2008 via SmittenKitchen).

Dough:
*1 cup whole milk
*3 tablespoons unsalted butter
*3 1/2 cups (or more) white whole wheat flour, divided
*1/2 cup sugar
*1 large egg
*2 1/4 teaspoons rapid-rise or instant yeast (from 1 envelope yeast)
*1 teaspoon salt
*Nonstick vegetable oil spray or butter, for greasing bowl

Filling:
*3/4 cup (packed) brown sugar
*2 tablespoons ground cinnamon
*1/4 cup (1/2 stick) unsalted butter, at room temperature
*Pinch of salt

Glaze:
*8 ounces cream cheese, at room temperature
*1 cup powdered sugar
*1/2 teaspoon vanilla extract

For dough: Combine milk and butter in glass measuring cup. Microwave on high until butter melts and mixture is just warmed to 120°F to 130°F, about 30 to 45 seconds. Pour into bowl of stand mixer fitted with paddle attachment. Add 1 cup flour, sugar, egg, yeast, and salt. Beat on low speed 3 minutes, stopping occasionally to scrape down sides of bowl. Add additional 2 1/2 cups flour. Beat on low until flour is absorbed and dough is sticky, scraping down sides of bowl. If dough is very sticky, add more flour by tablespoonfuls until dough begins to form ball and pulls away from sides of bowl. Turn dough out onto lightly floured work surface. Knead until smooth and elastic, adding more flour if sticky, about 8 minutes. (You may also use a KitchenAid’s dough hook for this process.) Form into ball.

Lightly oil large bowl with nonstick spray or thin layer of butter. Transfer dough to bowl, turning to coat. Cover bowl with plastic wrap, then kitchen towel. Let dough rise in warm draft-free area until doubled in volume, about 2 hours.

For filling:

Mix brown sugar and cinnamon in medium bowl. Punch down dough. Transfer to floured work surface. Roll out to 15x11-inch rectangle. Spread butter over dough, leaving 1/2-inch border. Sprinkle cinnamon sugar, then walnuts, evenly over butter. Starting at 1 long side, roll dough into log, pinching gently to keep it rolled up. With seam side down, trim ends straight if they are uneven (bake separately in ramekin), and cut dough crosswise with thin sharp knife into 18 equal slices (each about 1/2 to 3/4 inch wide).

Spray two 9-inch square glass baking dishes with nonstick spray. Divide rolls between baking dishes, arranging cut side up (there will be almost no space between rolls). Cover baking dishes with plastic wrap, then kitchen towel. Let dough rise in warm draft-free area until almost doubled in volume, 40 to 45 minutes.

Position rack in center of oven and preheat to 375°F. Bake rolls until tops are golden, about 20 minutes. Remove from oven and invert immediately onto rack. Cool 10 minutes. Turn rolls right side up.

For glaze:
Combine cream cheese, powdered sugar, and vanilla in medium bowl. Using electric mixer, beat until smooth. Spread glaze on rolls. Serve warm or at room temperature.

Wednesday, March 10, 2010

King Arthur Brownies

My BF tells me that I quantify things too much. Maybe he's right. Maybe it has something to do with my mathematics background, but there is definitely something that just feels right about quantifying things, especially when it comes to food.

After preparing a bunch of different dishes for dinner, my first instinct is to mentally rank them, and then of course, to ask him to rank them. Whenever we go out to eat or even attend dinner parties, I mentally rate everything I taste, and then of course, ask him to do the same. I also keep several mental lists: favorite restaurants, favorite types of cuisines, favorite savory foods, and my favorite favorites list: desserts. Unfortunately, this is a difficult list to maintain because it changes frequently and often based on my moods (certain times of the month,etc.). Often times, I find two contenders on this list battling it out for first place: chocolate cupcakes and the ever-popular chocolate brownies. They both hold a special place in my heart, but today brownies is number 1 on my list.


I am definitely a chewy fudgy brownie person. To me, the fate of a cakey brownie is to be melted down, combined with more butter and chocolate and turned into a chewy fudgy brownie. I have tried a few brownie recipes including Dorie Greenspans classic brownies (me likey!) and another recipe I have taped to my cabinet (no joke) but forgot where I got it from. This time I decided to try the highly coveted King Arthur Flour brownies.
The verdict? These brownies get an A (here's me quantifying again) for texture: they were very chewy and fudgy and not at all gummy. Unfortunately, they get a B+ for flavor. To me, these brownies did not yield a profound chocolate flavor, I actually found the chocolate level to be rather mild and disappointingly flat. I thought that they would improve over time, but 2 days later they were still a bit disappointing. Don't get me wrong -- they are not bad brownies, just not the sublime ones I was hoping for. Ok, so maybe it was my fault: I didn't add the optional espresso powder, and I'm not sure if the cocoa I used was Dutch processed. I will definitely try these brownies again with those changes, but next on my list is the Baked Brownie. If you've tried it, I'd love to hear how they turned out for you.
King Arthur's Fudge Brownies (adapted from here)
*1 cup (2 sticks) unsalted butter
*2 1/4 cups sugar
*4 large eggs
*1 1/4 cups Dutch-process cocoa
*1 teaspoon salt
*1 teaspoon baking powder
*1 teaspoon espresso powder, optional
*1 tablespoon vanilla extract
*1 1/2 cups all-purpose flour
*2 cups chocolate chips

1.Preheat the oven to 350°F. Lightly grease a 9" x 13" pan.
2. In a medium-sized microwave-safe bowl, or in a saucepan set over low heat, melt the butter, then add the sugar and stir to combine. Return the mixture to the heat (or microwave) briefly, just until it's hot (about 110°F to 120°F), but not bubbling; it'll become shiny looking as you stir it. Heating this mixture a second time will dissolve more of the sugar, which will yield a shiny top crust on your brownies.
3. While the sugar heats a second time, crack the 4 eggs into a bowl, and beat them with the cocoa, salt, baking powder, espresso powder, and vanilla till smooth.
4. Add the hot butter/sugar mixture, stirring until smooth.
5. Add the flour and chips, again stirring until smooth. Note: If you want the chips to remain intact in the baked brownies, rather than melting in, let the batter cool in the bowl for about 20 minutes before stirring in the chips.
6. Spoon the batter into a lightly greased 9" x 13" pan.
7. Bake the brownies for about 30 minutes, until a cake tester inserted into the center comes out clean, or with just a few moist crumbs clinging to it. The brownies should feel set on the edges, and the center should look very moist, but not uncooked. Remove them from the oven and cool on a rack before cutting and serving.