Showing posts with label Italian. Show all posts

Wednesday, June 9, 2010

Whole Wheat Focaccia


I think I've had this blank document up for about 2 hours now, trying to write this post. In the meantime, I've read the news, listened to a Christmas song, bought new running sneakers, and watched an episode of Sex and City (why, oh why can't the movies be as good as the show??). But write this post I did not. So since I could not come up with anything to write, I decided to write about how I could not come up with anything to write.

Truth is, I think I'm all writed-out. Yesterday, after weeks months of writing, editing, writing, editing, and even more writing and editing, I FINALLY submitted my thesis. Hallelujah is all I can say. For now that is. Until my committee members read it, find a million things wrong with it, and ask me to re-write it, edit it, rewrite it and edit...(please pray for me that this doesn't happen).

I now have a new respect for book writers and editors. How do they do it? More times than I'd like to admit, I'd get ready to proofread, red pen in hand, only to find myself...asleep. Face down. On my thesis. With a red ink stain on my cheek.

Don't get me wrong, I am in no way putting down my writing or my research, it's all very interesting (to me at least), but I find few things more boring than reading and re-reading something that I have written, read and re-read about a gazillion times. I'm just saying.

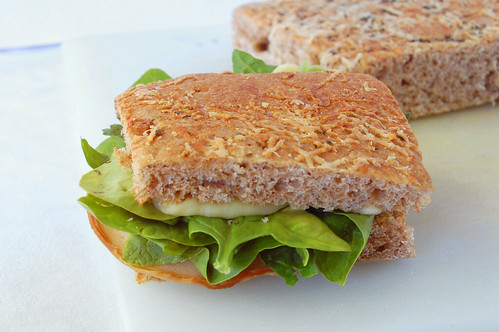
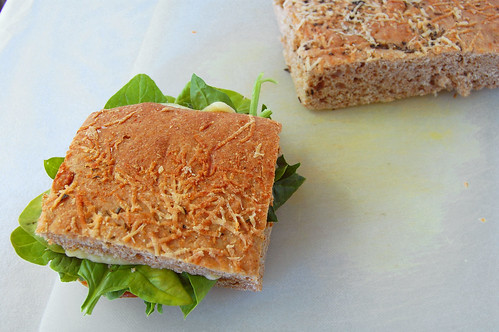
I have been wanting to post about this recipe for a while now - ever since Nancy was here (yes, that long!). It's probably the simplest yeast bread you can make and super tasty. The best thing about it, is the countless ways to flavor it with various combinations of herbs, cheese, and other fixin's: thyme and roasted garlic, caramelized onions and gruyere, or whatever else you fancy. This bread is a palette for your culinary imagination. Start painting!
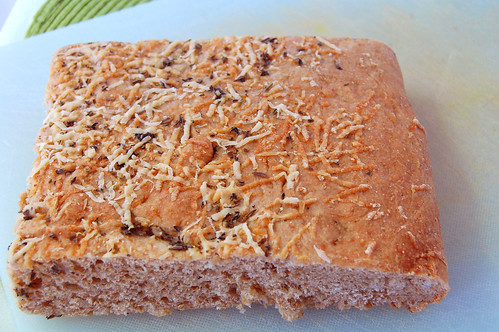

Whole Wheat Focaccia Bread (adapted from allrecipes)

1 tablespoon honey
2 cups warm water
1 tablespoon active dry yeast
1 tablespoon kosher salt
1 tablespoon extra-virgin olive oil
1/2 cup diced onion

3 cups all-purpose flour, plus a bit more as needed
2 cups whole wheat flour
3 tablespoons extra-virgin olive oil
2 tablespoons fresh chopped rosemary
1/4 cup freshly grated Parmesan cheese
1 tablespoon kosher salt

1. In a large bowl, dissolve honey in the warm water, then sprinkle yeast over the top. Let stand for 5 minutes until the yeast softens and begins to foam. Stir in 1 tablespoon of salt, 1 tablespoon olive oil, onions, and flour and form into a dough. Knead on a well floured surface until smooth and elastic, about 5 minutes.
2. Lightly oil a large bowl, place the dough in the bowl and turn to coat with oil. Cover with a damp cloth and let rise in a warm place until doubled in volume, about 20 minutes.
3. Preheat oven to 415 degrees F (215 degrees C).
4. Place dough onto oiled baking sheet, and flatten to cover the whole sheet evenly. Use the tips of your fingers to make indentations all over the dough spaced about 1 inch apart (I forgot to do this). Drizzle the focaccia with 3 tablespoons olive oil, then sprinkle rosemary, Parmesan cheese, and remaining 1 tablespoon of kosher salt over the top. Let rise for 10 minutes.
4. Bake in preheated oven 20 minutes until golden brown.

Wednesday, May 26, 2010

Panzanella Salad


My lovely readers, I know I have been away for a while. I have been traveling on a road trip for the last week with no internet access and therefore have been unable to update this site and read up on all my favorite blogs. I finally have internet access (woot!) now and I promise I will catch up on all the posts I have missed.

I also have some news...I got a job! Yes, in a few months, I will be finishing up graduate school and moving to the Midwest to teach at a small liberal arts college. I am excited and terrified at the same time. Happy and sad. Relieved and nervous. I'm definitely feeling a mix of emotions right now and this is only the start. It is crazy for me to think about how remarkably different my life will be in a few months, how so many changes are about to take place. And as excited as I am about this opportunity, I sometimes wish things wouldn't change.

I've spent the last 5 years of my life in California, and although I'm ready for a change, I know there are many things I will miss about this place. I've mentioned before how great the local farmer's market is here, and I feel almost at a loss when I think about not being able to have fresh and local produce all year long. The best thing about this farmer's market is the variety of produce stands avaialble. Sure there are the ridiculously pricey vendors who try to sell you a tiny basket of organic strawberries for $7, but there are also several vendors that sell pesticide-free produce at prices that are reasonable even for a cheap and poor graduate student like me.

Shopping at the farmer's market gives me opportunities to make things like this panzanella salad which was inspired by one of my favorite food sites. The original recipe called for asparagus and leeks, but I substituted spring garlic for the leeks and added fava beans. That is the beauty of this salad. It can be easily tweaked to accommodate whatever vegetable you're craving or, in my case, happens to be on sale!

Spring Panzanella Salad (adapted from Smitten Kitchen)
For the croutons:
1/4 cup olive oil
2 cloves garlic, finely chopped
5 cups day-old bread, crust removed, cubed (I used whole wheat)
6 tablespoons finely grated Parmesan or Pecorino cheese
Salt and freshly ground black pepper

For the vinaigrette:
Half a red onion, finely diced
2 to 2 1/2 tablespoons red wine vinegar
Juice of half a lemon
1/4 cup olive oil
1/2 teaspoon Dijon mustard

For the salad:
2 cups shelled fava beans (from about 2 lbs of unshelled beans), steamed or blanched
1 pound asparagus, cut into 1 inch pieces
2 bulbs spring garlic (optional)
1 19-ounce can of white beans, rinsed and drained or 1 1/2 cups cooked white beans

Preheat oven to 400°F.

To make bread cubes:
Mix the bread cubes with the garlic, olive oil, cheese, salt and pepper in a large bowl. Toss to coat well. Transfer bread to a baking sheet and sprinkle with salt and pepper. Bake stirring once or twice, until the croutons are crisp and lightly colored on the outside but still soft within, about 10 to 15 minutes. Set aside and let cool.

To make vinaigrette:
Whisk together red onion, vinegar, lemon juice, olive oil, and mustard in a small bowl.
Set aside.

To prepare salad:
Combine the beans, asparagus, spring garlic (if using), and white beans in a large bowl. Mix in bread cubes, pour in vinaigrette, and toss well.

Sunday, February 28, 2010

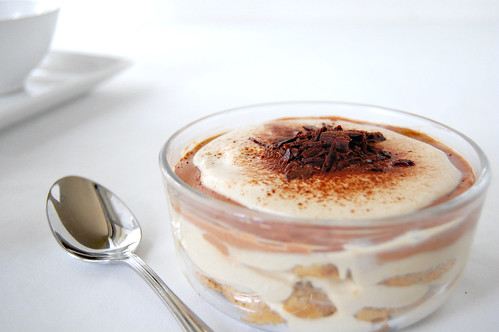
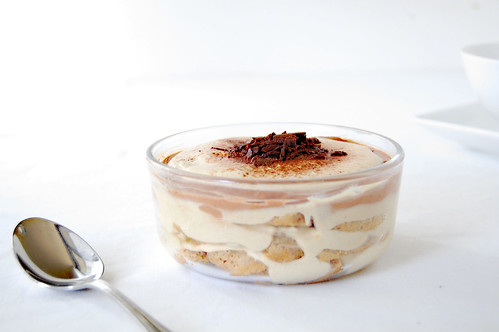
Daring Baker's Tiramisu

The February 2010 Daring Bakers’ challenge was hosted by Aparna of My Diverse Kitchen and Deeba of Passionate About Baking. They chose Tiramisu as the challenge for the month. Their challenge recipe is based on recipes from The Washington Post, Cordon Bleu at Home and Baking Obsession.

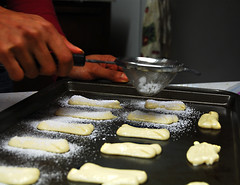
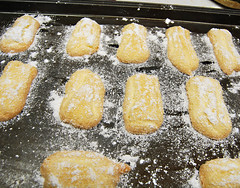
I LOVE tiramisu, and had previously never made it, so when I saw the February challenge, I was definitely excited. For this challenge, we were to make tiramisu from scratch -- meaning all of the components had to be made from scratch, including the lady fingers and the mascarpone cheese.

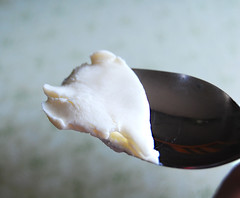
There were many components to this recipe. From experience, I've learned that for the sake of my mental health, I should never expect to complete a Daring Bakers challenges in one day. This dessert consisted of lady fingers, mascarpone cheese, zabaglione (Italian custard), pastry cream, and whipped cream. So, for this challenge, I split up the work over a span of a few days, and it worked out very nicely. I made the lady fingers and mascarpone one day, the zabaglione, pastry creams, and whipped creams 3 days later, assembled the dessert the following day, and let it chill overnight.


What I really loved about this recipe is that although there were many components, I didn't find any of them to be too difficult, just a bit time consuming. The lady fingers were pretty simple and very good, although next time I may add a bit of vanilla to give them more flavor. Since I had made mascarpone once before, this time around was definitely easier.

For my version of this decadent dessert, I made an extra chocolate layer by spiking the pastry cream with about 6 ounces of chopped bittersweet chocolate, and topped it with some shaved chocolate. I have a hard time saying no to chocolate. Sorry, it's a weakness.

Please check out Aparna's or Deeba's blogs for the recipe.

Tuesday, December 8, 2009

Daring Bakers Cannoli...Yes, it's Late


This is my first time posting late for a Daring Bakers Challenge. I'm sorry! I am hoping that my tardy posting will prevent me from getting kicked out of this group that I am actually really honored to be a part of. These are some seriously DARING Bakers. This month (or I guess last month) however, they were Daring Fryers, as the challenge recipe was Cannoli.

Mmm...Cannoli. I remember those little rolls of deliciousness from my school days back in Queens NY. Every once in a while I would walk into my favorite pizzeria on my way back from school, and treat myself to one of these babies. The fried crispy shells filled with white yummy filling (which is what I knew it as back then since I had never even heard of ricotta or marscarpone), speckled with mini chocolate chips. It was heaven! Unfortunately, these "cannoli" I concocted last weekend, were not :( .

I'm not sure if it was my fault or the fault of the recipe (I'm guessing its the former since others had good turnout with this recipe), but my cannoli shells were pretty awful. Firstly, the recipe said to fry for 1-2 min, but doing this caused major burnage for my shells -- so much that I was frying for about 30 seconds tops to make sure they didn't burn. Secondly, they were bland! I tried the suggested recipe for chocolate cannoli thinking chocolate anything has to be good -- but no, they were just chocolate blandness. And lastly, probably the saddest part of this challenge -- my shells did not stay crispy. The morning after they had basically become...tortillas. OK, maybe not as flimsy as a tortilla, but maybe something more like a pita. No joke!

Anyway, my favorite part about this recipe was a homemade chocolate mascarpone filling that I made to fill the cannoli (will post about it next). I was really surprised at how easy it is to make mascarpone at home! I would say it is even easier than paneer (or ricotta), since the first time I did that, I ended up burning the milk. Cream, on the other hand, is much tougher, and requires much more carelessness to burn. YES to burn-resistant ingredients!

Please check out Lisa's fantastic blog for the cannoli recipe. Her cannoli are seriously stunning and I'm sure much tastier than mine!

Thursday, June 11, 2009

Brown Rice Risotto with Asparagus and Mushrooms


Ok, I've realized that I cannot go to Trader Joe's without buying at least 2 pounds of cheese. Before I made this risotto, our fridge was stocked with 14 kinds of cheeses, that's right FOURTEEN: mozarella, white cheddar, orange cheddar, Swiss, Gruyère, goat, Comtè, Fontina, Parmesiano-Reggiano, Pecorino, Monterey jack, feta, parmesan, and Harvati. So as much as I love risotto, this recipe was more about clearing up some fridge room than satisfying a craving.

I know that Arborio rice is typically used for risotto, but I wanted to try making it a bit healthier by using brown rice. I wasn't sure how it would work out, or if it would at all, since brown rice is definitely not as starchy as Arborio, and the starchiness of the rice is what gives risotto its creaminess. I used a simple recipe for asparagus and shitake risotto and used brown rice instead of Arborio.

Using the brown rice required much more time since brown rice takes longer to cook, but the end result was totally worth it. This risotto was just as creamy as other risottos I've had with Arborio rice. I used Gruyère and Fontina, which added a ton of flavor.

Brown Rice Risotto with Asparagus and Mushrooms (adapted from Gourmèt, May 2003)
  • 5 cups vegetable broth
  • 1 cup water
  • 1 pound thin to medium asparagus, trimmed and cut into 1/4-inch-thick slices, leaving tips 1 1/2 inches long
  • 4 tablespoon olive oil
  • 1/4 pound fresh shiitake mushrooms, sliced
  • 1/2 pound fresh crimini mushrooms, sliced
  • 3 shallots, diced
  • 1 1/2 cups Brown rice (10 ounces)
  • 1/2 cup dry white wine
  • 1/2 cup Gruyere
  • 1/2 cup Fontina
1. Bring broth and water to a boil in a large pot. Add asparagus and cook, uncovered, until crisp-tender, 3 to 4 minutes. Transfer asparagus with a slotted spoon to a large bowl of ice and cold water to stop cooking, then drain and pat dry. Keep broth at a bare simmer, covered.
2. Heat 2 tablespoons of oil in a large heavy pot over moderately high heat, then sauté mushrooms, stirring occasionally, until browned, about 4 minutes. Transfer to a bowl.
3. Cook shallots in 2 tablespoons of oil in saucepan over moderate heat, stirring, about 1 minute. Add rice and cook, stirring, 1 minute. Add wine and cook, stirring, until absorbed, about 1 minute.
3. Ladle in 1 cup simmering broth and cook at a strong simmer, stirring, until absorbed, about 2 minutes. Continue simmering and adding broth, about 1/2 cup at a time, stirring frequently and letting each addition be absorbed before adding next, until rice is just tender and looks creamy, for about 1 hour.
4. Remove from heat and stir in cheese and salt and pepper to taste. Gently stir in asparagus and mushrooms. Serve immediately.

Wednesday, April 29, 2009

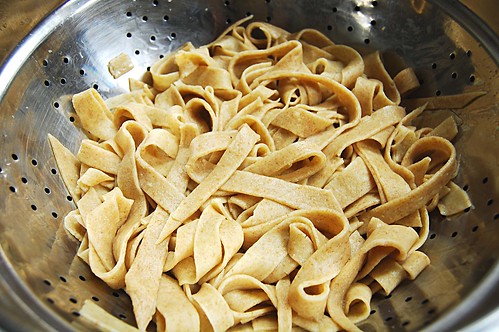
Homemade Whole Wheat Pasta

A few weeks ago, I saw a Good Eats episode on homemade pasta, and I was inspired. Alton Brown made ravioli, but since this was my first attempt at pasta from scratch and I don't own a pasta maker, I decided to keep it simple and go with a pasta noodle. I wanted to up the nutritional content, so I chose a whole wheat pasta recipe from my lovely Joy of Cooking. For this recipe, I followed both Alton's tips and the tips from Joy of Cooking. Here's how it went down.

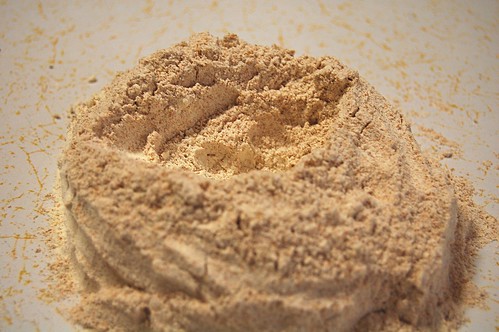
AB and JoC both suggested mounding the flour and creating a well in the center for the wet ingredients to be poured into. The benefit of doing it this way is you never use more flour than you need -- you just use as much flour as necessary to soak up the wet ingredients and form the dough. That's brilliant! And so simple! So I tried it.
First I mounded my dough. Then I made a well...

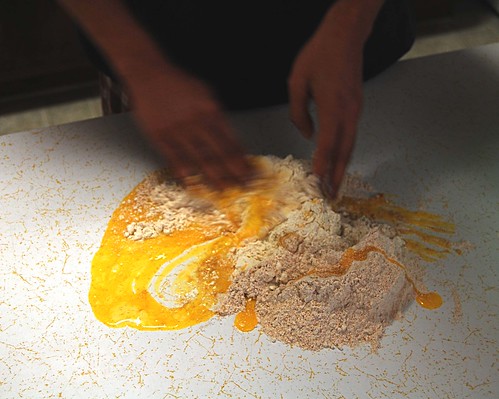
Then I added the wet ingredients...
Waahh!! My well! My beautiful well. Actually it was a stupid sissy well that couldn't even hold some eggs and water in place...arrghh. At this point I almost gave up, but the bf offered some moral support, so I continued...
Ahh..eventually, I got a dough! And it didn't suck. Yay! I actually didn't use up all the flour that the recipe called for, so I think it is a good idea to incorporate the dough and the wet ingredients slowly instead of all at once.

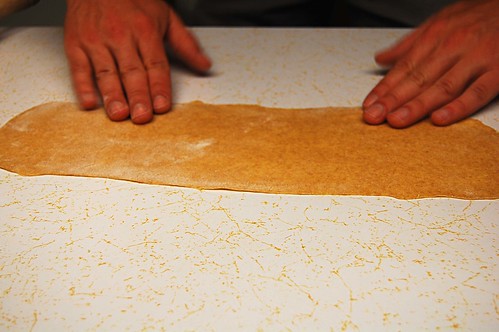
After the dough rested in the fridge for about an hour, we rolled it out into thin sheets...
And if you're wondering, no those are not my hands -- I put the bf to work for this recipe. Sometimes moral support just isn't enough.

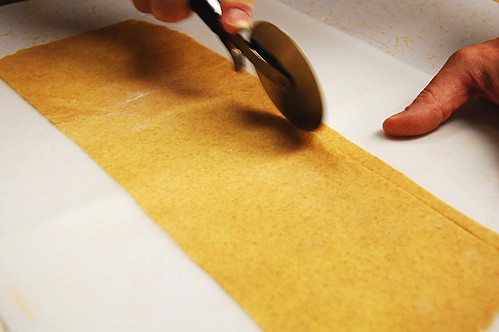
The next step was to cut the sheets into strips. Using a pizza cutter made it really easy.
The final step was to use a handy dandy pasta dryer and allow the pasta to dry for at least 2 hours...
This is what happens when you're living on a grad student stipend and therefore don't have a handy dandy pasta dryer. You make one! We scrubbed down a yard stick until it was nice and clean, propped it up with two chairs, and hung the pasta strips off of it. Drying the pasta this way was so simple, I don't think I even need a pasta dryer.

Once the pasta dries, it is ready to be boiled. The boiling time is much less than for store bought pasta. We boiled ours for about 6 minutes.

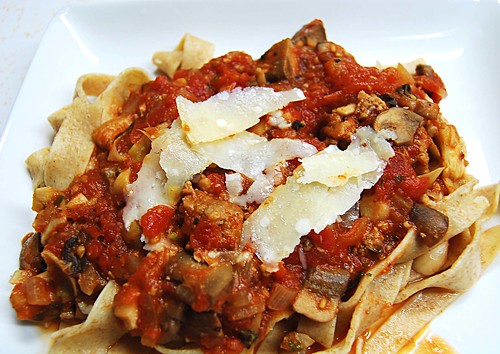
I made a simple tomato sauce with fresh mushrooms and onions, topped it with some Parmigiano Reggiano (yes, I splurged and bought the real stuff) and...Tah Dah!
This pasta was SOOO good and the taste/texture was just so much better than the store bought stuff. Now I'm not saying that I'll never use store-bought pasta, because, well, it's still really good and so quick to prepare, but whenever I have the time, I will definitely be making this again. It does take some effort and patience, but the end result is sooo worth it.

Whole Wheat Pasta (adapted from Joy of Cooking and Alton Brown)
  • 1 cup unbleached all-purpose flour
  • 1 cup whole wheat flour
  • 3 large eggs, beaten
  • 1 Tb water
  • 1/2 tsp salt
  • 1 tsp extra-virgin olive oil
1. Combine the flours and mound the mixture on a clean counter.
2. Combine the eggs, water, salt, and oil.
3. Make a large well* (see note below) in the center of the mound and slowly pour in the egg mixture a little bit at a time. Mix the flour with the wet ingredients until all of the wet ingredients are absorbed. Do not force the dough to use all the flour, just take as much as needed to incorporate all the wet ingredients.
4. Knead the dough for at least 10 minutes.
5. Cover the dough in plastic wrap and place in the refrigerator for 1 hour.
6. Divide the dough into four equal pieces. On a well-floured surface, roll out each piece into a thin sheet, one at a time. The dough should be about 1/8 inch thick, thin enough to detect the outline of your hand.
7. Cut the dough into strips of desired thickness.
8. Let the strips dry on a pasta dryer (or a homemade pasta dryer!) for at least 2 hours.
9. Note: Fresh pasta takes much less time to cook. Check the pasta as soon as 4 minutes of boiling.

*I think the reason my well didn't work out so well (hah!) is that I poured too much of the the wet ingredients in too quickly. The wet ingredients should be poured into the well in small batches, one at a time. Also, the well should be deep enough to hold a good amount of liquid (mine was not).

After making this, I decided to submit it to Presto Pasta Nights, a great group of food bloggers who challenge themselves by making interesting pasta dishes. This week's host is Ruth from Once Upon a Feast -- her blog has some great recipe ideas!

Thursday, April 9, 2009

Pizza Two Ways

I've noticed something about myself: I ALWAYS crave desserts. It doesn't matter where I am or when it is, but I think I can always happily picture myself eating a brownie, or cookie, or cupcake. Of course some cravings are more uh, defiant, than others, and maybe these happen to occur around the same time every month...sorry, too much info?

I have to admit, though, if there is one non-dessert food item that I find myself craving -- dare I say -- as much as I crave brownies, it would have to be pizza.

I know there are a TON of great trendy and atypical pizza recipes out there: pizza bianca, pizza margherita, and even this new-fangled black and gold pizza, but I really prefer the typical (some might say boring) tomato sauce and mozarella cheese pizza.

See, this meanie was raised in New York City and grew up eating and loving New York City pizza. And although I had the occasional encounter with the non red-and-white pizzas, something always left me wishing I had a cup of tomato sauce for dipping and a sprinkle of mozarella cheese.

I never understood why pizza got such a bad rap as being unhealthy. Bread, tomatoes, and cheese...what's not healthy? For my version, I use a homemade whole wheat crust, part-skim mozarella, and tons of veggies. This pizza defies being labeled as junk food. The crust is crispy, wholesome, and sturdy -- which makes nice for holding up all those veggies. It is not like the typical chewy, floppy NYC pizza crust, but considering how frequently I make this recipe, I think this is a great healthy alternative.

I usually make my pizza the same way: dough, tomato paste/sauce, mozarella cheese - and then experiment with different toppings. And I ALWAYS make two pizzas, because you can never have too much.
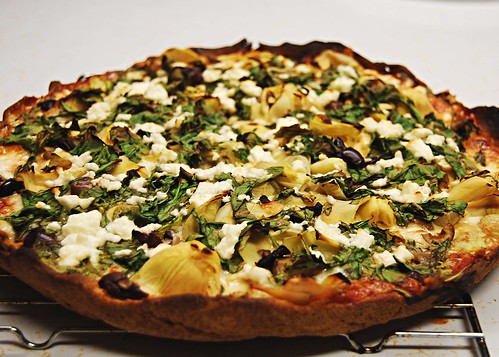
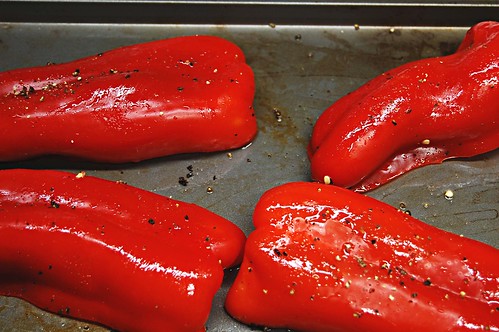
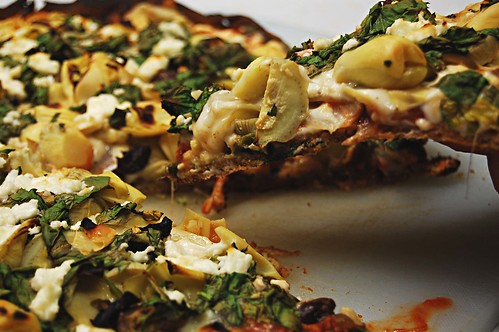
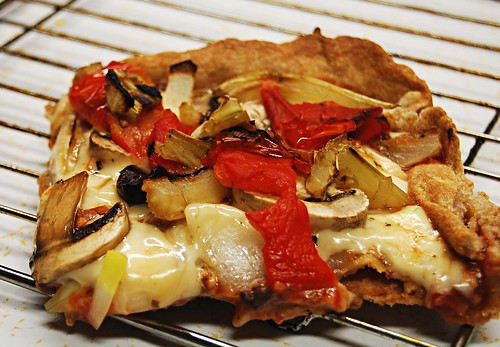
This week I went with Pizza#1 - Greek style: fresh spinach, artichoke hearts, olives, and feta, and Pizza#2: roasted red pepper, roasted fennel, mushrooms, and fontina.


Pizza-making is an art, and I am far from mastering it, but with every pizza I make, I think I'm getting closer and closer to my idea of the perfect homemade pizza.


Whole Wheat Pizza Dough (makes enough for two pizzas; adapted from allrecipes):
  • 1 teaspoon honey
  • 1 1/2 cups warm water
  • 1 tablespoon active dry yeast
  • 1 tablespoon + 1 tsp olive oil
  • 1 teaspoon salt
  • 2 cups whole wheat flour
  • 1 1/2 cups all-purpose flour
  1. In a large bowl, dissolve sugar in warm water. Sprinkle yeast over the top, and let stand for about 10 minutes, until foamy.
  2. Stir the olive oil and salt into the yeast mixture, then mix in the whole wheat flour and all-purpose flour until dough starts to come together. Tip dough out onto a floured surface and knead until the ball of dough becomes smooth, about 10 minutes. Place dough in an oiled bowl, and turn to coat the surface. Cover loosely with a damp towel, and let stand in a warm place until doubled in size, about 1 hour.
  3. When the dough is doubled, tip the dough out onto a lightly floured surface. Form into a tight ball. Let rise for about 45 minutes, until doubled.
  4. Preheat the oven to 425 degrees F (220 degrees C). Divide dough into 2 pieces. Roll each ball of dough with a rolling pin until it will not stretch any further. Then, drape it over both of your fists, and gently pull the edges outward, while rotating the crust. When the circle has reached the desired size, place on a well oiled pizza pan.
  5. Bake for 8 minutes in the preheated oven, until the crust is slightly crisp and golden at the edges.
  6. Remove from oven. Increase oven to 500 degrees F. Add sauce, cheese, and toppings, and bake for 10 minutes.