Friday, December 4, 2009

Blondies and My First Award


Wow. I know it has been too long since I've posted. And I've wanted to so much, but really have had no time this last month. I am teaching a class in my university, and I am really enjoying it but it is extremely time consuming. From preparing all the lectures, exams, and home works, grading, and holding office hours, I have found so little time to do other things I enjoy, including cooking. I've made a few interesting things here and there (mainly for Thanksgiving), but they were all either made at night (not good for photos), or eaten right away (too hungry to stop for pictures). So sadly, I have not been able to post, and really, I missed it so much. There is something so exciting about seeing comments on your postings, it really makes it all worth it. Thank you so much to my commenters! You all rock.

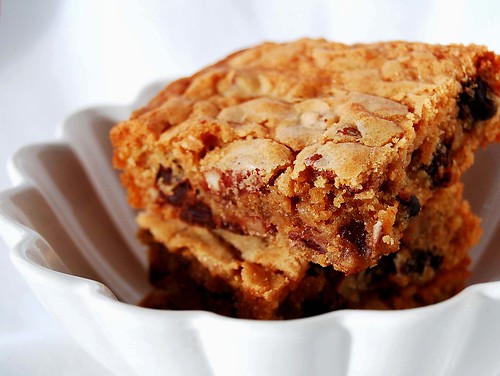
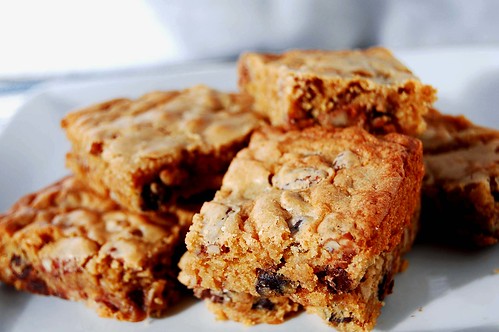
A while ago, I posted about whole wheat peanut butter cookies, and a whole wheat challenge where I was baking some of my favorite recipes by replacing some (or all) of the all purpose flour with whole wheat. I got a request from lucysmom for whole wheat blondies, so here they are!

This is the blondie recipe I ALWAYS make. It is fantastic -- the result is a soft, chewy, toffee-flavored, blondie loaded with chocolate chips (I also often put walnuts and pecans). I have always made it with all purpose flour, but a while back I tried replacing all the all-purpose with whole wheat pastry and I seriously cannot tell the difference. I guess the amount of butter and brown sugar in the recipe takes away the healthy tastes of the whole wheat (woot for butter and brown sugar!) If you don't have whole wheat pastry flour, I've also replaced half the all purpose with regular whole wheat and the result was just as good.
A few weeks ago, Memória from Mangio da Sola (a very lovely blog that I read regularly) gave my blog this award.
I am so grateful to her for recognizing my blog. I also really appreciate her generous and thoughtful comments on my blog. Thank you Memória!
In honor of this award, I will pass it on to two other drool-worthy blogs that I like to read regularly: Dolce at Confessions of a chocoholic and Jill at Jillicious Discoveries. Congratulations! :)

Whole Wheat Blondies
  • 6 tablespoons butter, melted (preferably on the stove top)
  • 1 cup brown sugar
  • 2 eggs, lightly beaten
  • 1 teaspoon vanilla extract
  • 1 cup whole wheat pastry flour (or 1/2 cup whole wheat flour + 1/2 cup all-purpose flour)
  • 1/2 teaspoon baking powder
  • 1/3 teaspoon salt
  • 1/2 cup chocolate chips
  • 1/4 chopped pecans or walnuts
1. Preheat oven to 350F. Mix the brown sugar with the melted butter (I usually do this by hand). Add the eggs and vanilla. Stir until well combined.
2. Add the flour, baking powder, and salt. Mix until just incorporated.
3. Stir in the chocolate chips and nuts.
4. Pour into 8x8 in pan and bake for 25-30 min or until a toothpick inserted in the center comes out clean.

Tuesday, November 10, 2009

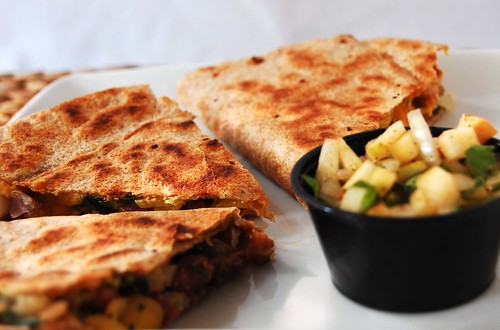
Acorn Squash Quesadillas with Apple Salsa

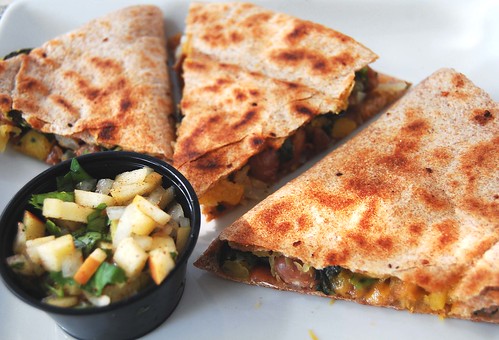
I love making quesadillas. They are super versatile since you can fill them with pretty much anything and they are just gosh darn tasty. The gooey warm fillings combined with a crisp exterior is just perfect with some cool salsa. I make quesadillas often in the summer time since there are so many awesome summer vegetables to stuff them with, plus yummy tomatoes for pico de gallo (aka salsa). This time, I wanted to try a more autumnized version of quesadillas, because hey, Fall has some great vegetables to offer too. I went with acorn squash and spinach. I also wanted to make a yummy autumnized salsa so I decided to make a sweet, spicy, and tangy apple salsa.

This combination was fabulous! The quesadillas rocked (as expected) but the salsa was AMAZING. No joke -- I seriously made a bunch of extra salsa and just ate it all on its own, it was that good. If you don't want to make the effort to make these 'dillas (although they are not difficult) you should still try this salsa. Even if you end up eating it out of the bowl like me.


Acorn Squash and Spinach Quesadillas with Apple Salsa
(makes 2 servings)
For the Quesadillas:
  • 1 Tb olive oil
  • 2 cups acorn squash, peeled and chopped
  • 1 onion, chopped
  • 2 handfuls of spinach, chopped
  • 4 cloves garlic, minced
  • 1 cup cooked beans (pinto, black, kidney)
  • 1/2 tsp cumin
  • salt, pepper to taste
  • 1 cup shredded cheddar cheese
  • 2 large tortillas (I used whole wheat)
For the Apple Salsa:
  • 1 medium crisp apple (I used fuji), diced
  • 1 handful of cilantro, chopped
  • 1/2 onion, chopped
  • 2 tablespoons fresh lemon or lime juice
  • salt, pepper to taste
For the Quesadillas:
1. Roast the acorn squash in the oven for about 20 min, until softened, but not mush.
2. Heat the oil in a skillet, and cook the onion for about 5 min. Add the squash, spinach, and garlic, and cook for about 10 minutes. Stir in the beans, cumin, and salt and pepper. (Here's a secret: I also do this step in...the microwave! Yes, when I don't have the patience to stand over the stove, I put all these ingredients in a bowl and nuke 'em for about 2 minutes. And you know what? I can't tell the difference).
3. Add a few drops of oil to a hot skillet. Place a tortilla on the skillet and add to one side half the squash mixture and half the cheese. Fold over and cook for about 5 minutes on each side, until crispy and browned. Repeat for other tortilla.

For the Apple Salsa:
1. Combine all ingredients in a large bowl and mix thoroughly.

Saturday, October 31, 2009

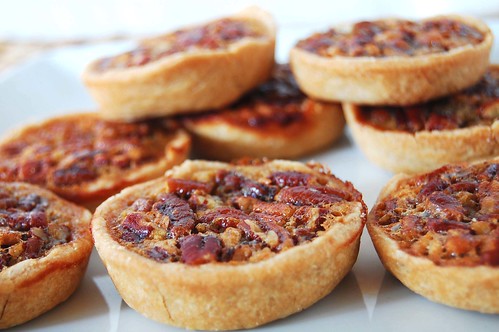
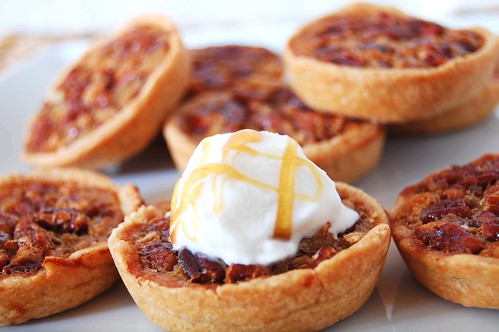
Pecan Tartelettes

Since the first time I tasted pecan pie it has been my favorite Thanksgiving dessert, and one of my favorite all time desserts -- which is pretty hard to believe considering it has no chocolate. Something about the gooeyness and nuttiness...yum. I've always used a simple recipe I found online for pecan pie, but after all this recent talk about the evil that is corn syrup, I decided to replace some of the corn syrup with honey. I also made them in a muffin pan, which allowed them to be super cute. Its funny how you can take any standard dessert, make them in a small pan, and all of sudden, cuteness.

For the crusts, I used my go-to pie crust recipe, but continuing with my whole wheat challenge, I swapped the regular flour with whole wheat pastry. The result was still good, although I have to admit that I could taste a difference in the pie crust. The whole wheat definitely tasted more wholesome, which is not necessarily bad, but not as good as the standard buttery pie crust. Maybe more butter would help. Or maybe a half and half mixture. Otherwise these little tartelettes were pretty awesome. Sweet, gooey, nutty all wrapped in a cute little package.

Pecan Tartelettes
  • 2 Eggs, Slightly Beaten
  • 3/4 cup honey
  • 1/4 cup Light Corn Syrup
  • 1/4 cup brown sugar
  • 2 Tablespoons Flour
  • 1/4 Teaspoon Salt
  • 1 Teaspoon Vanilla
  • 1-1/4 cups chopped pecans
  • 1 unbaked pie crust (recipe below)
1. Preheat oven to 375 deg F.
2. Using a 2in diameter cookie cutter, cut 16 rounds of pie dough. Lightly press into a buttered muffin pan.
3. In a large bowl, whisk together eggs, honey, syrup, sugar, flour, salt and vanilla. Pour about 2-3 Tablespoons in each mini pie shell. Be careful that the filling doesn't flow over the shell.
4. Spread 2 Tb pecans in each shell.

Bake at 375 deg F. for 20 minutes or until filling is set. Remove each tartelette onto cooling rack and let cool for at least 10 minutes before serving.

Whole Wheat Pie Crust (adapted from Land O'Lakes)
  • 1 cup whole wheat pastry flour
  • 1/8 teaspoon salt
  • 1/3 cup cold butter
  • 2 to 3 Tbs ice cold water
1. Combine flour and salt in large bowl; cut in butter with pastry blender or fork until mixture resembles coarse crumbs. Stir in enough water with fork just until flour is moistened.
2. Shape dough ball. Flatten slightly. Wrap ball in plastic food wrap and refrigerate for at least 30 minutes.

Wednesday, October 21, 2009

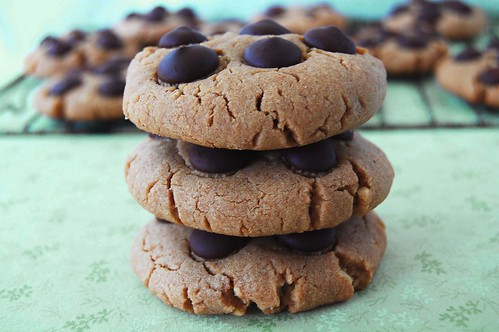
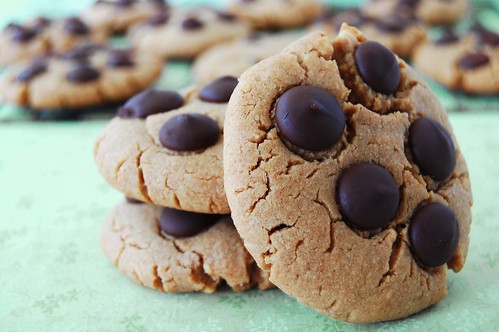
Whole Wheat Peanut Butter Chocolate Chip Cookies

Ok, I'm trying something new here. Lately, I've been making my favorite recipes by replacing the all purpose flour with whole wheat pastry flour. A few weeks ago, I made chocolate chip blondies (yum!) using only whole wheat and I was seriously amazed. I could not tell the difference AT ALL! Even the BF who hates my healthy replacements had to admit (hah!) that he could not tell a difference. I really wanted to blog about those blondies but unfortunately I ate them all before I could. Oof. This time, I had some restraint and photographed these lovely whole wheat peanut butter chocolate chip cookies before I could eat them all. Not that they weren't worthy of being eaten in one day. These cookies were amazing! So so good and again -- I could not tell the difference between these and the original recipe that used all white flour.

So now I've decided to do a test -- I will try to remake some of my favorite all-purpose flour recipes (I'm thinking chocolate chip cookies, brownies, pie crusts) by replacing some (or all) of the all purpose flour with whole wheat. And...I'll take requests for recipes too! I'll be your guinea pig. So send me a recipe that you are curious about and I'll take the whole wheat test and report the results. In the meantime, make these cookies!


Whole Wheat Peanut Butter Chocolate Chip Cookies

1. Preheat the oven to 375°F. Grease or line 2 cookie sheets.
2. Whisk together:
3/4 cups all-purpose flour
3/4 whole wheat (pastry) flour
1/2 teaspoon baking soda

3. Beat in a large bowl until well blended:
1/3 cup (5 1⁄3 tablespoons) unsalted butter, softened
1/2 cup sugar
1/2 cup packed brown sugar

4. Beat in:
1 large egg
1 cup peanut butter (smooth or chunky)
1/2 teaspoon vanilla
1 cup chocolate chips
5. Stir in the flour mixture until blended. Shape into 1-inch balls and arrange about 2 inches apart on the cookie sheets. Press in some extra chocolate chips on top. Bake 1 sheet at a time, about 8 to 10 minutes. Let stand briefly, then remove to a rack to cool.

Wednesday, October 14, 2009

Tres Leches Cake


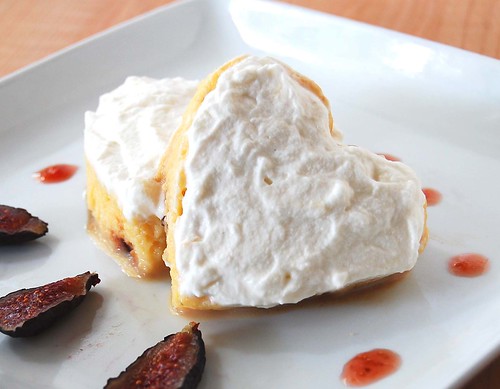
On our way back from Peru last month, we had a 14 hour lay over in Mexico City. After we visited the lovely Chapultepec Castle, we walked downtown searching for a good authentic Mexican meal. While the BF was thinking about burritos and tacos, I was dreaming about dulce de leche, tres leches, flan and other types of creamy, milky desserts. So after lunch, I was on the hunt for a cute, authentic bakery that would satisfy all my creamy milky cravings. So we searched, and searched, and although we did find some cute bakeries, we could not find these authentic desserts that I had been dreaming about. We did find brownies, cookies, cheesecake, and apple pie. But nothing that seemed downright Mexican. Naturally, I had to satisfy my craving, so one of the first things I baked was this tres leches cake.

The original recipe is from Martha Stewart. Of course traditional tres leches is chocolate-free, but I find it hard to make a dessert that doesn't have chocolate (I'm trying to change, really), so I added some chocolate chips to the batter. To compensate, I also reduced the sugar.

There are literally millions of recipes for tres leches, and I chose this one because the cake part was a sponge cake as opposed to a yellow cake. I remember reading that sponge cakes are better for absorbing liquids. And I say the more creamy, milky, the better! I also cut the cake into hearts since I was feeling girly.

Chocolate Chip Tres Leches Cake (adapted from Martha Stewart)
  • Unsalted butter, room temperature, for baking dish
  • 6 large eggs, separated
  • 3/4 cup sugar
  • 1 cup all-purpose flour, sifted
  • 1/2 cup chocolate chips
  • 1 can (14 ounces) sweetened condensed milk
  • 1 can(12 ounces) evaporated milk
  • 1 cup whole milk
  • 1 1/2 cups heavy cream
  • 1 tablespoon confectioners' sugar
  1. Preheat oven to 325 degrees. Butter a 9-by-13-inch baking dish. In a mixing bowl, beat egg yolks and sugar on high speed until light and fluffy. In another bowl, beat egg whites to soft peaks. Using a rubber spatula, fold whites into yolks until almost combined. Gently fold in flour first, then chocolate chips (do not overmix).
  2. Spread batter in prepared dish. Bake until golden and pulling away from sides of dish, 20 to 25 minutes. Cool cake for at least 20 minutes. Once cool, use a fork to poke several holes all over the cake.
  3. In a medium bowl, whisk together the three milks; pour evenly over cake. Cover with plastic wrap; refrigerate at least 1 hour and up to 1 day.
  4. To serve, prepare topping: In a mixing bowl, whip heavy cream with sugar to soft peaks. Chill cake and cut into squares; serve topped with whipped cream.

Wednesday, October 7, 2009

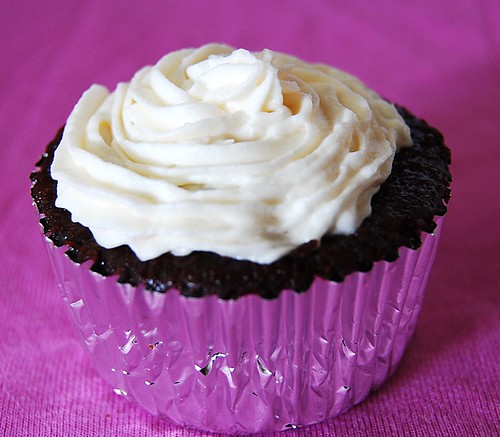
Chocolate Cupcakes with Chocolate Chocolate Chip Filling


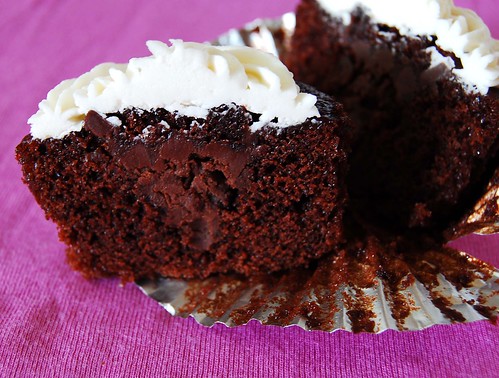
Yes the title is correct and no there is not an extra 'Chocolate' in there. That's what these are: Chocolate cupcakes with a chocolate filling that has chocolate chips in it. Can you tell I was craving something when I made these?

These cupcake are a delicious conglomeration of two fantastic chocolate recipes: Beatty's Chocolate Cake (from Ina Garten) and Scharffenberger's Chocolate Pudding. My additions are a vanilla (just to keep things interesting) buttercream frosting and mini chocolate chips in the pudding. Simply bake the cupcakes, cook the pudding, add the chips, core the cupcakes, fill with pudding, and frost. Ok, so maybe a few more steps than your average cupcake, but I promise these are totally worth the effort. Being super rich and chocolatey, they are sure to satisfy even the fiercest of chocolate cravings.

(Please forgive this picture, I realize the filling doesn't look very creamy at all. But it was about 90 degrees when I decided to take these pictures and I couldn't get the frosting to drip off without throwing these guys in the fridge for a few minutes, hence the funky looking filling. But not refrigerated, this filling is super creamy.)

Chocolate Cupcakes with Chocolate Chocolate Chip Filling (makes about 28 cupcakes)

For the chocolate cupcakes:
I don't make any changes to the chocolate cake recipe, so the recipe is here.

Chocolate Chip Filling (adapted from John Scharffenberger via Wednesday Chef)
  • 1/4 cup cornstarch
  • 1/2 cup sugar
  • 1/8 teaspoon salt
  • 3 cups 2% milk
  • 8 ounces bittersweet chocolate, coarsely chopped
  • 1 teaspoon pure vanilla extract
  • 1/4 cup mini chocolate chips or coarsely chopped chocolate
Vanilla Buttercream Frosting (adapted from Smitten Kitchen)
  • 3 to 4 cups confections sugar
  • 1 stick butter, at room temperatue
  • 3 tablespoons milk
  • 1/2 tsp pure vanilla extract
To make the Filling:
1. Combine the cornstarch, sugar and salt in the top of a double boiler.
2. Slowly whisk in the milk, scraping the bottom and sides with a heatproof spatula to incorporate the dry ingredients. Place over gently simmering water and stir occasionally, scraping the bottom and sides. Use a whisk as necessary should lumps begin to form.
3. After 15 to 20 minutes, when the mixture begins to thicken and coats the back of the spoon, add the chocolate. Continue stirring for about 2 to 4 minutes, or until the pudding is smooth and thickened.
4. Remove from the heat and stir in the vanilla.
5. Let cool to room temperature, and add the chocolate chips.

To make the Frosting:
1. Whip the butter in the bowl of an electric mixer, or with a hand mixer, for several minutes, until light and fluffy. Slowly add the powdered sugar, a few tablespoons at a time.
2. When the frosting looks thick enough to spread, add 2 more tablespoons of the confections sugar, one at a time. Drizzle in the milk, and mix it until combined. Add one more tablespoon of the sugar, then drizzle in the vanilla and mix until combined.

To prepare the cupcakes:
1. Let the cupcakes cool to room temperature. Insert a paring knife into each cupcake at a slight angle, halfway between the center and the outside edge of the cupcake. Cut a circular cone out of the cake, being careful not to cut all the way to the bottom.
3. Chop the pointy ends of the cones off, and set the circular bases aside. These will be used to cover the cupcake holes once they are filled.
4. Using a small teaspoon or a piping bag, fill each cupcake with the filling. Cover each cupcake with a circular base, and frost.

Saturday, October 3, 2009

Fig Jelly


Last time on CCT, I talked about a fig balsamic glaze made with fig jelly. If you've never had fig jelly, you are missing out. The BF makes an amazing fig jelly and he agreed to do a guest post! So here it is...

This is a little late but sometimes good things come to those who wait, or so they say. I decided to make some fig jelly finally. I guess it is really preserves, but I call all these types of things jelly. I had all these figs in the freezer from slowly hoarding them over the summer. There's this really big fig tree that nobody takes advantage of and if it wasn't for me they would all go to the birds...and rats.

It was only a couple of years ago that I had tried fresh figs for the first time. I'm not really into a lot of fruits like some people, but I really enjoyed the figs, especially right off the tree. This new found discovery for me, and the fact that I have a tendency to squirrel things away, prompted me to try putting some of these figs away in the form of a jelly. It turned out to be a fairly straightforward process, but I did manage to make a few sticky messes out of it along the way. The word on the street is that one should not double a recipe for jellies, but I did not heed this and I think it turned out well. The guidelines came from "The Joy of Cooking." I really only used this recipe to figure out what proportions of figs, lemon juice, and sugar to use, and for processing time. Apparently, figs are low in acid, so the lemon juice is necessary for preservation. I also processed much longer than what is called for in "Joy."

Fig Jelly (adapted from Joy of Cooking)
  • 4 pounds fresh figs washed, stemmed and quartered
  • 4 cups granulated sugar
  • 1/2 cup lemon juice (This turned out to be 3 lemons)
  • Enough jars (pint or 1/2 pint) to contain ~ 4 pints of jelly
Mix the figs and sugar in a big pot and simmer on the stove for about 30 minutes. I cooked them longer because I wanted to break apart the chunks a little bit more. While this was happening I got the jars ready and my boiling water started so that I could get the jars boiling as soon as I packed them. After simmering, I added the lemon juice and turned up the heat until it was rapidly boiling - constantly stirring. This is when it should reach the jelling point. I tested this by pulling out a sample and watching it gel as it cooled. I removed the pot from the burner and spooned the jelly into the jars leaving 1/4 inch head space, screwed the lids on, and processed for one hour. I then removed the jars to cool.