Lovely readers -- I know I've been away for a while. Things have been crazy busy around here. I've been packing, planning, and preparing for my big move across country, and it's been taking an insane amount of time. I miss cooking, posting, and reading and commenting on all my favorite blogs. I'll be moving mid-August, then starting my new job about a week later, so things will be hectic for a while. It's hard for me to say right now when I'll be blogging like the good ol' times again, but hopefully it won't be too long. I'm looking forward to catching up with you all soon.
-ms. meanie

Saturday, July 31, 2010

Sunday, July 11, 2010
Île Flottante (Floating Islands)
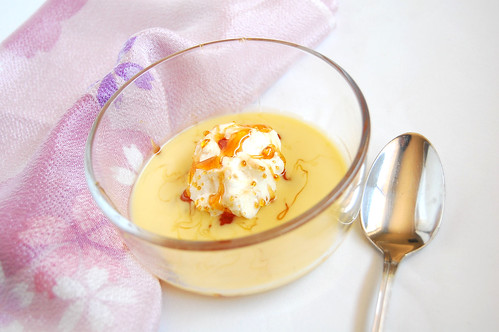 I'm too cheap to pay for cable, but I always say that if the people at Comcast made me a deal where I just pay for one channel, they would have me sold. Of course, that one channel would be FoodNetwork and the one show I'd be sure to watch is Barefoot Contessa.
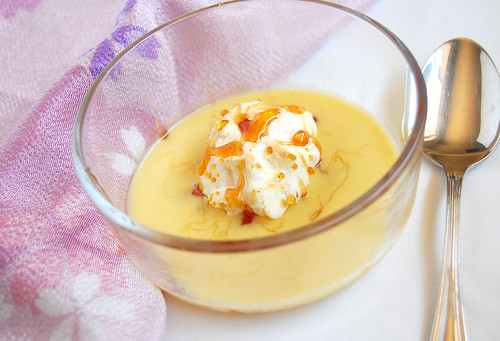
A few months ago when I visited my parents (who apparently are not to cheap too pay for cable), I watched Ina Garten make an Île Flottante. The dessert looked so elegant and different than anything I'd ever made, I was instantly intrigued. Fluffy meringues that are ever-so slightly baked floating on top of a rich and boozy sauce? Yes please!
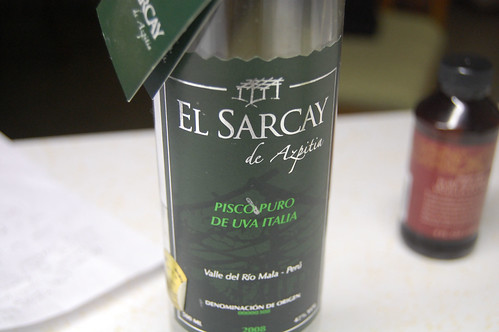
 This dessert was definitely interesting. I know that's not the most appetizing word to describe a dessert, but it seems the most accurate to me. The crème anglaise was fantastic: I spiked it with a touch of Pisco (a Peruvian brandy) which complemented the vanilla extract very nicely. The caramel was tasty as well, albeit somewhat tricky to work with. The meringues were a different story. They baked up beautifully, but me being the idiot that I am, decided to refrigerate them until I was ready to assemble this dessert. Yes, I know Ina would want to rip out her hair (or maybe mine) if she knew I committed this cardinal sin against meringues, but I really had no choice. I simply did not have enough time to make the entire dessert, plate it up prettily, and take pictures before the sun went down.
 |  | ||
 |  | ||
 |  |
Île Flottante (adapted from Ina Garten)
For caramel (about 1 cup):
*1 1/2 cups sugar
*1 cup water
*1/2 teaspoons pure vanilla extract
For meringues (the recipe says this will make 12 meringues, but I got more than twice this amount):
*8 extra-large egg whites, at room temperature
*1/8 teaspoon kosher salt
*1/4 teaspoon cream of tartar
*1 cup sugar
For crème anglaise (2 cups):
*4 extra-large egg yolks
*1/2 cup sugar
*1 teaspoon cornstarch
*1 3/4 cups scalded milk
*1 teaspoon pure vanilla extract
*1 1/2 teaspoons Cognac or brandy
Directions:
1. Preheat the oven to 250 degrees F. Line 2 sheet pans with parchment paper or a baking sheet.
2. For the caramel , heat 1 1/2 cups of the sugar and 1/2 cup water in a small, heavy-bottomed saucepan until the sugar dissolves. Cook over medium heat until the syrup turns a warm caramel color. Don't stir, just swirl it in the pan. Off the heat, add 1/2 cup water and 1/2 teaspoon of the vanilla; be careful, the syrup will bubble violently. Stir and cook over high heat until the caramel reaches 230 degrees F (thread stage) on a candy thermometer. Set aside.
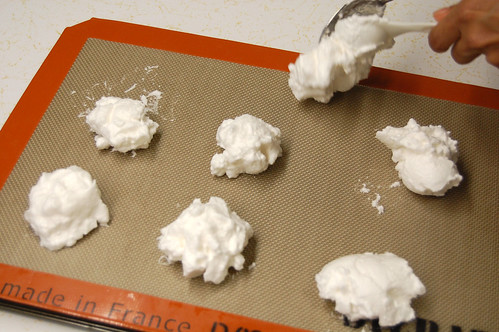
3. For the meringues , beat the egg whites, salt, and cream of tartar in the bowl of an electric mixer fitted with the whisk attachment on medium speed until frothy. Turn the mixer on high speed and sugar. Beat until the egg whites are very stiff and glossy. Whisk in the vanilla. With dessert spoons place 12 mounds of meringue on the parchment paper and bake for 20 minutes, or until a cake tester comes out clean.
4. For the crème anglaise , beat the egg yolks and sugar in the bowl of an electric mixer fitted with the paddle attachment on medium-high speed for 3 minutes, or until very thick. Reduce to low speed, and add the cornstarch. With the mixer still on low, slowly pour the hot milk into the eggs. Pour the custard mixture into a saucepan and cook over low heat, stirring constantly with a wooden spoon, until thickened. The custard will coat the spoon like heavy cream. Don't cook it above 180 degrees F or the eggs will scramble! Pour the sauce through a fine strainer, add the vanilla extract, Cognac or brandy, and chill.
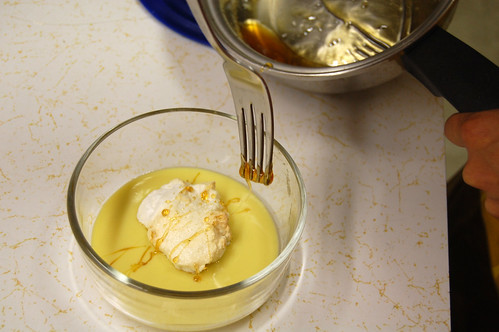
For serving, pour creme anglaise on the bottom of individual plates. Place a meringue on top of each serving, drizzle with caramel sauce, and serve.
To make a day or two ahead, leave the caramel at room temperature and refrigerate the creme anglaise. Reheat the caramel and bake the meringues before guests arrive and assemble the desserts just before serving.
This dessert is also my attempt to make up for missing last month's Daring Bakers challenge. I know it is not the Chocolate Pavlova challenge hosted by Dawn, but it does consist of a few of the same components: baked meringues and creme anglaise. Click here to see the actual Daring Bakers creations for June.
Wednesday, July 7, 2010
Garlic Hummus
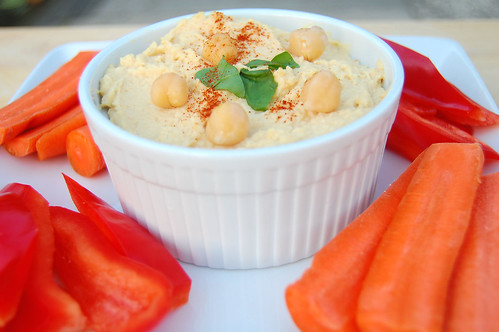 Homemade Hummus. Did you see this coming? After making tahini sauce, it was only natural to use it in a hummus recipe.
As a vegetarian, I always find it a challenge to come up with different fillings for sandwiches. Hummus, my friends, is the ultimate solution. It is easy to make, delicious to eat, and packed with protein. I made a big batch of this stuff almost 2 weeks ago, and I've been eating it ever since. Just freeze it in portions and let it defrost the day before.
The raw garlic in this recipe gives the hummus a nice kick. Be warned however, that this means you will have garlic breath. I have garlic breath almost every single day, so I'm now used to it, the BF is too. Not having to worry about garlic breath -- one of the best things about a long-term relationship.
 The measurements here are estimates. The great thing about this recipe is you can add more of this and less of that depending on your tastes. Add some heat with a bit of cayenne, richness with more oil, or (my favorite) an extra kick with more garlic. Mmm...garlic breath.
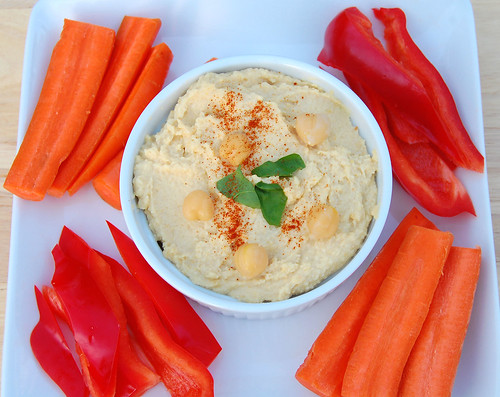 Hummus Recipe (adapted from Simply Recipes, makes about 2 cups)
* 3 garlic cloves, minced and then mashed
* 1 15-oz cans of garbanzo beans (chickpeas), drained and rinsed, OR about 2 cups cooked garbanzo beans (keep can or cooking liquid)
* 1/3 cup of tahini
* 3 tablespoons freshly squeezed lemon juice
* 1/4 cup liquid from can of beans or cooking liquid from beans (I threw this out by accident so just used water)
* 3 tablespoons olive oil
* 1/4 teaspoon of salt
In a food processor, combine all ingredients. Process until smooth. Add more olive oil if necessary to achieve desired consistency.
Thursday, July 1, 2010
Homemade Tahini
 Some things just do not photograph well. Let me rephrase that -- there are some things which I just cannot photograph well. Like homemade tahini. I know this looks like a pile of slop, but try not to focus on that part. Instead, direct your attention to my brand new mortar pestle (oooh, ahhh). You like?
I've used store-bought tahini once in the past for making hummus. Although it was tasty and all, I had to buy a whole can of it when I needed only a few tablespoons. Sadly, much of it went to waste, which pains me because this stuff ain't cheap.
So this time, I decided to make it myself and it was surprisingly simple. Yes, mashing it up in the mortar pestle requires a bit of elbow grease...but that's why we work out, no? To be better cooks, right? Of course!
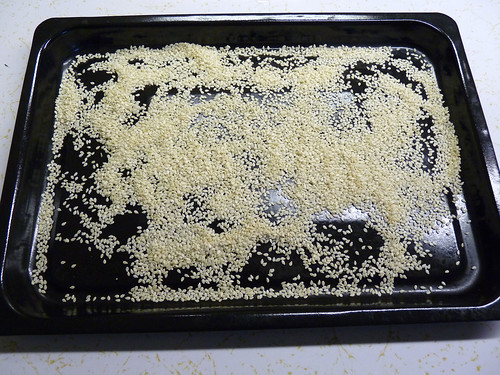
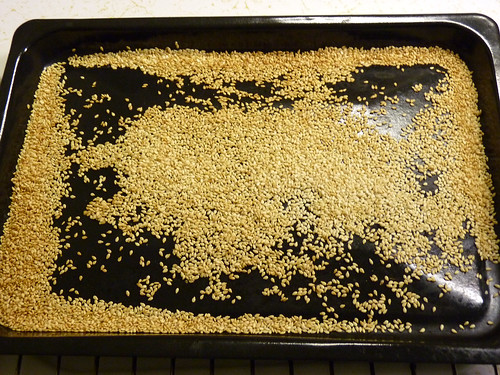
Step 1. Get out some sesame seeds and toast them until nice and well, toasty.
 |  |
Step 3. Mash the bejeezus out of them.
 Since I used a small amount of sesame seeds (about 1/4 cup) I made this in a mortar pestle. For a larger batch, you could certainly save some time and effort and make this in a food processor.
Homemade Tahini (adapted from Joy of Cooking and here)
* 1/4 cup sesame seeds
* 3 1/2 tablespoons olive oil
1. Preheat oven to 350. Toast sesame seeds for 5-10 minutes, tossing the seeds frequently with a spatula. Check often and make sure they do not burn!! Cool for 10 minutes.
2. Mash the seeds and oil with a mortar pestle until mixture is somewhat smooth and thick. The mixture will still be slightly lumpy.
Saturday, June 26, 2010
Homemade Crème Fraîche
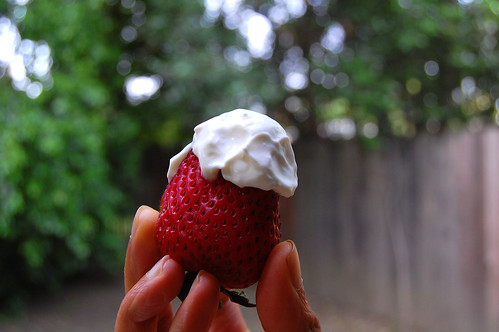 This will be a quick post with a simple recipe. Crème Fraîche is a thickened cream that has recently gotten much press throughout the food blogosphere. It is similar to sour cream, but less tangy with an amazing but subtle nuttiness. Grocery stores like to overcharge you for this stuff, which is silly to me, since it is very simple (and kind of fun) to make at home. After making this recipe and tasting how delicious the homemade version is, I will never consider buying this from a store.
I have also tried this other recipe that calls for heating the heavy cream, and it did not work for me. Instead of crème fraîche, I ended up with sour heavy cream - definitely not good eats. Below is the simplest recipe I have found for homemade crème fraîche, and it comes out beautifully. No heating, no fear of burnage, just mix, wait, and enjoy.
 Homemade Crème Fraîche (from Dorie Greenspan)
1 cup heavy cream
1 tablespoon buttermilk or plain yogurt (I used yo
1. Put the cream and buttermilk or yogurt in a clean jar with a tight-fitting lid. Cover the jar and shake for a minute or so.
2. Put the jar on a counter in a warm location (I placed it on top of my water heater) and leave it for 12 to 24 hours, or until the cream thickens slightly.
3. When the cream thickens, place the jar in the refrigerator and let it chill for 1 day.
Monday, June 21, 2010
Applesauce Spice Cake
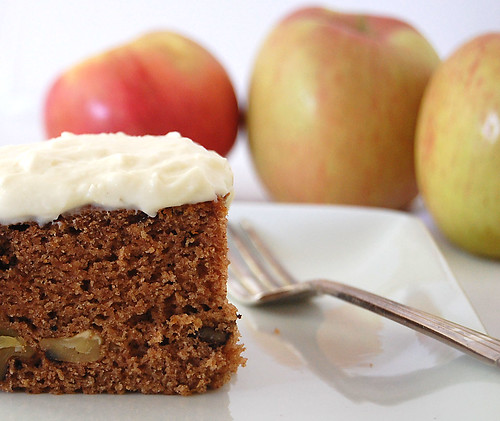 Can you tell I've had some free time on my hands? After making all the edits on my thesis, filling out a hundred forms about my graduate school experience, and setting up my meeting to officially submit my thesis (tomorrow at 10am!), I spent a few hours pimping up this blog. You like? Suggestions anyone?
I also thought and thought about what to write for this post. I know I have been trying to advocate local and seasonal recipes here on CCT, and as much as I try to eat locally and seasonally, I have a little confession everyone. Here goes...I eat apples. Every. Single. Day. Of the year. Just about. Fall? Yes, of course. Winter? Sure, cold storage apples are pretty awesome too. But then, I also eat apples in the spring...and summer (gasp!). Not sure why -- just trying to keep the doctor away, I guess.
And hence, the apples in the background of this picture. But here's the thing about this recipe...it doesn't call for apples, it calls for applesauce. So even if you abide by all the local and seasonal rules, you can still enjoy this cake all year long.
I'm not sure what prompted me to make this very autumn-esque cake in the middle of June. I was craving something sweet and spicy and nutty, and this just fit the bill. Maybe it was the countless number of yummy looking cake recipes I've been seeing on Grace's lovely site. Maybe I was just longing for Fall. Maybe I'm trying to use up what seems like hundreds of jars of Trader Joe's applesauce before I prepare for my big move across the country. Whatever the reason, I made this cake, and it made me happy.
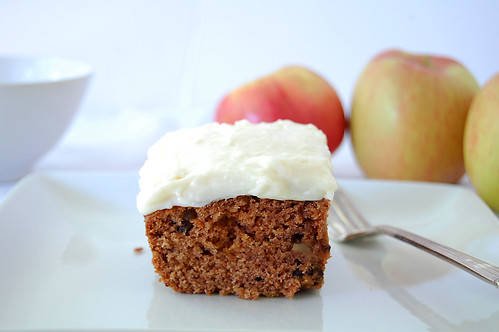 Applesauce Spice Cake with Cream Cheese Frosting (adapted from Joy of Cooking, makes about 12 servings)
*This cake was very spicy and moist, but a bit dense. I think next time I will increase the oil to 1/2 cup and reduce the flour by about 1/4 cup.
For cake:
1 cup sifted all-purpose flour
1 cup sifted whole wheat flour
1 teaspoon baking soda
1 teaspoon ground cinnamon
1/2 teaspoon ground cloves
1/2 teaspoon ground allspice
1/2 teaspoon salt
1/3 cup oil (I used canola)
1 cup packed brown sugar
1 large egg
1/4 cup buttermilk or yogurt (I used a mix)
1 cup unsweetened applesauce
1 cup chopped walnuts
For Cream Cheese Frosting:
1 8oz package cream cheese
2 tablespoons softened butter
1 cup confectioners' sugar, sifted
1/2 teaspoon vanilla extract
To make cake:
1. Preheat oven to 350F. Grease and flour an 8-inch square baking pan.
2. In a large bowl, whisk together the sifted flours, baking soda, cinnamon, cloves, allspice, and salt.
3. In a separate bowl, using a mixer on high speed, beat together the oil and sugar for about 3 minutes.
4. Set the speed to low, and beat in the egg. Stir in the flour mixture in 3 parts, alternating with the applesauce. Do not overmix. Finally, stir in the walnuts.
5. Scrape batter into pan and spread evenly. Bake for 25-30 minutes or until a toothpick inserted into the center comes out clean. Once cool, top with cream cheese frosting.
To make frosting:
In a large bowl, cream together cream cheese and butter until creamy. Gradually beat in the sugar until smooth. Beat in vanilla extract.
Sunday, June 13, 2010
(Lighter) Spinach Artichoke Dip
 I can't even remember the last time I've had spinach artichoke dip at a restaurant - it must have been at least 10 years ago. So I guess I can't completely attest that this version of the popular dip will be exactly like the kind you find at the restaurants, but I will say that this dip is truly delicious.
The flavors of this dip are so robust. The tart from the sour cream and the salty from the cheeses create a delicious contrast; the spinach and artichoke play so well together, you almost want to give them an award.
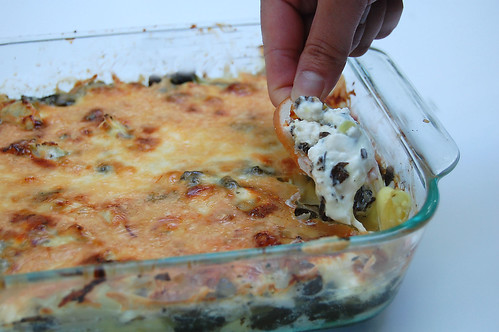 Below is my lightened version of this classic dip, which I think is just as good as the full-fat version. I say "lightened" instead of "light" because this dip is still rich, creamy, and cheesy. Use it as an accompaniment for bread, crackers, and carrot sticks, or do what I do: slather it on two pieces of good wholesome bread, add some sliced tomato, and call it lunch.
(Lighter) Spinach Artichoke Dip
* 1 1/2 cups thawed, chopped frozen artichoke hearts
* 1 cup thawed, chopped frozen spinach
* 1/2 cup sour cream (I use low-fat)
* 1/2 cup cream cheese, softened
* 1/4 cup grated Parmesan or Pecorino cheese (or combination of the two)
* 4 cloves garlic, chopped
* 1/2 cup grated mozzarella cheese
1. Preheat oven to 375 degrees F (190 degrees C).
2. In a 8x8 inch baking dish*, mix together artichoke hearts, spinach, sour cream, cream cheese, parmesan and pecorino cheese, and garlic.
3. Bake until heated through and bubbly, about 20 minutes.
4. Remove dish from oven and set oven to broil. Spread an even layer of mozzarella cheese over the top. Return to oven and broil until top is lightly browned and bubbly.
5. Cool for 5 minutes before serving.
*I baked this is a 8x8 inch dish and later transferred some to ramekins shown in the photos.
Subscribe to:
Posts (Atom)