Wednesday, April 28, 2010

Palak Paneer (Indian Spinach and Cheese)


Palak Paneer. Funny sounding but yummy tasting. Palak paneer (or spinach and cheese) is a quintessential vegetarian dish of North India. It is the vegetarian dish that even meat-lovers crave. My mother makes some of the best palak paneer I have ever had. Unfortunately it is almost impossible to get the recipe from her since, well, she doesn't have one. Her technique is to add some of 'this' and 'that' until the taste and texture is perfect. Measurements are a mystery. See, my mother doesn't use measuring spoons for adding spices. I don't even think she uses spoons. She uses her hands and her fingers and her tastebuds. As I stand in my kitchen, measuring out ingredients, desperately trying to replicate her "recipes", I imagine what she'd think if she saw me there. She'd be proud for sure, but she'd probably be laughing too.


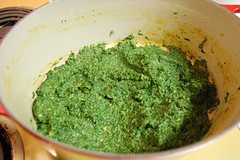
My (many) previous attempts to replicate her palak paneer have left me with a dish that was either too bitter, too sour, or lacking of a robust spinach flavor. Until now. This palak paneer has a great creamy spinach flavor, without the bitterness that many spinach dishes tend to have. The addition of spices also gives it a nice kick, so you know you're not just eating creamed spinach. The paneer is firm enough that it won't lose its form but soft enough that it almost melts in your mouth. I think Mama would approve.
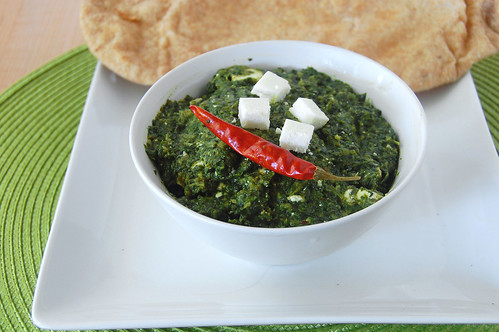
Palak Paneer
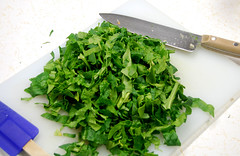
*10 cups of chopped fresh spinach or 10 oz of frozen spinach
*2 tablespoons tomato paste
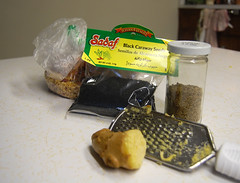
*2 teaspoons grated ginger
*3 cloves garlic
*1 tablespoon oil
*1/2 teaspoon cumin seeds
*1/2 teaspoon caraway seeds
*1 teaspoon coriander powder
*1/2 teaspoon turmeric powder
*1/2 teaspoon red chili powder
*1 teaspoon sugar
*1/3 cup heavy cream or (not skim) milk
*2 tablespoons flour
*salt and pepper, to taste
*1 1/2 cups of paneer, cut into 1/2 inch cubes

1. Place the spinach, tomato paste, ginger, and garlic in a food processor or blender and blend until smooth.
2. In a large pan, heat the oil until hot, then add the cumin and caraway seeds. Fry the seeds for about 30 seconds. Add the coriander, turmeric, and chili powder, and cook for about 2 minutes.
3. Add the spinach, sugar and milk. Stir to combine. Stir in the flour and season with salt and pepper. Cook, covered, for about 10 minutes.
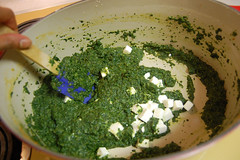
4. Remove from heat and (with a rubber spatula) gently fold in the the paneer.

Tuesday, April 27, 2010

Homemade Paneer


I have been meaning to post about making paneer pretty much since I started this blog, more than a year ago. Paneer is traditional Indian cheese, similar in taste and texture to ricotta. While ricotta is traditionally made from whey, paneer is made from the curds produced from adding an acid to boiling milk. It is a very mild cheese that is popular in many savory and sweet Indian dishes. It is also not very difficult to make at home.

Here are the two most helpful tips I can give about making paneer. (1) Milk is not as innocent as it seems: it can go from hot, to boiling to burnt in a matter of seconds. (2) To achieve a nice, firm, paneer like the kind you can buy in Indian grocery stores, you must drain out ALL of the water from the cheese. The easiest way is to press the paneer under heavy weight.

To prepare, place a colander lined with cheesecloth in the sink.
Then begin heating a gallon of milk in a large heavy-bottomed pan. The milk must be heated slowly and stirred constantly until it comes to the boil. Be very careful to heat the milk slowly, and stir constantly to prevent it from burning.
Once the milk reaches a boil, stir in a half cup of lemon juice or vinegar. The milk will immediately begin to separate into a liquid (whey) and curds. Continue stirring for another minute or two.

Now carefully pour the contents of the pot into the lined colander. Be very carefully since the liquid will be extremely hot. Every time I do this step, it breaks my heart a little to have to throw out the whey. But even after lots of google searching, I still have not found a use for it.
Rinse the paneer with a bit of cold water just so it is warm enough to handle. Then try to squeeze out as much of the liquid as you can using your hands.

The paneer needs to be drained of its liquid, and depending on how firm you'd like it, this could take anywhere from 2 hours to overnight. Most savory Indian dishes require a firm block of paneer, but many desserts call for a softer paneer that can be achieved with 2-3 hours of draining.
My go-to method for draining is to place the paneer (still in the cheesecloth) on a cutting board that is slighty hanging over the sink. Then on top, I place as much weight as possible as I can -- some iron skillets, cans of tomato sauces, textbooks that I don't feel like reading, etc.

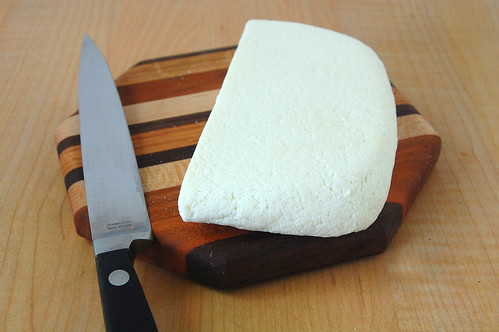
This is what the paneer should look like after being drained overnight. The texture will be just like the kind you find in the Indian grocery stores, but the taste will be at least 10 times better.


Here is what it looks like cut up. Anyone want to take a guess as to what I made with this?

Homemade Paneer

* 8 cups (half gallon) milk
* 1/2 cup lemon Juice or vinegar

1. Place a colander in the sink and line with a large piece of cheesecloth.
2. In a heavy bottomed pot, over medium heat, cook the milk, stirring occasionally, making sure not it does not burn.
3. As the milk comes to a boil, gradually stir in the lemon juice or vinegar. The curd will begin separating from the whey. Cook for an additional minute, then remove the pot from the heat.
4. Pour the liquid into the prepared colander. Wrap the curds in the cloth and gently rinse under cold water for a few seconds. Then, using your hands, squeeze the cloth to remove the excess water. This also helps to remove some of the sourness from the lemon juice/vinegar.
5. To drain the liquid, place the curds wrapped in the cheesecloth on a cutting board. Place a heavy pan (cast iron works well) on top. Then place a few cans in the pan. Drain for at least 2 hours and at most overnight. The longer the cheese is drained, the firmer the final product.

Tuesday, April 20, 2010

Artichoke and Mushroom Pasta

This post was supposed to contain a lovely display of photos from my local farmer's market. Photos of the dozens of colorful produce stands, appetizing baked goods, fresh cheeses, and local wines. Photos of the energetic bands performing, the happy food vendors, the strangely-dressed man making balloon animals, and the tons of smiling families enjoying their Saturday morning. See, last weekend I had this great idea of bringing my camera to the farmers market to take a bunch of photos and post them on this site. Instead, my morning went like this: Spend 30 minutes safely packing camera for bike ride to market, arrive at market, unpack camera, point, focus, click. Nothing. Camera. Battery. Dead. Oof.

So although I can't share photos of the Farmer's Market, I can share photos of a pasta - made with ingredients from the farmer's market. That's almost the same, right?


As much as I love all things artichoke, I've always had a lingering fear of using fresh artichokes. Maybe it's their thorns or their shell-like exterior, or their hefty price tag, but something always scared me away.

But I've now discovered that there's no reason to be afraid - fresh artichokes are super simple to prepare. And although I'm in no way surrendering my lovely canned and frozen artichokes, I do love how fresh artichokes taste so, well...fresh.

Sorry, I think all this thesis writing has erased my culinary vocabulary. All I can think of are words like 'methods', 'results', 'significant'. And "I love how fresh artichokes taste so significant" just doesn't sound right to me.


For this pasta, I used about a pound of baby artichokes, which are much better suited for pasta-type dishes since the entire leaf can be eaten. Preparation is simple: rinse the artichokes, cut off the stems, and remove the outer (tougher) leaves. Ideally, you should keep the cut artichokes in a bowl of lemon water to prevent browning. As you can see, I forgot this step, hence the already browning artichokes.

There are many ways to cook the artichokes. They can be boiled, grilled, sauteed, baked, or steamed. I steamed mine before adding them to this pasta.

Artichoke and Mushroom Pasta
*1/2 lb linguine, fettuccine, spaghetti, or other pasta (I used whole wheat spaghetti)
*2 Tbsp olive oil
*1 shallot, minced
*1/2 lb crimini mushrooms, chopped
*3 Tbsp prepared basil pesto (I used this recipe)
*1 cup frozen peas
*1 lb baby artichokes, quartered
*salt and freshly ground black pepper, to taste

1. Cook pasta as directed on package. Keep it slightly al dente since it will cook a bit more with the other ingredients.
2. In a large pan, heat the olive oil. Add the shallots and cook until slightly translucent (1-2 minutes).
3. Add the mushrooms and cook until slightly softened.
4. Add the pasta, pesto, peas, and artichokes, and gently (tongs are great for this) toss everything together. Add salt and pepper to taste.

Monday, April 12, 2010

The Baked Brownie

Firstly, I want to thank you all for your well wishes and kind words in my last post. I was amazed at the amount of support I received in the comments and I have come to realize that I have the BEST blog readers ever! :)

Now, let's talk brownies. I know what you're thinking - "another brownie recipe? Doesn't this girl get tired of chocolate, like ever?". The answer is "No. I don't." I am on a mission to find the best brownie recipe, even if that means baking a new batch every month and posting about them. A few weeks ago, I made the highly coveted King Arthur Flour brownies, and although I really enjoyed the texture of these - dense and fudgy, I felt they were a bit lacking in chocolate flavor. But since so many of my favorite fellow food bloggers love this recipe, I blame myself, and not the King, for their shortcomings. I will definitely try these brownies again, with a few changes, but in the meantime, I wanted to share another brownie recipe.

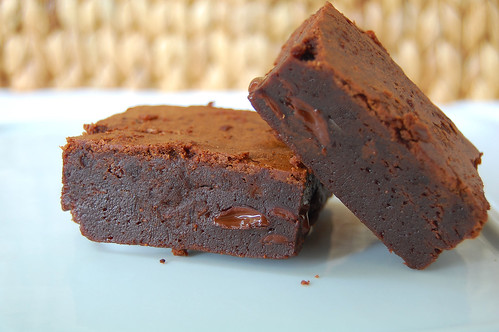
This one is the famous Baked brownie, created by the people at Baked bakery in Brooklyn, New York. These brownies were AMAZING. I brought one of these to work for an after lunch treat; one bite and I almost fell out of my chair - they were that good. They are rich, dense, and fudgy, and the brown sugar and espresso powder give them an unbeliveably delicious chocolate flavor. If you are looking for the perfect brownie, I highly recommend you try this one. You will not be disappointed!
Baked Brownie (from Baked – New Frontiers in Baking)
*1 1/4 cups all-purpose flour
*1 teaspoon salt
*2 tablespoons dark unsweetened cocoa powder
*11 ounces dark chocolate (60 to 72% cacao), coarsely chopped
*1 cup (2 sticks) unsalted butter, cut into 1-inch pieces
*1 teaspoon instant espresso powder
*1 1/2 cups granulated sugar
*1/2 cup firmly packed light brown sugar
*5 large eggs, at room temperature
*2 teaspoons pure vanilla extract

1. Preheat the oven to 350 degrees F. Butter the sides and bottom of a 9 x 13 glass or light-colored metal baking pan.
2. In a medium bowl, whisk the flour, salt and cocoa powder. Put the chocolate, butter, and instant espresso powder in a large bowl and set it over a saucepan of simmering water, stirring occasionally, until the chocolate and butter are completely melted and smooth. Turn off the heat, but keep the bowl over the water and add the sugars. Whisk until completely combined, then remove the bowl from the pan. The mixture should be room temperature.
3. Add 3 eggs to the chocolate mixture and whisk until combined. Add the remaining eggs and whisk until combined. Add the vanilla and stir until combined. Do not overbeat the batter at this stage or your brownies will be cakey.
4. Sprinkle the flour mixture over the chocolate mixture. Using a spatula (not a whisk), fold the flour mixture into the chocolate until just a bit of the flour mixture is visible.
5. Pour the batter into the prepared pan and smooth the top. Bake in the center of the oven for 30 minutes, rotating the pan halfway through the baking time, until a toothpick inserted into the center of the brownies comes out with a few moist crumbs sticking to it. Let the brownies cool completely, then cut them into squares and serve. Tightly covered with plastic wrap, the brownies keep at room temperature for up to 3 days.

Wednesday, April 7, 2010

Crustless Asparagus Quiche

Phew...finally, I'm back! I know I haven't posted in a while, and it's because things have been pretty busy here. After 5 long years, I am (finally) getting my PhD, so the last few months have been: applying for jobs, interviewing, and now waiting for offers. In the middle of all this, I am writing my thesis and still working on papers and presentations. I know, I know...none of this is as important as blogging about food, but unfortunately I can't convince my thesis committee of that.

Maybe they would be convinced, however, if they tried this quiche. Full of asparagus and mushrooms, and a combination of three cheeses, it is amazingly tasty and very satisfying. It almost makes you forget about nerve-wrecking interviews, impending deadlines, and (what feels like) the thousands of hours of writing and editing that await you. Almost.

This recipe is for a crustless quiche, and it so simple to make, it can easily be a weekday dinner. Perfect for days full of nerve-wrecking interviews, impending deadlines, and lots of writing. Yup, I think it’s pretty clear I will be making this dish often in the months to come.
Crustless Asparagus & Mushroom Quiche (adapted from Smitten Kitchen and allrecipes)
*1 tablespoon olive oil
*1/2 shallot, diced
*1 pound asparagus, trimmed and cut into 1/2 inch pieces
*1/2 pound mushrooms, chopped
*4 large eggs
*1/4 cup milk
*1/2 cup Swiss cheese, grated
*1/3 cup gruyere, grated
*1/3 cup Pecorino, grated
*1 tablespoon flour

1. Preheat oven to 425 degrees. Heat the oil in a skillet, add shallots, and cook until just translucent.
2. Add the asparagus and cook for 3-4 minutes. Add mushrooms and cook for an additional 3-4 minutes. Pour into pie pan.
3. In a separate bowl, whisk together eggs, milk, cheese, and flour. Pour over asparagus mixture.
4. Bake for 25 minutes. Cool for 10 minutes before serving.