Showing posts with label chocolate. Show all posts

Sunday, September 26, 2010

Swiss Roll Bombe

Wow. It has been a loooong time. Ready for my sob story? Because here it comes...
Over the last few months I've come to realize how precious is this thing that we call time. Time! What a sneaky thing you are. A few months ago I had so much of you -- almost too much. It was March and I had an offer for a job that didn't start until the end of August. I had 6 whole months to relish California while I slowly finished up my thesis. And now look at me...I barely have enough of you to sit down and write a post.

The last few months have been some of the craziest in my life. I went from being a graduate student on the verge of completely losing all motivation to an assistant professor. Sounds like a big change, but honestly, I don't think much has really changed. Sure, I'm in a different location, with a (dare I say it) real job, and a real (non-stipend) salary. But inside, I am still the same grad student -- stressing over deadlines, working late hours, and trying to hold on to every last bit of motivation I can find. It's been a challenge to say the least.

The hardest part is being away from those I love. I am in the middle of the country (literally) thousands of miles from anyone I love and sometimes I can't help but wonder if it's really worth it. Honestly, I'm still not sure. But this is what I've got myself into, so I might as well savor it while I've got it.

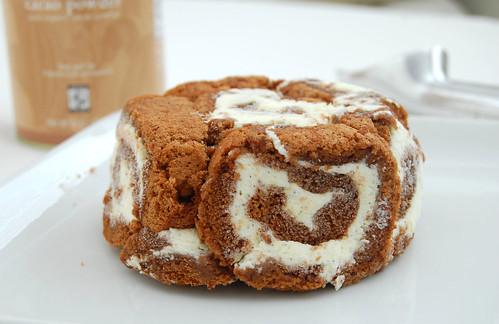
OK, enough rambling. I'm ready to talk food. I'm almost embarrassed to post this, but I'll do it anyway. This was supposed to be my submission for some past Daring Bakers challenge -- so long ago, I don't even remember the month, and right now I'm too lazy to look it up. The challenge was to create a Swiss bombe: basically cake-covered ice cream. That's right: Cake. And. Ice Cream. Together. Dessert doesn't get much better than this.

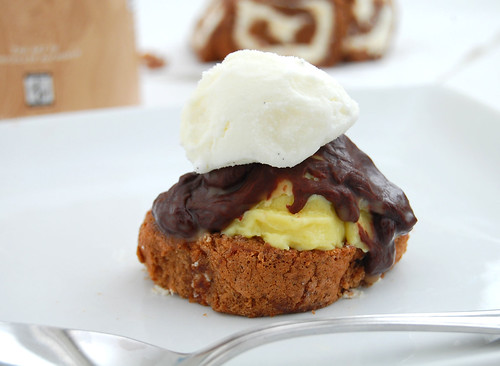
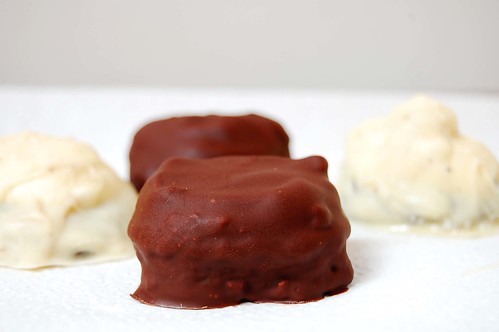
The swiss roll cake was really fantastic. Of course mine looked less than perfect, but the taste was phenomenal. Light and moist with the perfect amount of sweetness. I made two flavors of ice cream: vanilla bean and french vanilla (sorry, forgot which recipes I used), and added a layer of chocolate ganache. I made a mini bombe and a deconstructed version. Personally, I liked the deconstructed version better. But that's just me sometimes: disorganized and random (sshh...don't tell my students).

I also want to thank all my readers who left me the most endearing comments on my last post. After not blogging for so many months, I missed it terribly, and now I know why. Reading your comments and knowing that someone out there actually (somewhat?) cares about what's going on in my kitchen means so much to me. Seriously, your comments really touched me.
I really hope to be blogging regularly again soon.

Here are the recipes for the cake and ganache.

Thursday, May 27, 2010

Daring Bakers Piece Montée (Croquembouche)

The May 2010 Daring Bakers’ challenge was hosted by Cat of Little Miss Cupcake. Cat challenged everyone to make a piece montée, or croquembouche, based on recipes from Peter Kump’s Baking School in Manhattan and Nick Malgieri.

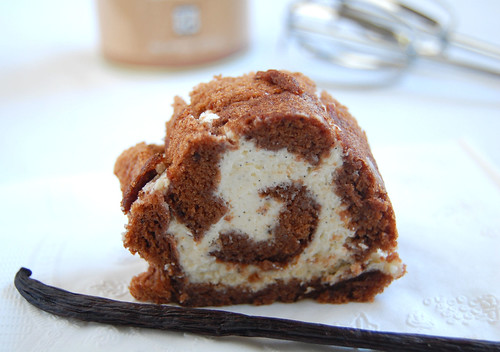
I wanted to make this dessert for one of my best friends (hi Nancy!) who was visiting a few weekends ago and my goal was to minimize the amount of work I had while she was here. Since there were several steps to this recipe, I started early -- made the pastry cream 3 days in advance, baked the pâte à choux the day before, and filled and froze them overnight. The next day, I assembled the Croqembouche while the choux were still frozen. I think freezing them actually made the assembly easier. The choux were much easier to handle, and the glaze hardened quickly which helped them stick together. Nancy is a fan of fruity desserts and chocolate, so I filled the choux with a banana pastry cream and assembled the Croquembouche with a chocolate glaze.


I had never made a pâte à choux before but had been longing to try it for some time. Cat's recipe for the choux was absolutely perfect. These little babies puffed up so beautifully I almost couldn't believe I actually made them. I ate one right out of the oven - no filling, no frosting, completely unadorned, and it was simply amazing. Like the most delicious fluffy little pillow you could ever eat.


For the pastry cream, I started with Kat's recipe for vanilla pastry cream, reduced the sugar a bit, and added a mashed banana. The cream was good but not spectacular. It was a bit too sweet and not very flavorful. I scraped in some vanilla beans, which helped enhance the flavor a bit, but I still wasn't in love. I would have preferred a creamier, maybe even gooier, filling for the choux.


Assembling the Croquembouche was probably the step I was most intimidated by, but it actually turned out to be much simpler than I had imagined. As I mentioned, I think working with frozen choux made it much simpler, and my Croquembouche came together pretty easily.

All in all, I really enjoyed making, and even more so eating, this dessert. Cat's pâte à choux recipe has opened up a world of possibilities -- I've been dreaming about eclairs, cream puffs, and profiteroles. This will be my go-to recipe the next time I want to make a pâte à choux, and there definitely will be a next time.

Piece Montée (Croquembouche)

For the Banana Crème Patissiere:
*1 cup (225 ml) whole milk
*2 tablespoons cornstarch
*6 tablespoons (100 g) sugar
*1 large egg
*2 large egg yolks
*1 small banana, mashed
*2 tablespoons (30 g) unsalted butter
*1/2 teaspoon vanilla extract
*1/2 vanilla bean, split lengthwise

Dissolve cornstarch in ¼ cup of milk. Combine the remaining milk with the sugar in a saucepan; bring to boil; remove from heat.

Beat the whole egg, then the yolks into the cornstarch mixture. Pour 1/3 of boiling milk into the egg mixture, whisking constantly so that the eggs do not begin to cook.

Return the remaining milk to boil. Pour in the hot egg mixture in a stream, continuing whisking.

Continue whisking (this is important – you do not want the eggs to solidify/cook) until the cream thickens and comes to a boil. Remove from heat and stir in the mashed banana, then beat in the butter and vanilla extract. Scrape the seeds from the vanilla bean and stir in to combine. Finally, for a smooth consistency, strain the creme through a sieve.

For the Pate a Choux (Yield: About 28)
*¾ cup (175 ml.) water
*6 Tbsp. (85 g.) unsalted butter
*¼ Tsp. salt
*1 Tbsp. sugar
*1 cup (125 g.) all-purpose flour
*4 large eggs

For Egg Wash:
*1 egg and pinch of salt ( Instead of egg wash, I brushed the choux with a bit of milk)

Pre-heat oven to 425◦F/220◦C degrees. Line two baking sheets with parchment paper.

To prepare batter: 1. Combine water, butter, salt and sugar in a saucepan over medium heat. Bring to a boil and stir occasionally. At boil, remove from heat and sift in the flour, stirring to combine completely. Return to heat and cook, stirring constantly until the batter dries slightly and begins to pull away from the sides of the pan. Transfer to a bowl and stir with a wooden spoon 1 minute to cool slightly. Add 1 egg. The batter will appear loose and shiny. As you stir, the batter will become dry-looking like lightly buttered mashed potatoes. It is at this point that you will add in the next egg. Repeat until you have incorporated all the eggs.

To Pipe:
Transfer batter to a pastry bag fitted with a large open tip (I piped directly from the bag opening without a tip). Pipe choux about 1 inch-part in the baking sheets. Choux should be about 1 inch high about 1 inch wide. Using a clean finger dipped in hot water, gently press down on any tips that have formed on the top of choux when piping. You want them to retain their ball shape, but be smoothly curved on top.

Brush tops with egg wash (1 egg lightly beaten with pinch of salt) or milk.

To Bake:
Bake the choux at 425◦F/220◦C degrees until well-puffed and turning lightly golden in color, about 10 minutes.

Lower the temperature to 350◦F/180◦C degrees and continue baking until well-colored and dry, about 20 minutes more. Remove to a rack and cool.

Can be stored in a airtight box overnight.

To Fill:
When you are ready to assemble your piece montée, using a plain pastry tip, pierce the bottom of each choux. Fill the choux with pastry cream using either the same tip or a star tip, and place on a paper-lined sheet. Choux can be refrigerated briefly at this point while you make your glaze.


For Chocolate Glaze:

*8 ounces/200 g. finely chopped semi or bitter sweet chocolate (use the finest quality you can afford as the taste will be quite pronounced)

Melt chocolate in microwave or double boiler. Stir at regular intervals to avoid burning. Use immediately.

Assembling the Piece Montée:
You may want to lay out your unfilled, unglazed choux in a practice design to get a feel for how to assemble the final dessert. For example, if making a conical shape, trace a circle (no bigger than 8 inches) on a piece of parchment to use as a pattern. Then take some of the larger choux and assemble them in the circle for the bottom layer. Practice seeing which pieces fit together best.

Once you are ready to assemble your piece montée, dip the top of each choux in your glaze (careful it may be still hot!), and start assembling on your cake board/plate/sheet. Continue dipping and adding choux in levels using the glaze to hold them together as you build up.



Sunday, May 16, 2010

Classic Yellow Cupcakes

Oh goodness me. Can someone teach me how to frost a cupcake? Apparently, I suck at this. These cupcakes were so cute out of the oven, and then I pulled out my piping bag, tips and all. Next thing you know, there I was, "piping" globs of frosting on them, desperately trying to maintain some coherent design, but really just creating what I can only describe as poo-like piles. Sorry for the description, but I need some pointers! Fellow bakers, how do you frost your cupcakes so beautifully, and why do mine always look so...strange? I read all the tips in Joy of Baking, even watched some videos, but something always goes astray. Either I pull away too quickly and end up with skinny tubes, or pipe for too long and end up with big puddles. Maybe I just need a different piping tip. Yup, that must be it. Blame it on the tools, not the handy man woman.

Luckily, I was able to somewhat salvage these cupcakes by using the frosting as more of a glue and sticking on some little chocolate chips (another reason why I love chocolate chips!). And in all seriousness, these cupcakes were rich, moist, and just sweet enough with a subtle hint of vanilla. Utterly delicious - botched-up frosting and all.

Yellow Cupcakes with Chocolate Frosting (adapted from Hummingbird Bakery Cookbook, makes about 18 cupcakes)

*2 cups all-purpose flour
*1 1/2 cup sugar
*2 teaspoons baking powder
*1 teaspoon baking soda
*pinch of salt
*6 tablespoons unsalted butter, at room temperature
*1 cup whole milk
*2 eggs
*1 teaspoon vanilla extract

Chocolate Buttercream Frosting
* 2 1/4 cup confectioner's sugar
* 8 Tb cocoa powder
* 6 Tb butter, at room temperature
* 1 tsp vanilla
* 2 Tb milk

1. In a large bowl, sift together the confectioners sugar and cocoa, and set aside.
2. In another large bowl, cream butter until smooth. Gradually add in one quarter of the sugar mixture, 2 Tb at a time. Add in all of the vanilla, then another quarter of the sugar mixture, two tablespoons at a time. The mixture should be firm. At this point, gradually add the milk, about a 1/2 tablespoon at at a time, alternating with 2 tablespoons at a time of the rest of the sugar mixture.

1. Preheat oven to 350 degrees.
2. Put the flour, sugar, baking powder, salt and butter in an electric mixer with a paddle attachment (or use a hand-held electric whisk) and beat on slow until you get a sandy consistency and everything is combined. Gradually pour in half the milk and beat until the milk is just incorporated.
3. Whisk the eggs, vanilla extract, and remaining milk together in a separate bowl for a few seconds, then pour into the flour mixture and continue beating until just incorporated (scrape any unmixed ingredients from the side of the bowl with a rubber spatula). Continue mixing for a couple more minutes until the mixture is smooth. Do not over-mix.
4. Pour the mixture into a muffin pan lined with paper cases until two thirds full and bake in the preheated oven for 20–25 minutes, or until light golden and the sponge bounces back when touched (smaller cupcakes will need 3-5 minutes less baking time).
5. A toothpick inserted in the center should come out clean. Leave the cupcakes to cool slightly in the tray before turning out on to a wire cooling rack to cool completely.
6. When the cupcakes are cold, frost with chocolate buttercream frosting. To

Monday, May 3, 2010

Chocolate Chip and Pecan Oatmeal Cookies

Boyfriends are fun to mess with. Especially mine. I have a simple trick that I like to play on him: I take some of our favorite dessert recipes, make some healthy substitutions (without him knowing of course), and innocently watch him to see if he notices any differences. Yes, he is the official guinea pig of MsMeanie's Test Kitchen.

I'll admit it though, some recipes don't fool him, and he can detect a hint of healthy, but these oatmeal cookies? They get him - every, single, time.

The first time I made these cookies, I followed the recipe exactly and they were amazing - rich and chewy and just sweet enough. A few weeks later I made them again, this time with a few healthy tweaks, and guess what? They were STILL amazing. Deliciously rich from the chocolate and pecans, with a balance of crispy on the outside and chewy in the center. My tastebuds loved me, my arteries thanked me, and my test kitchen guinea pig devoured them without suspecting a thing. Now, that to me is cookie perfection.

Chocolate Chip and Pecan Oatmeal Cookies (adapted from Smitten Kitchen and David Lebovitz, makes about 36 cookies)

*4 tablespoons unsalted butter, at room temperature
*4 tablespoons unsweetened applesauce
*3/4 cup white sugar
*1 cup light brown sugar, firmly packed
*1 teaspoon salt
*1 teaspoon vanilla extract
*2 large eggs
*1/2 cup all purpose flour
*3/4 cup whole wheat pastry flour
*1 teaspoon baking soda
*1 1/2 cup quick-cooking oats
*2 cups chopped pecans
*12 ounces semisweet chocolate chips

1.Preheat oven to 350°F. Lightly butter a large cookie sheet or line with parchment paper.
2. Using an electric mixer, beat the butter and applesauce in a bowl until light and fluffy. Add both sugars, salt, and vanilla, and beat until well mixed, about three minutes. Stir in eggs, one at a time.
3. Sift together the flour and baking soda in a separate bowl. Stir in half of the flour mixture to the butter. Once the flour has been incorporated, add the second half. Stir in the oats, pecans, orange zest, and chocolate chips.
3. Place a small piece of plastic wrap over the dough and chill in the refrigerator for a few hours (at least 1 hour). This step gives the cookies a great texture and really enhances the flavor. The longer the cookies are chilled, the chewier and more flavorful they will be.
4. Allow the dough to sit at room temperature for a few minutes, then drop the dough, by the tablespoon, onto the cookie sheet and bake for 10 to 12 minutes or until golden. Remove from the oven and cool the cookies on a rack.

Monday, April 12, 2010

The Baked Brownie

Firstly, I want to thank you all for your well wishes and kind words in my last post. I was amazed at the amount of support I received in the comments and I have come to realize that I have the BEST blog readers ever! :)

Now, let's talk brownies. I know what you're thinking - "another brownie recipe? Doesn't this girl get tired of chocolate, like ever?". The answer is "No. I don't." I am on a mission to find the best brownie recipe, even if that means baking a new batch every month and posting about them. A few weeks ago, I made the highly coveted King Arthur Flour brownies, and although I really enjoyed the texture of these - dense and fudgy, I felt they were a bit lacking in chocolate flavor. But since so many of my favorite fellow food bloggers love this recipe, I blame myself, and not the King, for their shortcomings. I will definitely try these brownies again, with a few changes, but in the meantime, I wanted to share another brownie recipe.

This one is the famous Baked brownie, created by the people at Baked bakery in Brooklyn, New York. These brownies were AMAZING. I brought one of these to work for an after lunch treat; one bite and I almost fell out of my chair - they were that good. They are rich, dense, and fudgy, and the brown sugar and espresso powder give them an unbeliveably delicious chocolate flavor. If you are looking for the perfect brownie, I highly recommend you try this one. You will not be disappointed!
Baked Brownie (from Baked – New Frontiers in Baking)
*1 1/4 cups all-purpose flour
*1 teaspoon salt
*2 tablespoons dark unsweetened cocoa powder
*11 ounces dark chocolate (60 to 72% cacao), coarsely chopped
*1 cup (2 sticks) unsalted butter, cut into 1-inch pieces
*1 teaspoon instant espresso powder
*1 1/2 cups granulated sugar
*1/2 cup firmly packed light brown sugar
*5 large eggs, at room temperature
*2 teaspoons pure vanilla extract

1. Preheat the oven to 350 degrees F. Butter the sides and bottom of a 9 x 13 glass or light-colored metal baking pan.
2. In a medium bowl, whisk the flour, salt and cocoa powder. Put the chocolate, butter, and instant espresso powder in a large bowl and set it over a saucepan of simmering water, stirring occasionally, until the chocolate and butter are completely melted and smooth. Turn off the heat, but keep the bowl over the water and add the sugars. Whisk until completely combined, then remove the bowl from the pan. The mixture should be room temperature.
3. Add 3 eggs to the chocolate mixture and whisk until combined. Add the remaining eggs and whisk until combined. Add the vanilla and stir until combined. Do not overbeat the batter at this stage or your brownies will be cakey.
4. Sprinkle the flour mixture over the chocolate mixture. Using a spatula (not a whisk), fold the flour mixture into the chocolate until just a bit of the flour mixture is visible.
5. Pour the batter into the prepared pan and smooth the top. Bake in the center of the oven for 30 minutes, rotating the pan halfway through the baking time, until a toothpick inserted into the center of the brownies comes out with a few moist crumbs sticking to it. Let the brownies cool completely, then cut them into squares and serve. Tightly covered with plastic wrap, the brownies keep at room temperature for up to 3 days.

Wednesday, March 10, 2010

King Arthur Brownies

My BF tells me that I quantify things too much. Maybe he's right. Maybe it has something to do with my mathematics background, but there is definitely something that just feels right about quantifying things, especially when it comes to food.

After preparing a bunch of different dishes for dinner, my first instinct is to mentally rank them, and then of course, to ask him to rank them. Whenever we go out to eat or even attend dinner parties, I mentally rate everything I taste, and then of course, ask him to do the same. I also keep several mental lists: favorite restaurants, favorite types of cuisines, favorite savory foods, and my favorite favorites list: desserts. Unfortunately, this is a difficult list to maintain because it changes frequently and often based on my moods (certain times of the month,etc.). Often times, I find two contenders on this list battling it out for first place: chocolate cupcakes and the ever-popular chocolate brownies. They both hold a special place in my heart, but today brownies is number 1 on my list.


I am definitely a chewy fudgy brownie person. To me, the fate of a cakey brownie is to be melted down, combined with more butter and chocolate and turned into a chewy fudgy brownie. I have tried a few brownie recipes including Dorie Greenspans classic brownies (me likey!) and another recipe I have taped to my cabinet (no joke) but forgot where I got it from. This time I decided to try the highly coveted King Arthur Flour brownies.
The verdict? These brownies get an A (here's me quantifying again) for texture: they were very chewy and fudgy and not at all gummy. Unfortunately, they get a B+ for flavor. To me, these brownies did not yield a profound chocolate flavor, I actually found the chocolate level to be rather mild and disappointingly flat. I thought that they would improve over time, but 2 days later they were still a bit disappointing. Don't get me wrong -- they are not bad brownies, just not the sublime ones I was hoping for. Ok, so maybe it was my fault: I didn't add the optional espresso powder, and I'm not sure if the cocoa I used was Dutch processed. I will definitely try these brownies again with those changes, but next on my list is the Baked Brownie. If you've tried it, I'd love to hear how they turned out for you.
King Arthur's Fudge Brownies (adapted from here)
*1 cup (2 sticks) unsalted butter
*2 1/4 cups sugar
*4 large eggs
*1 1/4 cups Dutch-process cocoa
*1 teaspoon salt
*1 teaspoon baking powder
*1 teaspoon espresso powder, optional
*1 tablespoon vanilla extract
*1 1/2 cups all-purpose flour
*2 cups chocolate chips

1.Preheat the oven to 350°F. Lightly grease a 9" x 13" pan.
2. In a medium-sized microwave-safe bowl, or in a saucepan set over low heat, melt the butter, then add the sugar and stir to combine. Return the mixture to the heat (or microwave) briefly, just until it's hot (about 110°F to 120°F), but not bubbling; it'll become shiny looking as you stir it. Heating this mixture a second time will dissolve more of the sugar, which will yield a shiny top crust on your brownies.
3. While the sugar heats a second time, crack the 4 eggs into a bowl, and beat them with the cocoa, salt, baking powder, espresso powder, and vanilla till smooth.
4. Add the hot butter/sugar mixture, stirring until smooth.
5. Add the flour and chips, again stirring until smooth. Note: If you want the chips to remain intact in the baked brownies, rather than melting in, let the batter cool in the bowl for about 20 minutes before stirring in the chips.
6. Spoon the batter into a lightly greased 9" x 13" pan.
7. Bake the brownies for about 30 minutes, until a cake tester inserted into the center comes out clean, or with just a few moist crumbs clinging to it. The brownies should feel set on the edges, and the center should look very moist, but not uncooked. Remove them from the oven and cool on a rack before cutting and serving.

Sunday, February 28, 2010

Daring Baker's Tiramisu

The February 2010 Daring Bakers’ challenge was hosted by Aparna of My Diverse Kitchen and Deeba of Passionate About Baking. They chose Tiramisu as the challenge for the month. Their challenge recipe is based on recipes from The Washington Post, Cordon Bleu at Home and Baking Obsession.

I LOVE tiramisu, and had previously never made it, so when I saw the February challenge, I was definitely excited. For this challenge, we were to make tiramisu from scratch -- meaning all of the components had to be made from scratch, including the lady fingers and the mascarpone cheese.

There were many components to this recipe. From experience, I've learned that for the sake of my mental health, I should never expect to complete a Daring Bakers challenges in one day. This dessert consisted of lady fingers, mascarpone cheese, zabaglione (Italian custard), pastry cream, and whipped cream. So, for this challenge, I split up the work over a span of a few days, and it worked out very nicely. I made the lady fingers and mascarpone one day, the zabaglione, pastry creams, and whipped creams 3 days later, assembled the dessert the following day, and let it chill overnight.


What I really loved about this recipe is that although there were many components, I didn't find any of them to be too difficult, just a bit time consuming. The lady fingers were pretty simple and very good, although next time I may add a bit of vanilla to give them more flavor. Since I had made mascarpone once before, this time around was definitely easier.

For my version of this decadent dessert, I made an extra chocolate layer by spiking the pastry cream with about 6 ounces of chopped bittersweet chocolate, and topped it with some shaved chocolate. I have a hard time saying no to chocolate. Sorry, it's a weakness.

Please check out Aparna's or Deeba's blogs for the recipe.

Saturday, February 13, 2010

Chocolate Cupcakes


As I've mentioned a few times on this blog, I am a lover of all things desserts. Brownies, cookies, and pies are high up on the list, but my all time favorite dessert is chocolate cake with vanilla frosting. OK, I know it's not the most exciting dessert, but something about the contrast of the rich chocolate and the creamy sweet frosting is incredibly satisfying.

This is the chocolate cake recipe that I always make. Although Ina Garten is a culinary genius, she is not known for making low-fat recipes (take a look at this). But as I was preparing the batter for these cupcakes, I realized they are actually relatively low in fat: 14 (unfrosted) cupcakes require just 1 egg, and only 1/4 cup of oil. So that's 1/14 of an egg and .85 teaspoons (NOT tablespoons) of oil per cupcake. The frosting is a bit more sinful, but only a small amount is needed per cupcake. Me? I start with a small amount, but always have more on the side for dipping. Yum.

I'm not a big fan of sprinkles, but since I was making these cupcakes for a birthday party, I decided to be festive.

Chocolate Cupcakes (adapted from Ina Garten)
*3/4 cup + 2 tablespoons all-purpose flour
*1 cups sugar
*1/4 cup + 2 heaping tablespoons cocoa powder
*1 teaspoon baking soda
*1/2 teaspoon baking powder
*1/2 teaspoon kosher salt
*1/2 cup buttermilk, shaken
*1/4 cup vegetable oil (I use canola)
*1 egg at room temperature
*1/2 teaspoon vanilla extract
*1/2 cup strong brewed
*sprinkles (optional)

Vanilla Buttercream Frosting (adapted from Smitten Kitchen)

*2 cups confections sugar
*1/2 stick butter, at room temperature
*1/2 tablespoons milk
*1/4 tsp pure vanilla extract

To make the Frosting:
1. Whip the butter in the bowl of an electric mixer, or with a hand mixer, for several minutes, until light and fluffy. Slowly add the powdered sugar, a few tablespoons at a time.
2. When the frosting looks thick enough to spread, add 2 more tablespoons of the confectioners sugar, one at a time. Drizzle in the milk, and mix it until combined. Add one more tablespoon of the sugar, then drizzle in the vanilla and mix until combined.

To make the cupcakes:
1. Preheat the oven to 350 degrees F. Line a muffin pan with cupcake liners.
2. Sift the flour, sugar, cocoa, baking soda, and baking powder into a large bowl. Add salt. Mix with an electric mixer (if using stand mixer, use paddle attachment) on low speed until combined.
3. In another bowl, combine the buttermilk, oil, eggs, and vanilla. With the mixer on low speed, slowly add the wet ingredients to the dry. With mixer still on low, add the coffee and stir just to combine, scraping the bottom of the bowl with a rubber spatula.
4.Pour the batter into the prepared pan and bake for 35 to 40 minutes, until a toothpick inserted in the center cupcake comes out clean. Place cupcakes out onto a cooling rack and cool completely.
5. Frost with vanilla frosting and top with sprinkles.

Tuesday, January 26, 2010

Peanut Butter Nanaimo Bars

The January 2010 Daring Bakers’ challenge was hosted by Lauren of Celiac Teen. Lauren chose Gluten-Free Graham Wafers and Nanaimo Bars as the challenge for the month. The sources she based her recipe on are 101 Cookbooks and www.nanaimo.ca.

Wow. So simple yet so utterly delicious. This was one of my favorite Daring Baker's challenges for three important reasons -- 1) I didn't lose sleep over it 2) I didn't almost destroy my kitchen in the process of making it, and 3) it was super delicious.

This month we made Nanaimo Bars, a classic Canadian dessert created in Nanaimo, British Colombia. The bars have 3 layers: a base containing graham crackers, cocoa, coconut and nuts, a middle custard layer, and a topping of chocolate.

We had the option to make gluten-free graham crackers, but I stuck to original (flour) graham crackers (sorry, I forgot to take pictures of them). I wanted to make these desserts for the BF's birthday, and since he is a peanut butter fanatic, I swapped the traditional vanilla flavored custard for a peanut butter layer. I also swapped the almonds in the bottom layer for salted peanuts, and replaced some of the butter with peanut oil.

And OMG. The result was amazing: a bottom chewy yet crunchy layer of chocolatey goodness, a creamy and sweet peanut butter filling, and a hard chocolate shell on top -- AMAZING. Initially, I thought these bars were going to be just like the many American dessert bar recipes that I do love, but have tried several times. But no -- they were really different. The coconut in the bottom layer really added to taste and texture of these bars, making them very different than other bar recipes I've had. The addition of the peanut oil really added a lot of peanut flavor to this recipe, but of course can be replaced with butter.

The original recipe can be found on Lauren's lovely (and gluten-free) blog. Below is my peanut butter version.

Peanut-Butter Nanaimo Bars (loosely adapted from here)

Ingredients

Base
  • 1/4 cup (115 g) (4 ounces) unsalted butter
  • 2 tablespoons peanut oil
  • 1/4 cup (50 g) (1.8 ounces) granulated sugar
  • 5 tablespoons unsweetened cocoa powder
  • 1 large egg, beaten
  • 1 1/4 cups graham cracker crumbs
  • 1/2 cup roasted peanuts, chopped
  • 1 cup (130 g) (4.5 ounces) shredded sweetened coconut
Filling
  • 1/2 cup peanut butter
  • 1 tablespoon unsalted butter, at room temperature
  • 1 tablespoon peanut oil
  • 2 teaspoons cornstarch
  • 1 teaspoon vanilla
  • 2 cups confectioner’s sugar
  • 3 tablespoons milk

Glaze
  • 5 ounces semisweet chocolate chips or finely chopped baking chocolate
  • 2 tablespoons unsalted butter
Directions:
1. For bottom Layer: Melt unsalted butter, oil, sugar and cocoa in top of a double boiler. Add egg and stir to cook and thicken. Remove from heat. Stir in crumbs, nuts and coconut. Press firmly into an ungreased 8 by 8 inch pan.
2. For Middle Layer: Cream together peanut butter, butter, and oil until smooth well. Add the cornstarch and continue creaming. Gradually add half of the sugar, 2 tablespoons at a time until smooth. Add vanilla. Continue adding sugar and milk, alternating 2 tablespoons at a time of each. Spread over bottom layer. Spreading this will be a bit difficult at first, since the mixture is very sticky. I let the mixture sit for a while and used a offset spatula to spread it.
3. For Top Layer: Melt chocolate and unsalted butter over low heat. Cool. Once cool, pour over middle layer and chill.

Monday, January 11, 2010

New York Times CCC Again!


Change is a difficult thing. I'm always wanting to try new recipes, new desserts especially, but every time I contemplate which dessert to make next, I find myself craving the ones I'm most familiar with: brownies, chocolate cake, banana muffins, and of course -- chocolate chip cookies. I don't think there is ever a time when I don't want a chocolate chip cookie. Morning? Check. Before lunch? Check. After lunch? Check. Anyway, you get it...always!

If you are a food blogger or if you read food blogs, I am sure you have heard of the famous Chocolate Chip Cookie recipe published by the NY times last summer. I made the cookies shortly after the article was published, and unlike the other 4, 982, 623 food bloggers who have made this recipe, I was underwhelmed. The cookies were just too crispy for my taste, I prefer a soft, chewy cookie. Back then, however, I did not own a stand mixer (something the recipe calls for), and I complained a bit about recipes that required special ($200) appliances. Anyway, after all that complaining, I broke down, and bought myself a Kitchen Aid mixer a few months ago.

I tried these cookies again, this time of course using my KA, wondering if it would make a difference at all. And the verdict? YES this time around, I enjoyed the cookies much more. The texture was what everyone raves about. The cookies were much chewier than the first time, and they had the signature crisp edges that give away to a soft chewy center. BUT...I should point out that this doesn't necessarily mean that a stand mixer is essential for making these cookies properly. There is the hopeful part of me that believes that maybe these cookies were better because, well, maybe, just maybe, over the course of a year, I've gained some useful experience in the kitchen. Let's just say that's true.

So like the 4, 982, 623 others, I agree, this is a fantastic chocolate chip cookie. However, since I am a bigger fan of the chewy-all-over CCC, I personally prefer this cookie.

Here is a link to the recipe.

Tuesday, December 8, 2009

Daring Bakers Cannoli...Yes, it's Late


This is my first time posting late for a Daring Bakers Challenge. I'm sorry! I am hoping that my tardy posting will prevent me from getting kicked out of this group that I am actually really honored to be a part of. These are some seriously DARING Bakers. This month (or I guess last month) however, they were Daring Fryers, as the challenge recipe was Cannoli.

Mmm...Cannoli. I remember those little rolls of deliciousness from my school days back in Queens NY. Every once in a while I would walk into my favorite pizzeria on my way back from school, and treat myself to one of these babies. The fried crispy shells filled with white yummy filling (which is what I knew it as back then since I had never even heard of ricotta or marscarpone), speckled with mini chocolate chips. It was heaven! Unfortunately, these "cannoli" I concocted last weekend, were not :( .

I'm not sure if it was my fault or the fault of the recipe (I'm guessing its the former since others had good turnout with this recipe), but my cannoli shells were pretty awful. Firstly, the recipe said to fry for 1-2 min, but doing this caused major burnage for my shells -- so much that I was frying for about 30 seconds tops to make sure they didn't burn. Secondly, they were bland! I tried the suggested recipe for chocolate cannoli thinking chocolate anything has to be good -- but no, they were just chocolate blandness. And lastly, probably the saddest part of this challenge -- my shells did not stay crispy. The morning after they had basically become...tortillas. OK, maybe not as flimsy as a tortilla, but maybe something more like a pita. No joke!

Anyway, my favorite part about this recipe was a homemade chocolate mascarpone filling that I made to fill the cannoli (will post about it next). I was really surprised at how easy it is to make mascarpone at home! I would say it is even easier than paneer (or ricotta), since the first time I did that, I ended up burning the milk. Cream, on the other hand, is much tougher, and requires much more carelessness to burn. YES to burn-resistant ingredients!

Please check out Lisa's fantastic blog for the cannoli recipe. Her cannoli are seriously stunning and I'm sure much tastier than mine!

Friday, December 4, 2009

Blondies and My First Award


Wow. I know it has been too long since I've posted. And I've wanted to so much, but really have had no time this last month. I am teaching a class in my university, and I am really enjoying it but it is extremely time consuming. From preparing all the lectures, exams, and home works, grading, and holding office hours, I have found so little time to do other things I enjoy, including cooking. I've made a few interesting things here and there (mainly for Thanksgiving), but they were all either made at night (not good for photos), or eaten right away (too hungry to stop for pictures). So sadly, I have not been able to post, and really, I missed it so much. There is something so exciting about seeing comments on your postings, it really makes it all worth it. Thank you so much to my commenters! You all rock.

A while ago, I posted about whole wheat peanut butter cookies, and a whole wheat challenge where I was baking some of my favorite recipes by replacing some (or all) of the all purpose flour with whole wheat. I got a request from lucysmom for whole wheat blondies, so here they are!

This is the blondie recipe I ALWAYS make. It is fantastic -- the result is a soft, chewy, toffee-flavored, blondie loaded with chocolate chips (I also often put walnuts and pecans). I have always made it with all purpose flour, but a while back I tried replacing all the all-purpose with whole wheat pastry and I seriously cannot tell the difference. I guess the amount of butter and brown sugar in the recipe takes away the healthy tastes of the whole wheat (woot for butter and brown sugar!) If you don't have whole wheat pastry flour, I've also replaced half the all purpose with regular whole wheat and the result was just as good.
A few weeks ago, Memória from Mangio da Sola (a very lovely blog that I read regularly) gave my blog this award.
I am so grateful to her for recognizing my blog. I also really appreciate her generous and thoughtful comments on my blog. Thank you Memória!
In honor of this award, I will pass it on to two other drool-worthy blogs that I like to read regularly: Dolce at Confessions of a chocoholic and Jill at Jillicious Discoveries. Congratulations! :)

Whole Wheat Blondies
  • 6 tablespoons butter, melted (preferably on the stove top)
  • 1 cup brown sugar
  • 2 eggs, lightly beaten
  • 1 teaspoon vanilla extract
  • 1 cup whole wheat pastry flour (or 1/2 cup whole wheat flour + 1/2 cup all-purpose flour)
  • 1/2 teaspoon baking powder
  • 1/3 teaspoon salt
  • 1/2 cup chocolate chips
  • 1/4 chopped pecans or walnuts
1. Preheat oven to 350F. Mix the brown sugar with the melted butter (I usually do this by hand). Add the eggs and vanilla. Stir until well combined.
2. Add the flour, baking powder, and salt. Mix until just incorporated.
3. Stir in the chocolate chips and nuts.
4. Pour into 8x8 in pan and bake for 25-30 min or until a toothpick inserted in the center comes out clean.

Wednesday, October 21, 2009

Whole Wheat Peanut Butter Chocolate Chip Cookies

Ok, I'm trying something new here. Lately, I've been making my favorite recipes by replacing the all purpose flour with whole wheat pastry flour. A few weeks ago, I made chocolate chip blondies (yum!) using only whole wheat and I was seriously amazed. I could not tell the difference AT ALL! Even the BF who hates my healthy replacements had to admit (hah!) that he could not tell a difference. I really wanted to blog about those blondies but unfortunately I ate them all before I could. Oof. This time, I had some restraint and photographed these lovely whole wheat peanut butter chocolate chip cookies before I could eat them all. Not that they weren't worthy of being eaten in one day. These cookies were amazing! So so good and again -- I could not tell the difference between these and the original recipe that used all white flour.

So now I've decided to do a test -- I will try to remake some of my favorite all-purpose flour recipes (I'm thinking chocolate chip cookies, brownies, pie crusts) by replacing some (or all) of the all purpose flour with whole wheat. And...I'll take requests for recipes too! I'll be your guinea pig. So send me a recipe that you are curious about and I'll take the whole wheat test and report the results. In the meantime, make these cookies!


Whole Wheat Peanut Butter Chocolate Chip Cookies

1. Preheat the oven to 375°F. Grease or line 2 cookie sheets.
2. Whisk together:
3/4 cups all-purpose flour
3/4 whole wheat (pastry) flour
1/2 teaspoon baking soda

3. Beat in a large bowl until well blended:
1/3 cup (5 1⁄3 tablespoons) unsalted butter, softened
1/2 cup sugar
1/2 cup packed brown sugar

4. Beat in:
1 large egg
1 cup peanut butter (smooth or chunky)
1/2 teaspoon vanilla
1 cup chocolate chips
5. Stir in the flour mixture until blended. Shape into 1-inch balls and arrange about 2 inches apart on the cookie sheets. Press in some extra chocolate chips on top. Bake 1 sheet at a time, about 8 to 10 minutes. Let stand briefly, then remove to a rack to cool.

Wednesday, October 7, 2009

Chocolate Cupcakes with Chocolate Chocolate Chip Filling


Yes the title is correct and no there is not an extra 'Chocolate' in there. That's what these are: Chocolate cupcakes with a chocolate filling that has chocolate chips in it. Can you tell I was craving something when I made these?

These cupcake are a delicious conglomeration of two fantastic chocolate recipes: Beatty's Chocolate Cake (from Ina Garten) and Scharffenberger's Chocolate Pudding. My additions are a vanilla (just to keep things interesting) buttercream frosting and mini chocolate chips in the pudding. Simply bake the cupcakes, cook the pudding, add the chips, core the cupcakes, fill with pudding, and frost. Ok, so maybe a few more steps than your average cupcake, but I promise these are totally worth the effort. Being super rich and chocolatey, they are sure to satisfy even the fiercest of chocolate cravings.

(Please forgive this picture, I realize the filling doesn't look very creamy at all. But it was about 90 degrees when I decided to take these pictures and I couldn't get the frosting to drip off without throwing these guys in the fridge for a few minutes, hence the funky looking filling. But not refrigerated, this filling is super creamy.)

Chocolate Cupcakes with Chocolate Chocolate Chip Filling (makes about 28 cupcakes)

For the chocolate cupcakes:
I don't make any changes to the chocolate cake recipe, so the recipe is here.

Chocolate Chip Filling (adapted from John Scharffenberger via Wednesday Chef)
  • 1/4 cup cornstarch
  • 1/2 cup sugar
  • 1/8 teaspoon salt
  • 3 cups 2% milk
  • 8 ounces bittersweet chocolate, coarsely chopped
  • 1 teaspoon pure vanilla extract
  • 1/4 cup mini chocolate chips or coarsely chopped chocolate
Vanilla Buttercream Frosting (adapted from Smitten Kitchen)
  • 3 to 4 cups confections sugar
  • 1 stick butter, at room temperatue
  • 3 tablespoons milk
  • 1/2 tsp pure vanilla extract
To make the Filling:
1. Combine the cornstarch, sugar and salt in the top of a double boiler.
2. Slowly whisk in the milk, scraping the bottom and sides with a heatproof spatula to incorporate the dry ingredients. Place over gently simmering water and stir occasionally, scraping the bottom and sides. Use a whisk as necessary should lumps begin to form.
3. After 15 to 20 minutes, when the mixture begins to thicken and coats the back of the spoon, add the chocolate. Continue stirring for about 2 to 4 minutes, or until the pudding is smooth and thickened.
4. Remove from the heat and stir in the vanilla.
5. Let cool to room temperature, and add the chocolate chips.

To make the Frosting:
1. Whip the butter in the bowl of an electric mixer, or with a hand mixer, for several minutes, until light and fluffy. Slowly add the powdered sugar, a few tablespoons at a time.
2. When the frosting looks thick enough to spread, add 2 more tablespoons of the confections sugar, one at a time. Drizzle in the milk, and mix it until combined. Add one more tablespoon of the sugar, then drizzle in the vanilla and mix until combined.

To prepare the cupcakes:
1. Let the cupcakes cool to room temperature. Insert a paring knife into each cupcake at a slight angle, halfway between the center and the outside edge of the cupcake. Cut a circular cone out of the cake, being careful not to cut all the way to the bottom.
3. Chop the pointy ends of the cones off, and set the circular bases aside. These will be used to cover the cupcake holes once they are filled.
4. Using a small teaspoon or a piping bag, fill each cupcake with the filling. Cover each cupcake with a circular base, and frost.

Sunday, August 30, 2009

Daring Bakers Dobos Torte

The August 2009 Daring Bakers' challenge was hosted by Angela of A Spoonful of Sugar and Lorraine of Not Quite Nigella. They chose the spectacular Dobos Torte based on a recipe from Rick Rodgers' cookbook Kaffeehaus: Exquisite Desserts from the Classic Caffés of Vienna, Budapest, and Prague.

The Dobos Torte is a five-layer sponge cake filled with chocolate buttercream and topped with wedges of crunchy caramel. The orginal recipe called for a buttercream made with eggs and many of the other Daring Bakers had complained that it melted easily. Since I knew I'd be taking this cake to work, which is a 1 1/2 hr drive, I opted for a more resilient chocolate buttercream (recipe below). I added a bit of coffee to the buttercream and brushed on a simple syrup of kahlua and water to the cake layers. I finished off by covering the cake in toasted hazelnuts.

The most challenging part of the recipe was preparing the separate cake layers. I followed the recipe exactly but somehow ended up with 5 layers. They were still 5 layers of sponge cake and chocolate buttercream goodness. If I were to make this again I think I would skip the caramel topping. They were a bit too chewy and sweet for my taste.

Here are some comments from co-workers:

CW1: Fancy!
CW2: Wow! You made this from scratch? And the frosting is not from a can?!
CW3: Very yummy and not too sweet.

There you have it folks. Dobos definitely knew what he was doing when he came up with this cake. Check out the recipe here. Below is my favorite recipe for melt-free chocolate mocha buttercream (tried and tested after many many not-so-good recipes).

Chocolate Mocha Buttercream Frosting
  • 2 3/4 cup - 2 Tb confectioners sugar
  • 8 Tb cocoa powder
  • 6 Tb butter, NOT melted
  • 1 tsp vanilla
  • 2 Tb milk
  • 2 Tb strong coffee
1. In a large bowl, sift together the confectioners sugar and cocoa, and set aside.
2.
In another large bowl, cream butter until smooth. Gradually add in one quarter of the sugar mixture, 2 Tb at a time. Add in all of the vanilla, then another quarter of the sugar mixture, two tablespoons at a time. The mixture should be firm. At this point, gradually add the milk and coffee, alternating with 2 tablespoons at a time of the rest of the sugar mixture.

Sunday, July 26, 2009

Daring Bakers: Mallomars


The July 2009 Daring Bakers challenge was hosted by Nicole at Sweet Tooth. She chose Chocolate Covered Marshmallow Cookies and Milan Cookies from pastry chef Gale Gand of the Food Network.

For this month's challenge, I chose the Chocolate Covered Marshmallow Cookies. I really wanted to try both, but I've been super busy with my internship and only had enough time to try one. The marshmallow cookies were intriguing because I've never made marshmallows before and definitely wanted to give it a try.

I wanted to make the marshmallows vegetarian (no gelatin), so I followed one of the recipes on the Daring Bakers Alternative Bakers forum. The recipe uses Xanthan Gum instead of gelatin to achieve the gelatin-like consistency, and it is fantastic! I read some reviews and was worried that the marshmallows would be too runny. But I followed all the steps and holy moly!
It was true...I had marshmallows. And they weren't runny piles of goop, they were just soft and fluffy, like little pillows...little pillows that were a magnet to uhm, everything. Literally. By the time I was done dipping the last cookie, my kitchen had become a marshmallow. Fortunately, it was worth it because this recipe makes some mighty good cookies, and a ton of them! I
only made a third of the recipe and still ended up with about 20 big cookies!

I made two variations of the cookie: for the first type, I added a layer of homemade dulce de leche (think: marshmallows, chocolate, and caramel...oh mama). The other variation was inside out Mallomars: I used a chocolate cookie base and dipped the cookies in white chocolate.

This recipe was definitely a challenge for me - although the individual parts were simple, putting them together was trickier. Also, trying to get the world's stickiest stuff to do what you want is not particularly easy. Still, these cookies were very very tasty and I would definitely recommend this recipe -- just be prepared, you might end up with marshmallow on your ceiling (I did).

The recipe for the cookies is here. Below is the recipe I used for vegetarian marshmallows. I followed the recipe exactly except piped the marshmallows onto the cookies instead of spreading it on a baking pan.

Vegetarian Marshmallows (by Elizabeth Falkner of Demolition Desserts)

Ingredients:
• 60 mL water
• pinch of cream of tartar
• 255 g sugar, granulated
• 255 g light corn syrup
• ½ vanilla bean
• 85 g egg whites (about 3 egg whites)
• 5 g xanthan (0.76%)

1. Ground xanthan with a tablespoon of sugar. Set aside.
2. Heat water, cream of tartar, remaining sugar, corn syrup and vanilla to 120ºC. Discard vanilla bean. Whisk egg whites for about 2 min until still soft. Continue whipping egg whites at slow speed while adding syrup slowly. Sprinkle xanthan mix while still whipping. Turn speed up and continue mixing for 2-3 min or until meringue pulls away from sides.
3. Sprinkle a pan or baking sheet generously with cornstarch and spread out the meringue. Sprinkle top with cornstarch, cover with plastic and leave to set for 4 hours in a refrigerator. Cut marshmallows into desired shapes and dip cut surfaces in cornstarch.