Showing posts with label daring bakers. Show all posts

Sunday, September 26, 2010

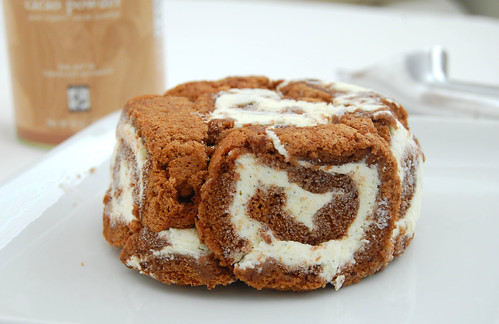
Swiss Roll Bombe

Wow. It has been a loooong time. Ready for my sob story? Because here it comes...
Over the last few months I've come to realize how precious is this thing that we call time. Time! What a sneaky thing you are. A few months ago I had so much of you -- almost too much. It was March and I had an offer for a job that didn't start until the end of August. I had 6 whole months to relish California while I slowly finished up my thesis. And now look at me...I barely have enough of you to sit down and write a post.

The last few months have been some of the craziest in my life. I went from being a graduate student on the verge of completely losing all motivation to an assistant professor. Sounds like a big change, but honestly, I don't think much has really changed. Sure, I'm in a different location, with a (dare I say it) real job, and a real (non-stipend) salary. But inside, I am still the same grad student -- stressing over deadlines, working late hours, and trying to hold on to every last bit of motivation I can find. It's been a challenge to say the least.

The hardest part is being away from those I love. I am in the middle of the country (literally) thousands of miles from anyone I love and sometimes I can't help but wonder if it's really worth it. Honestly, I'm still not sure. But this is what I've got myself into, so I might as well savor it while I've got it.

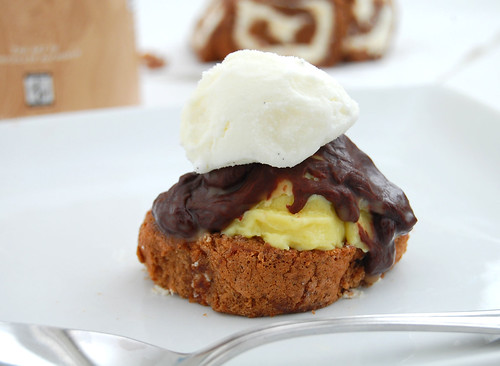
OK, enough rambling. I'm ready to talk food. I'm almost embarrassed to post this, but I'll do it anyway. This was supposed to be my submission for some past Daring Bakers challenge -- so long ago, I don't even remember the month, and right now I'm too lazy to look it up. The challenge was to create a Swiss bombe: basically cake-covered ice cream. That's right: Cake. And. Ice Cream. Together. Dessert doesn't get much better than this.

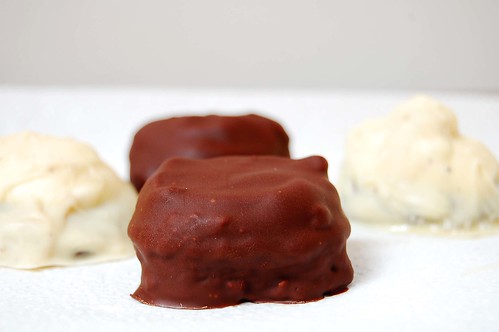
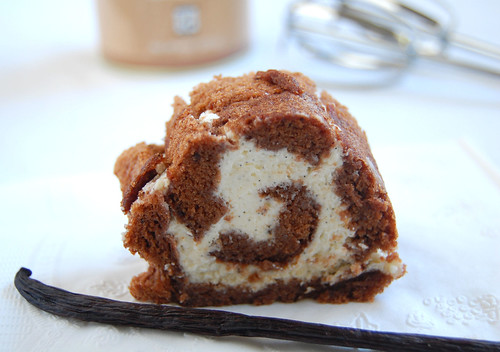
The swiss roll cake was really fantastic. Of course mine looked less than perfect, but the taste was phenomenal. Light and moist with the perfect amount of sweetness. I made two flavors of ice cream: vanilla bean and french vanilla (sorry, forgot which recipes I used), and added a layer of chocolate ganache. I made a mini bombe and a deconstructed version. Personally, I liked the deconstructed version better. But that's just me sometimes: disorganized and random (sshh...don't tell my students).

I also want to thank all my readers who left me the most endearing comments on my last post. After not blogging for so many months, I missed it terribly, and now I know why. Reading your comments and knowing that someone out there actually (somewhat?) cares about what's going on in my kitchen means so much to me. Seriously, your comments really touched me.
I really hope to be blogging regularly again soon.

Here are the recipes for the cake and ganache.

Thursday, May 27, 2010

Daring Bakers Piece Montée (Croquembouche)

The May 2010 Daring Bakers’ challenge was hosted by Cat of Little Miss Cupcake. Cat challenged everyone to make a piece montée, or croquembouche, based on recipes from Peter Kump’s Baking School in Manhattan and Nick Malgieri.

I wanted to make this dessert for one of my best friends (hi Nancy!) who was visiting a few weekends ago and my goal was to minimize the amount of work I had while she was here. Since there were several steps to this recipe, I started early -- made the pastry cream 3 days in advance, baked the pâte à choux the day before, and filled and froze them overnight. The next day, I assembled the Croqembouche while the choux were still frozen. I think freezing them actually made the assembly easier. The choux were much easier to handle, and the glaze hardened quickly which helped them stick together. Nancy is a fan of fruity desserts and chocolate, so I filled the choux with a banana pastry cream and assembled the Croquembouche with a chocolate glaze.


I had never made a pâte à choux before but had been longing to try it for some time. Cat's recipe for the choux was absolutely perfect. These little babies puffed up so beautifully I almost couldn't believe I actually made them. I ate one right out of the oven - no filling, no frosting, completely unadorned, and it was simply amazing. Like the most delicious fluffy little pillow you could ever eat.


For the pastry cream, I started with Kat's recipe for vanilla pastry cream, reduced the sugar a bit, and added a mashed banana. The cream was good but not spectacular. It was a bit too sweet and not very flavorful. I scraped in some vanilla beans, which helped enhance the flavor a bit, but I still wasn't in love. I would have preferred a creamier, maybe even gooier, filling for the choux.


Assembling the Croquembouche was probably the step I was most intimidated by, but it actually turned out to be much simpler than I had imagined. As I mentioned, I think working with frozen choux made it much simpler, and my Croquembouche came together pretty easily.

All in all, I really enjoyed making, and even more so eating, this dessert. Cat's pâte à choux recipe has opened up a world of possibilities -- I've been dreaming about eclairs, cream puffs, and profiteroles. This will be my go-to recipe the next time I want to make a pâte à choux, and there definitely will be a next time.

Piece Montée (Croquembouche)

For the Banana Crème Patissiere:
*1 cup (225 ml) whole milk
*2 tablespoons cornstarch
*6 tablespoons (100 g) sugar
*1 large egg
*2 large egg yolks
*1 small banana, mashed
*2 tablespoons (30 g) unsalted butter
*1/2 teaspoon vanilla extract
*1/2 vanilla bean, split lengthwise

Dissolve cornstarch in ¼ cup of milk. Combine the remaining milk with the sugar in a saucepan; bring to boil; remove from heat.

Beat the whole egg, then the yolks into the cornstarch mixture. Pour 1/3 of boiling milk into the egg mixture, whisking constantly so that the eggs do not begin to cook.

Return the remaining milk to boil. Pour in the hot egg mixture in a stream, continuing whisking.

Continue whisking (this is important – you do not want the eggs to solidify/cook) until the cream thickens and comes to a boil. Remove from heat and stir in the mashed banana, then beat in the butter and vanilla extract. Scrape the seeds from the vanilla bean and stir in to combine. Finally, for a smooth consistency, strain the creme through a sieve.

For the Pate a Choux (Yield: About 28)
*¾ cup (175 ml.) water
*6 Tbsp. (85 g.) unsalted butter
*¼ Tsp. salt
*1 Tbsp. sugar
*1 cup (125 g.) all-purpose flour
*4 large eggs

For Egg Wash:
*1 egg and pinch of salt ( Instead of egg wash, I brushed the choux with a bit of milk)

Pre-heat oven to 425◦F/220◦C degrees. Line two baking sheets with parchment paper.

To prepare batter: 1. Combine water, butter, salt and sugar in a saucepan over medium heat. Bring to a boil and stir occasionally. At boil, remove from heat and sift in the flour, stirring to combine completely. Return to heat and cook, stirring constantly until the batter dries slightly and begins to pull away from the sides of the pan. Transfer to a bowl and stir with a wooden spoon 1 minute to cool slightly. Add 1 egg. The batter will appear loose and shiny. As you stir, the batter will become dry-looking like lightly buttered mashed potatoes. It is at this point that you will add in the next egg. Repeat until you have incorporated all the eggs.

To Pipe:
Transfer batter to a pastry bag fitted with a large open tip (I piped directly from the bag opening without a tip). Pipe choux about 1 inch-part in the baking sheets. Choux should be about 1 inch high about 1 inch wide. Using a clean finger dipped in hot water, gently press down on any tips that have formed on the top of choux when piping. You want them to retain their ball shape, but be smoothly curved on top.

Brush tops with egg wash (1 egg lightly beaten with pinch of salt) or milk.

To Bake:
Bake the choux at 425◦F/220◦C degrees until well-puffed and turning lightly golden in color, about 10 minutes.

Lower the temperature to 350◦F/180◦C degrees and continue baking until well-colored and dry, about 20 minutes more. Remove to a rack and cool.

Can be stored in a airtight box overnight.

To Fill:
When you are ready to assemble your piece montée, using a plain pastry tip, pierce the bottom of each choux. Fill the choux with pastry cream using either the same tip or a star tip, and place on a paper-lined sheet. Choux can be refrigerated briefly at this point while you make your glaze.


For Chocolate Glaze:

*8 ounces/200 g. finely chopped semi or bitter sweet chocolate (use the finest quality you can afford as the taste will be quite pronounced)

Melt chocolate in microwave or double boiler. Stir at regular intervals to avoid burning. Use immediately.

Assembling the Piece Montée:
You may want to lay out your unfilled, unglazed choux in a practice design to get a feel for how to assemble the final dessert. For example, if making a conical shape, trace a circle (no bigger than 8 inches) on a piece of parchment to use as a pattern. Then take some of the larger choux and assemble them in the circle for the bottom layer. Practice seeing which pieces fit together best.

Once you are ready to assemble your piece montée, dip the top of each choux in your glaze (careful it may be still hot!), and start assembling on your cake board/plate/sheet. Continue dipping and adding choux in levels using the glaze to hold them together as you build up.



Sunday, February 28, 2010

Daring Baker's Tiramisu

The February 2010 Daring Bakers’ challenge was hosted by Aparna of My Diverse Kitchen and Deeba of Passionate About Baking. They chose Tiramisu as the challenge for the month. Their challenge recipe is based on recipes from The Washington Post, Cordon Bleu at Home and Baking Obsession.

I LOVE tiramisu, and had previously never made it, so when I saw the February challenge, I was definitely excited. For this challenge, we were to make tiramisu from scratch -- meaning all of the components had to be made from scratch, including the lady fingers and the mascarpone cheese.

There were many components to this recipe. From experience, I've learned that for the sake of my mental health, I should never expect to complete a Daring Bakers challenges in one day. This dessert consisted of lady fingers, mascarpone cheese, zabaglione (Italian custard), pastry cream, and whipped cream. So, for this challenge, I split up the work over a span of a few days, and it worked out very nicely. I made the lady fingers and mascarpone one day, the zabaglione, pastry creams, and whipped creams 3 days later, assembled the dessert the following day, and let it chill overnight.


What I really loved about this recipe is that although there were many components, I didn't find any of them to be too difficult, just a bit time consuming. The lady fingers were pretty simple and very good, although next time I may add a bit of vanilla to give them more flavor. Since I had made mascarpone once before, this time around was definitely easier.

For my version of this decadent dessert, I made an extra chocolate layer by spiking the pastry cream with about 6 ounces of chopped bittersweet chocolate, and topped it with some shaved chocolate. I have a hard time saying no to chocolate. Sorry, it's a weakness.

Please check out Aparna's or Deeba's blogs for the recipe.

Tuesday, January 26, 2010

Peanut Butter Nanaimo Bars

The January 2010 Daring Bakers’ challenge was hosted by Lauren of Celiac Teen. Lauren chose Gluten-Free Graham Wafers and Nanaimo Bars as the challenge for the month. The sources she based her recipe on are 101 Cookbooks and www.nanaimo.ca.

Wow. So simple yet so utterly delicious. This was one of my favorite Daring Baker's challenges for three important reasons -- 1) I didn't lose sleep over it 2) I didn't almost destroy my kitchen in the process of making it, and 3) it was super delicious.

This month we made Nanaimo Bars, a classic Canadian dessert created in Nanaimo, British Colombia. The bars have 3 layers: a base containing graham crackers, cocoa, coconut and nuts, a middle custard layer, and a topping of chocolate.

We had the option to make gluten-free graham crackers, but I stuck to original (flour) graham crackers (sorry, I forgot to take pictures of them). I wanted to make these desserts for the BF's birthday, and since he is a peanut butter fanatic, I swapped the traditional vanilla flavored custard for a peanut butter layer. I also swapped the almonds in the bottom layer for salted peanuts, and replaced some of the butter with peanut oil.

And OMG. The result was amazing: a bottom chewy yet crunchy layer of chocolatey goodness, a creamy and sweet peanut butter filling, and a hard chocolate shell on top -- AMAZING. Initially, I thought these bars were going to be just like the many American dessert bar recipes that I do love, but have tried several times. But no -- they were really different. The coconut in the bottom layer really added to taste and texture of these bars, making them very different than other bar recipes I've had. The addition of the peanut oil really added a lot of peanut flavor to this recipe, but of course can be replaced with butter.

The original recipe can be found on Lauren's lovely (and gluten-free) blog. Below is my peanut butter version.

Peanut-Butter Nanaimo Bars (loosely adapted from here)

Ingredients

Base
  • 1/4 cup (115 g) (4 ounces) unsalted butter
  • 2 tablespoons peanut oil
  • 1/4 cup (50 g) (1.8 ounces) granulated sugar
  • 5 tablespoons unsweetened cocoa powder
  • 1 large egg, beaten
  • 1 1/4 cups graham cracker crumbs
  • 1/2 cup roasted peanuts, chopped
  • 1 cup (130 g) (4.5 ounces) shredded sweetened coconut
Filling
  • 1/2 cup peanut butter
  • 1 tablespoon unsalted butter, at room temperature
  • 1 tablespoon peanut oil
  • 2 teaspoons cornstarch
  • 1 teaspoon vanilla
  • 2 cups confectioner’s sugar
  • 3 tablespoons milk

Glaze
  • 5 ounces semisweet chocolate chips or finely chopped baking chocolate
  • 2 tablespoons unsalted butter
Directions:
1. For bottom Layer: Melt unsalted butter, oil, sugar and cocoa in top of a double boiler. Add egg and stir to cook and thicken. Remove from heat. Stir in crumbs, nuts and coconut. Press firmly into an ungreased 8 by 8 inch pan.
2. For Middle Layer: Cream together peanut butter, butter, and oil until smooth well. Add the cornstarch and continue creaming. Gradually add half of the sugar, 2 tablespoons at a time until smooth. Add vanilla. Continue adding sugar and milk, alternating 2 tablespoons at a time of each. Spread over bottom layer. Spreading this will be a bit difficult at first, since the mixture is very sticky. I let the mixture sit for a while and used a offset spatula to spread it.
3. For Top Layer: Melt chocolate and unsalted butter over low heat. Cool. Once cool, pour over middle layer and chill.

Tuesday, December 8, 2009

Daring Bakers Cannoli...Yes, it's Late


This is my first time posting late for a Daring Bakers Challenge. I'm sorry! I am hoping that my tardy posting will prevent me from getting kicked out of this group that I am actually really honored to be a part of. These are some seriously DARING Bakers. This month (or I guess last month) however, they were Daring Fryers, as the challenge recipe was Cannoli.

Mmm...Cannoli. I remember those little rolls of deliciousness from my school days back in Queens NY. Every once in a while I would walk into my favorite pizzeria on my way back from school, and treat myself to one of these babies. The fried crispy shells filled with white yummy filling (which is what I knew it as back then since I had never even heard of ricotta or marscarpone), speckled with mini chocolate chips. It was heaven! Unfortunately, these "cannoli" I concocted last weekend, were not :( .

I'm not sure if it was my fault or the fault of the recipe (I'm guessing its the former since others had good turnout with this recipe), but my cannoli shells were pretty awful. Firstly, the recipe said to fry for 1-2 min, but doing this caused major burnage for my shells -- so much that I was frying for about 30 seconds tops to make sure they didn't burn. Secondly, they were bland! I tried the suggested recipe for chocolate cannoli thinking chocolate anything has to be good -- but no, they were just chocolate blandness. And lastly, probably the saddest part of this challenge -- my shells did not stay crispy. The morning after they had basically become...tortillas. OK, maybe not as flimsy as a tortilla, but maybe something more like a pita. No joke!

Anyway, my favorite part about this recipe was a homemade chocolate mascarpone filling that I made to fill the cannoli (will post about it next). I was really surprised at how easy it is to make mascarpone at home! I would say it is even easier than paneer (or ricotta), since the first time I did that, I ended up burning the milk. Cream, on the other hand, is much tougher, and requires much more carelessness to burn. YES to burn-resistant ingredients!

Please check out Lisa's fantastic blog for the cannoli recipe. Her cannoli are seriously stunning and I'm sure much tastier than mine!

Sunday, September 27, 2009

Daring Bakers Vols-au-Vent


The September 2009 Daring Bakers' challenge was hosted by Steph of A Whisk and a Spoon. She chose the French treat, Vols-au-Vent based on the Puff Pastry recipe by Michel Richard from the cookbook Baking With Julia by Dorie Greenspan.

My goodness this was a challenge. Roll, fold, chill, and repeat, about 900 times and somehow you end up with puff pastry. Form the pastry into pretty shapes and fill them and you get Vols-au-Vent (little puff pastry cases designed to hold filling).

The BF helped out big time with this challenge because for once he was as excited as I was about making it. No surprise since it was the first non-dessert challenge I've had with the Daring Bakers. So the BF and I each picked our signature filling and had a vols-au-vent throwdown.

Meanie: Goat cheese and roasted red pepper with basil pesto.
(Yes, it's lopsided, but just tilt your head to the right and I promise it'll be ok).

BF: Smoked pork with fig balsamic glaze.
Unfortunately, I didn't try his (don't eat meat), but he assures me that he's the winner ( I just nod and smile).

Recipes:
Puff Pastry/vols-au-vent : here on Steph's amazing drool-inducing blog.
Basil Pesto: From Ina Garten

Fig Balsamic Glaze
1/4 cup fig jelly
2 Tb water
1 tsp salt
2 Tb balsamic vinegar
1 tsp chilli powder

Stir the jelly and water in a small saucepan over medium heat. Stir in salt and chilli powder. Cook for 5 min. Lower the heat. Stir in vinegar. Cook over low heat for 5 min.

Sunday, August 30, 2009

Daring Bakers Dobos Torte

The August 2009 Daring Bakers' challenge was hosted by Angela of A Spoonful of Sugar and Lorraine of Not Quite Nigella. They chose the spectacular Dobos Torte based on a recipe from Rick Rodgers' cookbook Kaffeehaus: Exquisite Desserts from the Classic Caffés of Vienna, Budapest, and Prague.

The Dobos Torte is a five-layer sponge cake filled with chocolate buttercream and topped with wedges of crunchy caramel. The orginal recipe called for a buttercream made with eggs and many of the other Daring Bakers had complained that it melted easily. Since I knew I'd be taking this cake to work, which is a 1 1/2 hr drive, I opted for a more resilient chocolate buttercream (recipe below). I added a bit of coffee to the buttercream and brushed on a simple syrup of kahlua and water to the cake layers. I finished off by covering the cake in toasted hazelnuts.

The most challenging part of the recipe was preparing the separate cake layers. I followed the recipe exactly but somehow ended up with 5 layers. They were still 5 layers of sponge cake and chocolate buttercream goodness. If I were to make this again I think I would skip the caramel topping. They were a bit too chewy and sweet for my taste.

Here are some comments from co-workers:

CW1: Fancy!
CW2: Wow! You made this from scratch? And the frosting is not from a can?!
CW3: Very yummy and not too sweet.

There you have it folks. Dobos definitely knew what he was doing when he came up with this cake. Check out the recipe here. Below is my favorite recipe for melt-free chocolate mocha buttercream (tried and tested after many many not-so-good recipes).

Chocolate Mocha Buttercream Frosting
  • 2 3/4 cup - 2 Tb confectioners sugar
  • 8 Tb cocoa powder
  • 6 Tb butter, NOT melted
  • 1 tsp vanilla
  • 2 Tb milk
  • 2 Tb strong coffee
1. In a large bowl, sift together the confectioners sugar and cocoa, and set aside.
2.
In another large bowl, cream butter until smooth. Gradually add in one quarter of the sugar mixture, 2 Tb at a time. Add in all of the vanilla, then another quarter of the sugar mixture, two tablespoons at a time. The mixture should be firm. At this point, gradually add the milk and coffee, alternating with 2 tablespoons at a time of the rest of the sugar mixture.

Sunday, July 26, 2009

Daring Bakers: Mallomars


The July 2009 Daring Bakers challenge was hosted by Nicole at Sweet Tooth. She chose Chocolate Covered Marshmallow Cookies and Milan Cookies from pastry chef Gale Gand of the Food Network.

For this month's challenge, I chose the Chocolate Covered Marshmallow Cookies. I really wanted to try both, but I've been super busy with my internship and only had enough time to try one. The marshmallow cookies were intriguing because I've never made marshmallows before and definitely wanted to give it a try.

I wanted to make the marshmallows vegetarian (no gelatin), so I followed one of the recipes on the Daring Bakers Alternative Bakers forum. The recipe uses Xanthan Gum instead of gelatin to achieve the gelatin-like consistency, and it is fantastic! I read some reviews and was worried that the marshmallows would be too runny. But I followed all the steps and holy moly!
It was true...I had marshmallows. And they weren't runny piles of goop, they were just soft and fluffy, like little pillows...little pillows that were a magnet to uhm, everything. Literally. By the time I was done dipping the last cookie, my kitchen had become a marshmallow. Fortunately, it was worth it because this recipe makes some mighty good cookies, and a ton of them! I
only made a third of the recipe and still ended up with about 20 big cookies!

I made two variations of the cookie: for the first type, I added a layer of homemade dulce de leche (think: marshmallows, chocolate, and caramel...oh mama). The other variation was inside out Mallomars: I used a chocolate cookie base and dipped the cookies in white chocolate.

This recipe was definitely a challenge for me - although the individual parts were simple, putting them together was trickier. Also, trying to get the world's stickiest stuff to do what you want is not particularly easy. Still, these cookies were very very tasty and I would definitely recommend this recipe -- just be prepared, you might end up with marshmallow on your ceiling (I did).

The recipe for the cookies is here. Below is the recipe I used for vegetarian marshmallows. I followed the recipe exactly except piped the marshmallows onto the cookies instead of spreading it on a baking pan.

Vegetarian Marshmallows (by Elizabeth Falkner of Demolition Desserts)

Ingredients:
• 60 mL water
• pinch of cream of tartar
• 255 g sugar, granulated
• 255 g light corn syrup
• ½ vanilla bean
• 85 g egg whites (about 3 egg whites)
• 5 g xanthan (0.76%)

1. Ground xanthan with a tablespoon of sugar. Set aside.
2. Heat water, cream of tartar, remaining sugar, corn syrup and vanilla to 120ºC. Discard vanilla bean. Whisk egg whites for about 2 min until still soft. Continue whipping egg whites at slow speed while adding syrup slowly. Sprinkle xanthan mix while still whipping. Turn speed up and continue mixing for 2-3 min or until meringue pulls away from sides.
3. Sprinkle a pan or baking sheet generously with cornstarch and spread out the meringue. Sprinkle top with cornstarch, cover with plastic and leave to set for 4 hours in a refrigerator. Cut marshmallows into desired shapes and dip cut surfaces in cornstarch.

Saturday, June 27, 2009

Daring Bakers Bakewell Tart


The June Daring Bakers challenge was hosted by Jasmine of Confessions of a Cardamom Addict and Annemarie of Ambrosia and Nectar. They chose a Traditional (UK) Bakewell Tart/pudding that was inspired by a rich baking history dating back to the 1800’s in England.

This was my first Daring Bakers challenge, and I am dedicating it to the BF. Without a doubt, if it weren't for him, there is no way I would have completed this recipe. There were so many factors which tempted me to be a no-show for my very first challenge: (1) I was leaving to go out of town, and then out of the country, for 2 weeks, so would not be around to enjoy the results of the challenge (2) I really wanted to do something creative and I had the hardest time coming up with ideas (3) I had never heard of a Bakewell Tart, or even used almond flour, and (4) the recipe required a scale for measuring the ingredients, and my broke self does not own one.

With some much needed moral support from the BF, I finally decided to tough it out and complete the challenge, and I am so glad I did! Since I was not going to be around to enjoy it, I decided the next best thing would be to give it away. I wanted to give half the tart to a friend I was visiting who just finished business school, and since she is a major chocoholic I knew that I would have to incorporate chocolate into the recipe. So instead of the traditional fruit spread which the recipe calls for, I decided to go with a chocolate spread. They're almost the same, right? Cocoa is a fruit, right? Oh, it's not? Ok, well it grows on trees, right? Oh, not really? Ok, well it's sweet like fruit, right? No?! Ok, they're not similar, but they both make good spreads, so there.

The most popular chocolate-based spread I know of is nutella, which is made with chocolate and hazelnuts. But since this dessert uses almond flour, I decided to make my own version of nutella, with almonds instead of hazelnuts. The homemade almond "nutella" came out great, and was perfect for this dessert.

The Bakewell tart traditionally consists of a shortcrust pastry (like a pie crust), a layer of jam, and a frangipane (or almond cake) topping. I was a bit wary of this dessert, because I expected the frangipane to taste like marzipan, which I am not a fan of. Surprisingly, it tasted nothing like marzipan -- instead it was like a very rich, almost creamy, cake -- totally delicious. This was my first experience using almond flour and I loved it. It's a bit pricey compared to regular flour, but I will definitely be using it when I'm in the mood to splurge. Also, since I was short on time, I used my trusty pie crust recipe instead of the one given in the challenge. I really enjoyed this recipe. The butter, almond, and chocolate flavors came together really well to make a very rich and satisfying dessert.

As for measuring the ingredients -- the BF took them all to his lab and measured them for me using his lab scale! Ah, it's great to know a scientist, and even better when he's your boyfriend. :) As much as I appreciated his help, this challenge has definitely convinced me to invest in a kitchen scale, so this little baby will be sitting on my counter in 5 to 7 business days. Woot!


Bakewell Tart with Chocolate Almond Spread
  • One quantity sweet shortcrust pastry (recipe follows)
  • Bench flour
  • 250ml (1cup (8 US fl. oz)) jam or curd, warmed for spreadability
  • One quantity frangipane (recipe follows)
  • One handful blanched, flaked almonds

Assembling the tart
Place the chilled dough disc on a lightly floured surface. If it's overly cold, you will need to let it become acclimatised for about 15 minutes before you roll it out. Flour the rolling pin and roll the pastry to 5mm (1/4”) thickness, by rolling in one direction only (start from the centre and roll away from you), and turning the disc a quarter turn after each roll. When the pastry is to the desired size and thickness, transfer it to the tart pan, press in and trim the excess dough. Patch any holes, fissures or tears with trimmed bits. Chill in the freezer for 15 minutes.

Preheat oven to 200C/400F.

Remove shell from freezer, spread as even a layer as you can of jam onto the pastry base. Top with frangipane, spreading to cover the entire surface of the tart. Smooth the top and pop into the oven for 30 minutes. Five minutes before the tart is done, the top will be poofy and brownish. Remove from oven and strew flaked almonds on top and return to the heat for the last five minutes of baking.

The finished tart will have a golden crust and the frangipane will be tanned, poofy and a bit spongy-looking. Remove from the oven and cool on the counter. Serve warm, with crème fraîche, whipped cream or custard sauce if you wish.

When you slice into the tart, the almond paste will be firm, but slightly squidgy and the crust should be crisp but not tough.

Sweet shortcrust pastry
225g (8oz) all purpose flour
30g (1oz) sugar
2.5ml (½ tsp) salt
110g (4oz) unsalted butter, cold (frozen is better)
2 (2) egg yolks
2.5ml (½ tsp) almond extract (optional)
15-30ml (1-2 Tbsp) cold water

Sift together flour, sugar and salt. Grate butter into the flour mixture, using the large hole-side of a box grater. Using your finger tips only, and working very quickly, rub the fat into the flour until the mixture resembles bread crumbs. Set aside.

Lightly beat the egg yolks with the almond extract (if using) and quickly mix into the flour mixture. Keep mixing while dribbling in the water, only adding enough to form a cohesive and slightly sticky dough.

Form the dough into a disc, wrap in cling and refrigerate for at least 30 minutes.

Frangipane
125g (4.5oz) unsalted butter, softened
125g (4.5oz) icing sugar
3 (3) eggs
2.5ml (½ tsp) almond extract
125g (4.5oz) ground almonds
30g (1oz) all purpose flour

Cream butter and sugar together for about a minute or until the mixture is primrose in colour and very fluffy. Scrape down the side of the bowl and add the eggs, one at a time, beating well after each addition. The batter may appear to curdle. After all three are in, pour in the almond extract and mix for about another 30 seconds and scrape down the sides again. With the beaters on, spoon in the ground nuts and the flour. Mix well. The mixture will be soft, keep its slightly curdled look (mostly from the almonds) and retain its pallid yellow colour.