
 As part of last month's Daring Bakers challenge, I made mascarpone cheese to fill my cannoli. Homemade mascarpone is really simple, and I think much simpler than homemade paneer (or ricotta). The reason is that mascarpone is made with heavy cream (as opposed to whole milk) so it is much more resilient to heat. The first time I made paneer I burned a whole gallon of milk. Not fun.
These pictures are not so good as I made this at night, but hopefully they will explain the process.
You start with some heavy whipping cream and heat it in a double boiler (I use a make-shift double boiler by placing one saucepan on top of another) until it reaches 190F degrees (this took about 25 minutes for me):
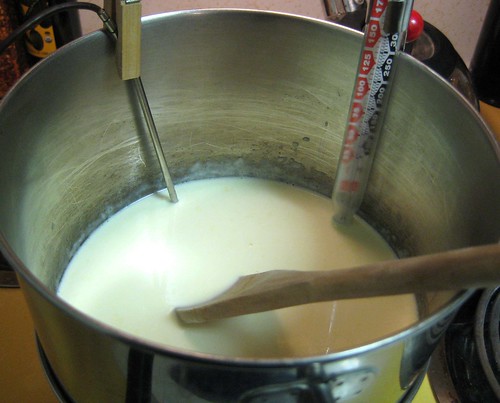
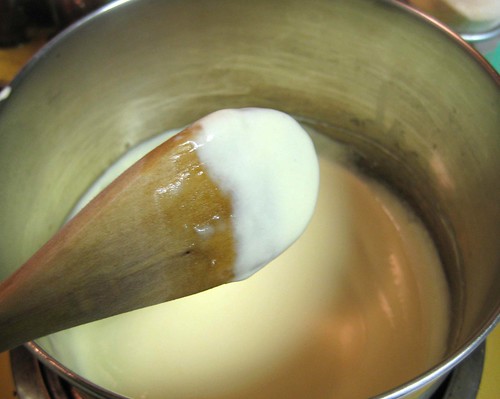
In case you're wondering, yes, that is a thermometer clipped on with a clothespin (the BF's idea). Once the cream reaches 190F degrees, add fresh lemon juice and stir. The cream will eventually thicken, enough so that it coats the back of a wooden spoon:
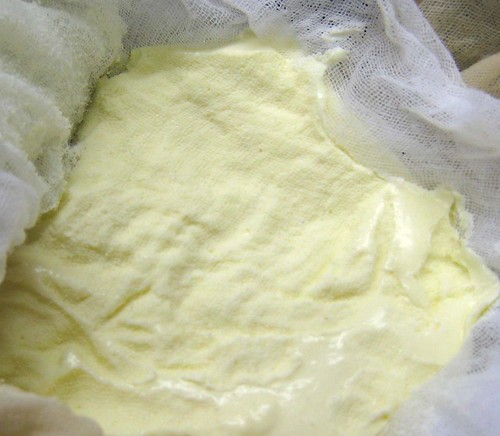
 Let the cream cool for about 20 min. Then pour it in a sieve lined with cheesecloth, and refrigerate. Before the refrigeration, the cream is still well, creamy, and not as thick as you would expect a cheese to be, but don't fret. Refrigeration is key - after a night of refrigeration, you will have mascarpone. And it will taste divine!Homemade Mascarpone (adapted from Baking Obsession)
Makes about 12 oz
- 500 ml whipping (36 %) pasteurized (not ultra-pasteurized), preferably organic cream
- 1 tbsp fresh lemon juice
1. Prepare a double boiler OR make your own by placing about 1-2 inches of water in a saucepan, then placing another saucepan (or bowl) inside the first. The bottom of the second saucepan should NOT be touching the water.
2. Bring the water to a boil, then reduce the heat to medium-low so the water is barely simmering. Pour the cream into the top saucepan.
3. Heat the cream, stirring often, to 190 F. It will take about 25-30 minutes.
4. Add the lemon juice and continue heating the mixture, stirring gently, until the cream curdles. Do not expect the same action as you see during ricotta cheese making. All that the whipping cream will do is become thicker. It will cover a back of your wooden spoon thickly.
5. Remove the top saucepan from from the water and let cool for about 20 minutes.
6. Meanwhile, line a sieve with four layers of dampened cheesecloth and set it over a bowl. Transfer the mixture into the lined sieve. Do not squeeze the cheese in the cheesecloth or press on its surface (be patient, it will firm up after refrigeration time). Once cooled completely, cover with plastic wrap and refrigerate (in the sieve) overnight or up to 24 hours.
wow.. very impressive! Who knew... little girls from queens CAN grow up to become farmers who make their own cheese.
ReplyDeleteThat sounds so easy, I'll try it soon. In fact, I'll try it as soon as I find a cake recipe that requires mascarpone.
ReplyDeleteAnd regarding the clothespin: I think AB used a similar setup in the show once, so the BF's method is very professional :)
How did I not see this???!!!!!! I made this cheese for the challenge, too. You probably already know that, though. Great job!
ReplyDeletehow did you make the chocolate mascarpone filling? is the recipe somewhere on here?
ReplyDeleteis your recipe for the choc mascaropne filling on here?
ReplyDelete