Saturday, January 16, 2010

Butternut Squash & Swiss Chard Lasagna

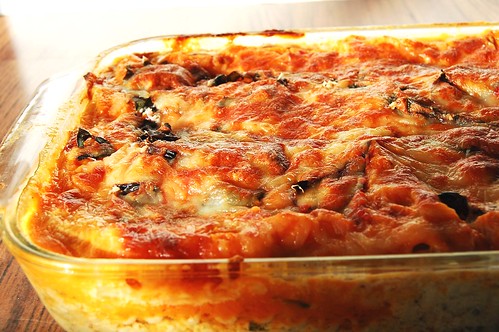
Oh my. Butternut Squash Lasagna. Where have you been my whole life?

Since I am a lover of all things tomato sauce, tomato-based lasagna is one of my favorite foods ever. So, when I heard about this butternut squash lasagna, I was skeptical. But I was wrong. This lasagna was fantastic. The butternut squash adds a sweetness much like tomato sauce does in traditional lasagna. The cheeses add a great savory contrast to the squash, and everything is enlivened with the addition of the herbs. I added some swiss chard to give it some more texture and increase the healthiness factor. I also used sage and a bit of rosemary instead of basil because I think they complement the squash better. I also roasted the squash instead of boiling it as I think that enhances the sweetness more. I added some tofu and cottage cheese to the cheese mixture to give it some extra protein.

This dish is so hearty and flavorful, and it is great with a side of toasted garlic bread which helps to sop up the yummy sauce. This will definitely be a staple winter-time meal at our place.
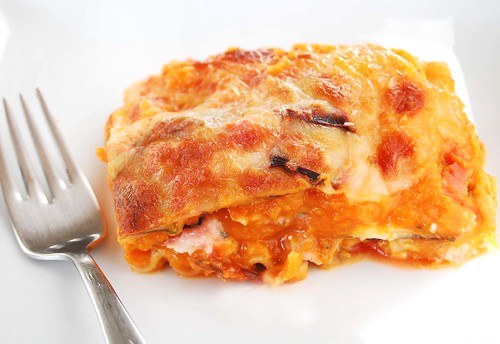
Butternut Squash & Swiss Chard Lasagna (adapted from Giada De Laurentiis)
  • 1 tablespoon olive oil
  • 1 (1 1/2 to 2-pound) butternut squash, peeled, seeded, and cut into 1-inch cubes
  • salt and freshly ground black pepper
  • 1/2 cup water
  • 2 Tb olive oil
  • 2 Tb butter
  • 1/4 cup all-purpose flour
  • 3 1/2 cups milk
  • Pinch nutmeg (freshly grated)
  • 3/4 cup (lightly packed) fresh sage leaves
  • 2 1/2 Tb fresh rosemary, chopped
  • 2 cups shredded mozzarella cheese
  • 1/3 cup grated Parmesan
  • 1/3 cup grated Pecorino
  • 1 cup cottage cheese
  • 1/2 cup firm tofu, chopped into small pieces
  • 2 cups (lightly packed) chopped swiss chard
  • 12 lasagna noodles, cooked to al dente
1. Lightly oil a baking pan. Add the squash and toss to coat. Roast the squash at 350 degrees for 35-40 min, or until softened. Cool slightly and then transfer the squash, along with 1/4 cup water to a food processor. Puree the squash, and season the puree, to taste, with salt and pepper.

2. Heat the 2 Tb of oil and melt the butter in a heavy medium-size saucepan over medium heat. Add the flour and whisk for 1 minute. Gradually whisk in the milk. Bring to a boil over medium-high heat. Reduce the heat to medium and simmer until the sauce thickens slightly, whisking often, about 5 minutes. Whisk in the nutmeg. Cool slightly. Transfer half of the sauce to a blender*. Add the sage and rosemary and blend until smooth. Return the sauce to the sauce in the pan and stir to blend. Season the sauce with salt and pepper, to taste.

3. Mix together 2 cups of mozzarella with the Parmesan, Pecorino, cottage cheese, and tofu. Season with salt and pepper, to taste.

3. Position the rack in the center of the oven and preheat to 375 degrees F. Lightly butter a 13 by 9 by 2-inch glass baking dish. Spread 3/4 cup of the sauce over the prepared baking dish. Arrange 3 lasagna noodles on the bottom of the pan. Spread 1/3 of the squash puree over the noodles. Spread a layer of the chard. Sprinkle with 1/2 cup of the cheese mixture. Repeat layering 3 more times.

5. Bake the lasagna for 40 minutes. Continue baking uncovered until the sauce bubbles and the top is golden, 15 minutes longer. Let the lasagna stand for 15 minutes before serving.

*When blending hot liquids: Remove liquid from the heat and allow to cool for at least 5 minutes. Transfer liquid to a blender or food processor and fill it no more than halfway. If using a blender, release one corner of the lid. This prevents the vacuum effect that creates heat explosions. Place a towel over the top of the machine, pulse a few times then process on high speed until smooth.

Monday, January 11, 2010

New York Times CCC Again!


Change is a difficult thing. I'm always wanting to try new recipes, new desserts especially, but every time I contemplate which dessert to make next, I find myself craving the ones I'm most familiar with: brownies, chocolate cake, banana muffins, and of course -- chocolate chip cookies. I don't think there is ever a time when I don't want a chocolate chip cookie. Morning? Check. Before lunch? Check. After lunch? Check. Anyway, you get it...always!

If you are a food blogger or if you read food blogs, I am sure you have heard of the famous Chocolate Chip Cookie recipe published by the NY times last summer. I made the cookies shortly after the article was published, and unlike the other 4, 982, 623 food bloggers who have made this recipe, I was underwhelmed. The cookies were just too crispy for my taste, I prefer a soft, chewy cookie. Back then, however, I did not own a stand mixer (something the recipe calls for), and I complained a bit about recipes that required special ($200) appliances. Anyway, after all that complaining, I broke down, and bought myself a Kitchen Aid mixer a few months ago.

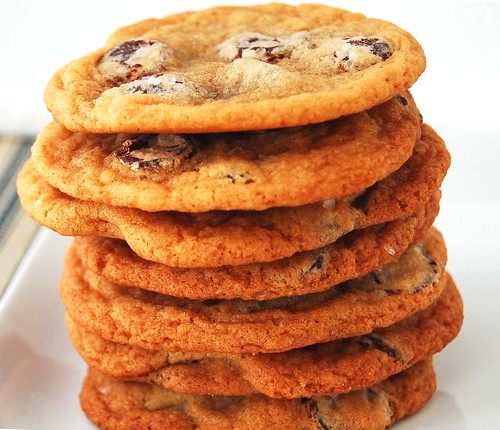
I tried these cookies again, this time of course using my KA, wondering if it would make a difference at all. And the verdict? YES this time around, I enjoyed the cookies much more. The texture was what everyone raves about. The cookies were much chewier than the first time, and they had the signature crisp edges that give away to a soft chewy center. BUT...I should point out that this doesn't necessarily mean that a stand mixer is essential for making these cookies properly. There is the hopeful part of me that believes that maybe these cookies were better because, well, maybe, just maybe, over the course of a year, I've gained some useful experience in the kitchen. Let's just say that's true.

So like the 4, 982, 623 others, I agree, this is a fantastic chocolate chip cookie. However, since I am a bigger fan of the chewy-all-over CCC, I personally prefer this cookie.

Here is a link to the recipe.

Wednesday, December 23, 2009

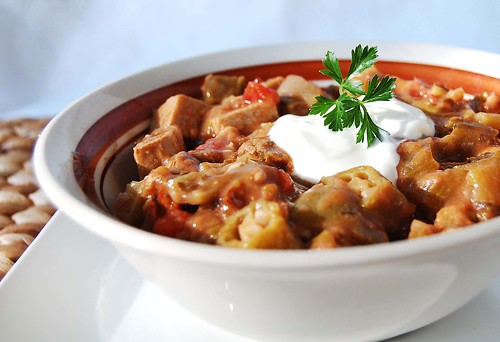
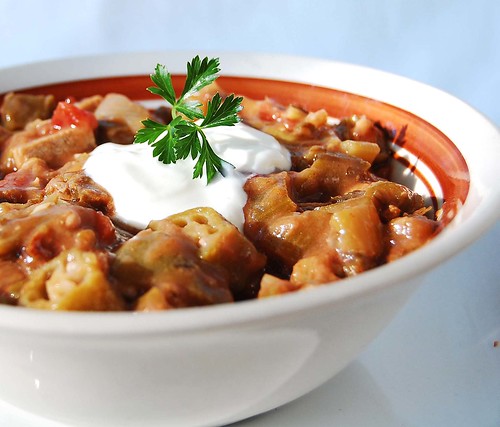
Vegetarian Gumbo

Gumbo is an extremely satisfying winter time meal. It is a thick stew, originating from louisiana, and often made with sausage, chicken, and seafood. Although I cannot attest for the meat version of this dish, the BF loves it, and I can't get enough of the vegetarian version. Even in the vegetarian version, the flavors are so complex, I often stop and think about all the ingredients while I'm eating it. There is the warmth from the vegetable broth, the kick from the spices, and the subtle sweetness from the Worcestershire sauce. To me, this gumbo is even better than what I've tried in New Orleans.

The BF and I have made this gumbo a few times, and although it is time consuming, much of the time is spent just waiting for it to simmer. There is a bit of work making the roux and cooking the vegetables, but after that it is almost 2 hours of just simmer time. I can be pretty impatient in the kitchen, but I will honestly say that this gumbo is worth every minute of preparation time...it is that good!

The original (meat-friendly) gumbo recipe comes from Paula Deen (but suprisingly doesn't have much butter). Below is my vegetarian version.

Vegetarian Gumbo (adapted from Paula Deen, 10 servings)
  • 2 tablespoons olive oil
  • 2 tablespoons butter
  • 1/2 cup all-purpose flour
  • 2 tablespoons butter
  • 1 large onion, chopped
  • 8 cloves garlic minced
  • 2 green bell pepper, seeded and chopped (I omitted this)
  • 3 stalks celery chopped
  • 1/4 cup Worcestershire sauce (vegetarian recipe below)
  • 1/4 bunch flat leaf parsley, stems and leaves, coarsely chopped, plus chopped leaves for garnish
  • 4 cups hot water
  • 4 vegetable bouillon cubes
  • 1 (14-ounce can) diced tomatoes with juice
  • 2 cups frozen sliced okra
  • 1/2 lb tofu, well drained and diced into cubes
1. Heat the 2 tablespoons of oil in a heavy bottomed pot over medium-high heat. Sprinkle the flour, add 2 tablespoons of butter, and cook over medium heat, stirring constantly, until brown, about 10 minutes. Let the roux cool.

2. Return the pot to low heat and melt the remaining 2 tablespoons butter. Add the onion, garlic, green pepper and celery and cook for 10 minutes.

3. Add the (vegetarian) Worcestershire sauce, salt and pepper, to taste and the 1/4 bunch parsley. Cook, while stirring frequently, for 10 minutes.

4. Add 4 cups hot water and bouillon cubes, whisking constantly. Add the tofu. Bring to a boil, then reduce the heat, cover, and simmer for 45 minutes.

5. Add tomatoes and okra. Cover and simmer for 1 hour. Just before serving add the green onions and remaining chopped parsley.

Vegetarian Worcestershire Sauce (about 1/4 cup)

1 1/2 Tablespoons water
1 Tablespoon soy sauce
1 Tablespoon apple cider vinegar
1 teaspoon blackstrap molasses or tamarind paste
1/2 teaspoon powdered ginger
1/2 teaspoon garlic powder
1/8 teaspoon ground cayenne pepper
a pinch of onion powder
a pinch of powdered cloves or pumpkin pie spice

Stir together all ingredients.

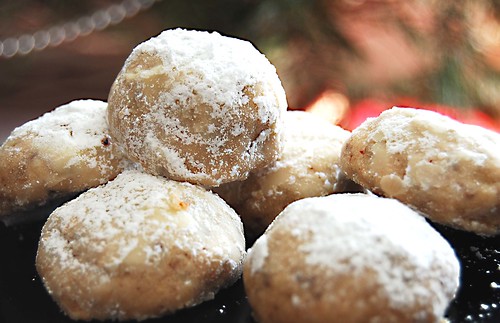
Mexican Wedding Cakes

These cookies are seriously amazing. Six ingredients (one of them is salt), no eggs or leavening, and they taste amazing. They are extremely easy to make and too easy to eat. The BF made these to bring to my family back in NY, and I think we will be making these every year now.

Mexican Wedding Cakes (also called Snowballs or Russian Tea Cakes; adapted from Joy of Cooking) makes 30 cookies
1/2 cup unsalted butter, softened
1/4 cup confectioners' sugar
1/8 teaspoon salt
1 teaspoons vanilla
1/2 cup pecans, lightly toasted, and finely ground
1 cups all purpose flour
1/3 cup confectioners' sugar

1. Preheat oven to 350F. Grease or line 2 cookie sheets.
2. Beat the butter, 1/4 sugar, salt, and vanilla in a large bowl until blended.
3. Stir in the pecans. Stir in the flour until well blended.
4. Shape into 1-inch balls and arrange about 1 1/4 inches apart on the cookie sheets. Bake each sheet at a time, for 12-15 minutes or until the cookies are lightly browned. Let stand for about 2 minutes, then remove to rack to cool.
5. Roll the cooled cookies in 1/3 cup confectioners' sugar.

Monday, December 14, 2009

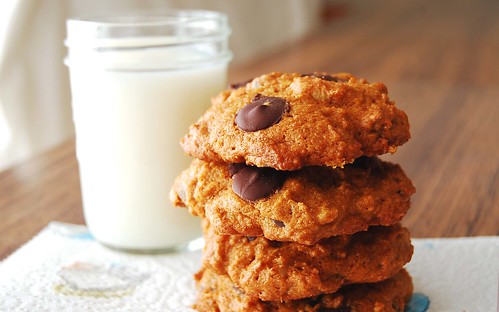
Pumpkin Chocolate Chip Cookies


I discovered these cookies on Joy the Baker's wonderful website about a month ago. Since then I have made these cookies 3 times. That's saying a lot for someone like me, who gets bored of the same desserts after about...a day. But there's something really satisfying about these cookies. They are soft from the pumpkin, chocolatey from the chips, and cruchy and wholesome from the walnuts - a perfect mix of three great cookie traits.

Pumpkin Chocolate Chip Cookies (adapted from Joy the Baker) (makes about 14 cookies)
  • 1/2 cup all purpose flour
  • 1/2 cup whole wheat pastry flour
  • 3/4 tsp baking powder
  • 1/2 tsp baking soda
  • 1/4 tsp salt
  • 1/2 tsp cinnamon
  • 1/8 tsp freshly grated nutmeg
  • 1 egg
  • 1/4 cup white sugar
  • 1/4 cup brown sugar
  • 3 tablespoons butter, melted
  • 1/2 cup + 1 tablespoon pumpkin puree
  • 1/2 tsp vanilla
  • 3/4 cup chocolate chips
  • 1/2 chopped walnuts
1. Preheat the oven to 325 degrees F. Butter two baking sheets.
2. Stir the flour, baking powder, baking soda, salt and spices together in a medium bowl and set aside.
3. In a large bowl, using an electric mixer on medium speed, beat the eggs and sugar until smooth and lightened in color, about 1 minute. Stop the mixer and scrape the sides of the bowl as needed during mixing. On low speed, mix the butter, pumpkin, and vanilla until blended. Mix in the flour mixture to incorporate it. Mix in the chips and walnuts.
4. Scoop about 1/4 cup mounds of the dough onto the prepared baking sheets, spacing the cookies at least 2 1/2-inches apart.
5. Bake for about 14-16 minutes or until a toothpick inserted in the center comes out dry. Transfer the cookies to a wire rack to cool completely.

Thursday, December 10, 2009

Homemade Mascarpone

As part of last month's Daring Bakers challenge, I made mascarpone cheese to fill my cannoli. Homemade mascarpone is really simple, and I think much simpler than homemade paneer (or ricotta). The reason is that mascarpone is made with heavy cream (as opposed to whole milk) so it is much more resilient to heat. The first time I made paneer I burned a whole gallon of milk. Not fun.

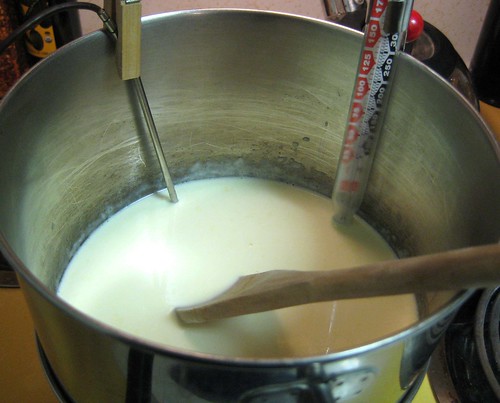
These pictures are not so good as I made this at night, but hopefully they will explain the process.

You start with some heavy whipping cream and heat it in a double boiler (I use a make-shift double boiler by placing one saucepan on top of another) until it reaches 190F degrees (this took about 25 minutes for me):

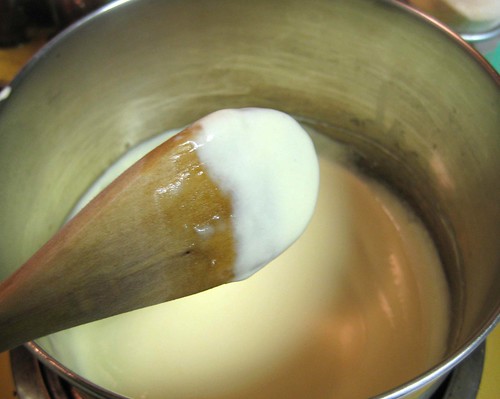
In case you're wondering, yes, that is a thermometer clipped on with a clothespin (the BF's idea). Once the cream reaches 190F degrees, add fresh lemon juice and stir. The cream will eventually thicken, enough so that it coats the back of a wooden spoon:

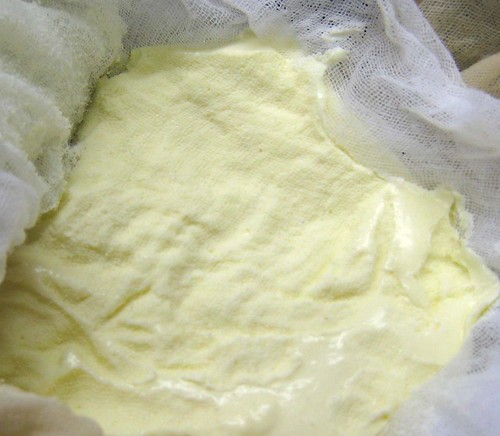
Let the cream cool for about 20 min. Then pour it in a sieve lined with cheesecloth, and refrigerate. Before the refrigeration, the cream is still well, creamy, and not as thick as you would expect a cheese to be, but don't fret. Refrigeration is key - after a night of refrigeration, you will have mascarpone. And it will taste divine!
Homemade Mascarpone (adapted from Baking Obsession)
Makes about 12 oz
  • 500 ml whipping (36 %) pasteurized (not ultra-pasteurized), preferably organic cream
  • 1 tbsp fresh lemon juice

1. Prepare a double boiler OR make your own by placing about 1-2 inches of water in a saucepan, then placing another saucepan (or bowl) inside the first. The bottom of the second saucepan should NOT be touching the water.

2. Bring the water to a boil, then reduce the heat to medium-low so the water is barely simmering. Pour the cream into the top saucepan.

3. Heat the cream, stirring often, to 190 F. It will take about 25-30 minutes.

4. Add the lemon juice and continue heating the mixture, stirring gently, until the cream curdles. Do not expect the same action as you see during ricotta cheese making. All that the whipping cream will do is become thicker. It will cover a back of your wooden spoon thickly.

5. Remove the top saucepan from from the water and let cool for about 20 minutes.

6. Meanwhile, line a sieve with four layers of dampened cheesecloth and set it over a bowl. Transfer the mixture into the lined sieve. Do not squeeze the cheese in the cheesecloth or press on its surface (be patient, it will firm up after refrigeration time). Once cooled completely, cover with plastic wrap and refrigerate (in the sieve) overnight or up to 24 hours.

Tuesday, December 8, 2009

Daring Bakers Cannoli...Yes, it's Late


This is my first time posting late for a Daring Bakers Challenge. I'm sorry! I am hoping that my tardy posting will prevent me from getting kicked out of this group that I am actually really honored to be a part of. These are some seriously DARING Bakers. This month (or I guess last month) however, they were Daring Fryers, as the challenge recipe was Cannoli.

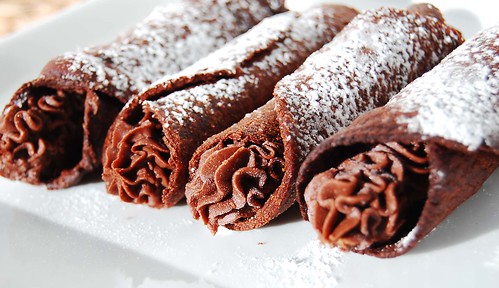
Mmm...Cannoli. I remember those little rolls of deliciousness from my school days back in Queens NY. Every once in a while I would walk into my favorite pizzeria on my way back from school, and treat myself to one of these babies. The fried crispy shells filled with white yummy filling (which is what I knew it as back then since I had never even heard of ricotta or marscarpone), speckled with mini chocolate chips. It was heaven! Unfortunately, these "cannoli" I concocted last weekend, were not :( .

I'm not sure if it was my fault or the fault of the recipe (I'm guessing its the former since others had good turnout with this recipe), but my cannoli shells were pretty awful. Firstly, the recipe said to fry for 1-2 min, but doing this caused major burnage for my shells -- so much that I was frying for about 30 seconds tops to make sure they didn't burn. Secondly, they were bland! I tried the suggested recipe for chocolate cannoli thinking chocolate anything has to be good -- but no, they were just chocolate blandness. And lastly, probably the saddest part of this challenge -- my shells did not stay crispy. The morning after they had basically become...tortillas. OK, maybe not as flimsy as a tortilla, but maybe something more like a pita. No joke!

Anyway, my favorite part about this recipe was a homemade chocolate mascarpone filling that I made to fill the cannoli (will post about it next). I was really surprised at how easy it is to make mascarpone at home! I would say it is even easier than paneer (or ricotta), since the first time I did that, I ended up burning the milk. Cream, on the other hand, is much tougher, and requires much more carelessness to burn. YES to burn-resistant ingredients!

Please check out Lisa's fantastic blog for the cannoli recipe. Her cannoli are seriously stunning and I'm sure much tastier than mine!